How to Print & Assemble The DRACO-M3

How to print this model?

If you want to save this How-To instruction as a pdf file (and print it out later if needed), simply copy the URL of this page and paste it to https://www.printfriendly.com/ . Printfriendly will generate a printer-friendly pdf of the page with all the texts and images for you.

Most of the STL files are really straight forward to print. All you need to do is load them into your slicer software (I use Cura), select your desirable settings (e.g. layer height, infill percentage, etc.) and slice the parts. I used 0.4mm nozzle (0.2mm layer height) to print most parts and 0.25mm nozzle (0.1mm layer height to print small parts (e.g. pins, washers, links, etc.)

Here are 4 particular parts for which I want to give you some tips:

  • SpaceX Astronaut: You need to scale the astronaut model down to 60% to get the correct scale (in relation to the rest of the model). Also, print with raft to create a small base for the model to stand on its own

  • Body: Print in the orientation shown below. Use support ‘everywhere’ but DO NOT use support at one location shown in the picture below (otherwise, you may struggle to remove support due to restricted access):  the holes and slots located on the top of the model (this is where the hinge is fitted). As you can see in the picture, I created a Support Blocker on the model to prevent any support to be generated at this location.

  • Nose Cone: Print in the orientation shown below. Use support but DO NOT use support for the holes and slots where the hinge is fitted. Again, as illustrated, I used a Support Blocker at this location

  • Trunk: The entire Trunk can be printed without any support except the areas underneath the fins. Therefore, you can create a ‘huge’ Support Blocker as shown in the picture to avoid any support from being generated on the model BUT leave the fins out because we need support underneath them

How to assemble this model?

So now you’ve got all your parts printed? Great! Let’s assemble the model!

This model is super simple (yet impressive) to assemble. However, before we start, you’ll need to purchase some super glue and magnets to put this model together:

  • 10mm dia x 2mm thick N42 Neodymium magnets (LINK) | Qty: 8-off
  • Super glue (LINK) | Qty: 1 bottle

STEP 1: Assemble the Hinge, Body and Nose Cone

What you need (refer to the photos below):

  • 3x Link (a)
  • 2x Apin (b)
  • 1x Bpin (c)
  • 2x Cpin (d)
  • 1x Large Washer (e)
  • 1x Small Washer (f)
  • 1x Short Dowel (g)
  • 1x Long Dowel (h)
  • 1x Nose Cone (i)
  • 1x Body (j)

Note: All parts in STEP 1 should be easily fitted together without any super glue. Some parts are quite small so I suggest you use a pair of tweezers to handle them

STEP 2: Complete the exterior of the Pressurised Crew Section

What you need:

  • 1x Sub-assembly from STEP 1
  • 4x Window
  • 1x DracoFrontLeft
  • 1x DracoFrontRight
  • 1x DracoRearLeft
  • 1x DracoRearRight
  • 2x SideDraco

Assembly:

  1. Super-glue ALL the Window’s and Draco’s to the Body sub-assembly (from STEP 1)

STEP 3: Assemble the Base

What you need:

  • 1x Heat Shield
  • 4x Pod
  • 4x SuperDraco
  • 1x Panel

Assembly:

  1. Super-glue the 4 Pod’s to the Heat Shield
  2. Super-glue the 4 SuperDraco’s into the 4 Pod’s
  3. Press fit the Panel into the Heat Shield

STEP 4: Assemble the ‘Ceiling’ sub-assembly

What you need:

  • 1x Seal
  • 1x Hard Capture System
  • 1x Roof
  • 1x TopDraco

Assembly:

  1. Press fit Seal into Hard Capture System
  2. Press fit Hard Capture System into Roof (ensure that the data & power plug and data & power socket on both sides of the Hard Capture System fully engage with their slots on the Roof)
  3. Press fit Top Draco into Roof (from underneath)

Fun fact: These thrusters on the top of the spacecraft are used to abort docking with the ISS whilst the SuperDraco engines you assembled at STEP 3 are used for launch abort)

STEP 5: Assemble the whole Pressurised Crew Section

What you need:

  • 1x ‘Ceiling’ sub-assembly from STEP 4
  • 1x Base from STEP 3
  • 1x Exterior sub-assembly from STEP 2
  • 1x Nose Ring

Assembly:

  1. Fit Exterior sub-assembly (STEP 2) to Base (STEP 3) – use glue if required
  2. Cut open the Nose Ring at the marked location
  3. Super-glue the Nose Ring and ‘Ceiling’ sub-assembly (STEP 4) onto the sub-assembly above

STEP 6: Assemble the Trunk to the Pressurised Crew Section

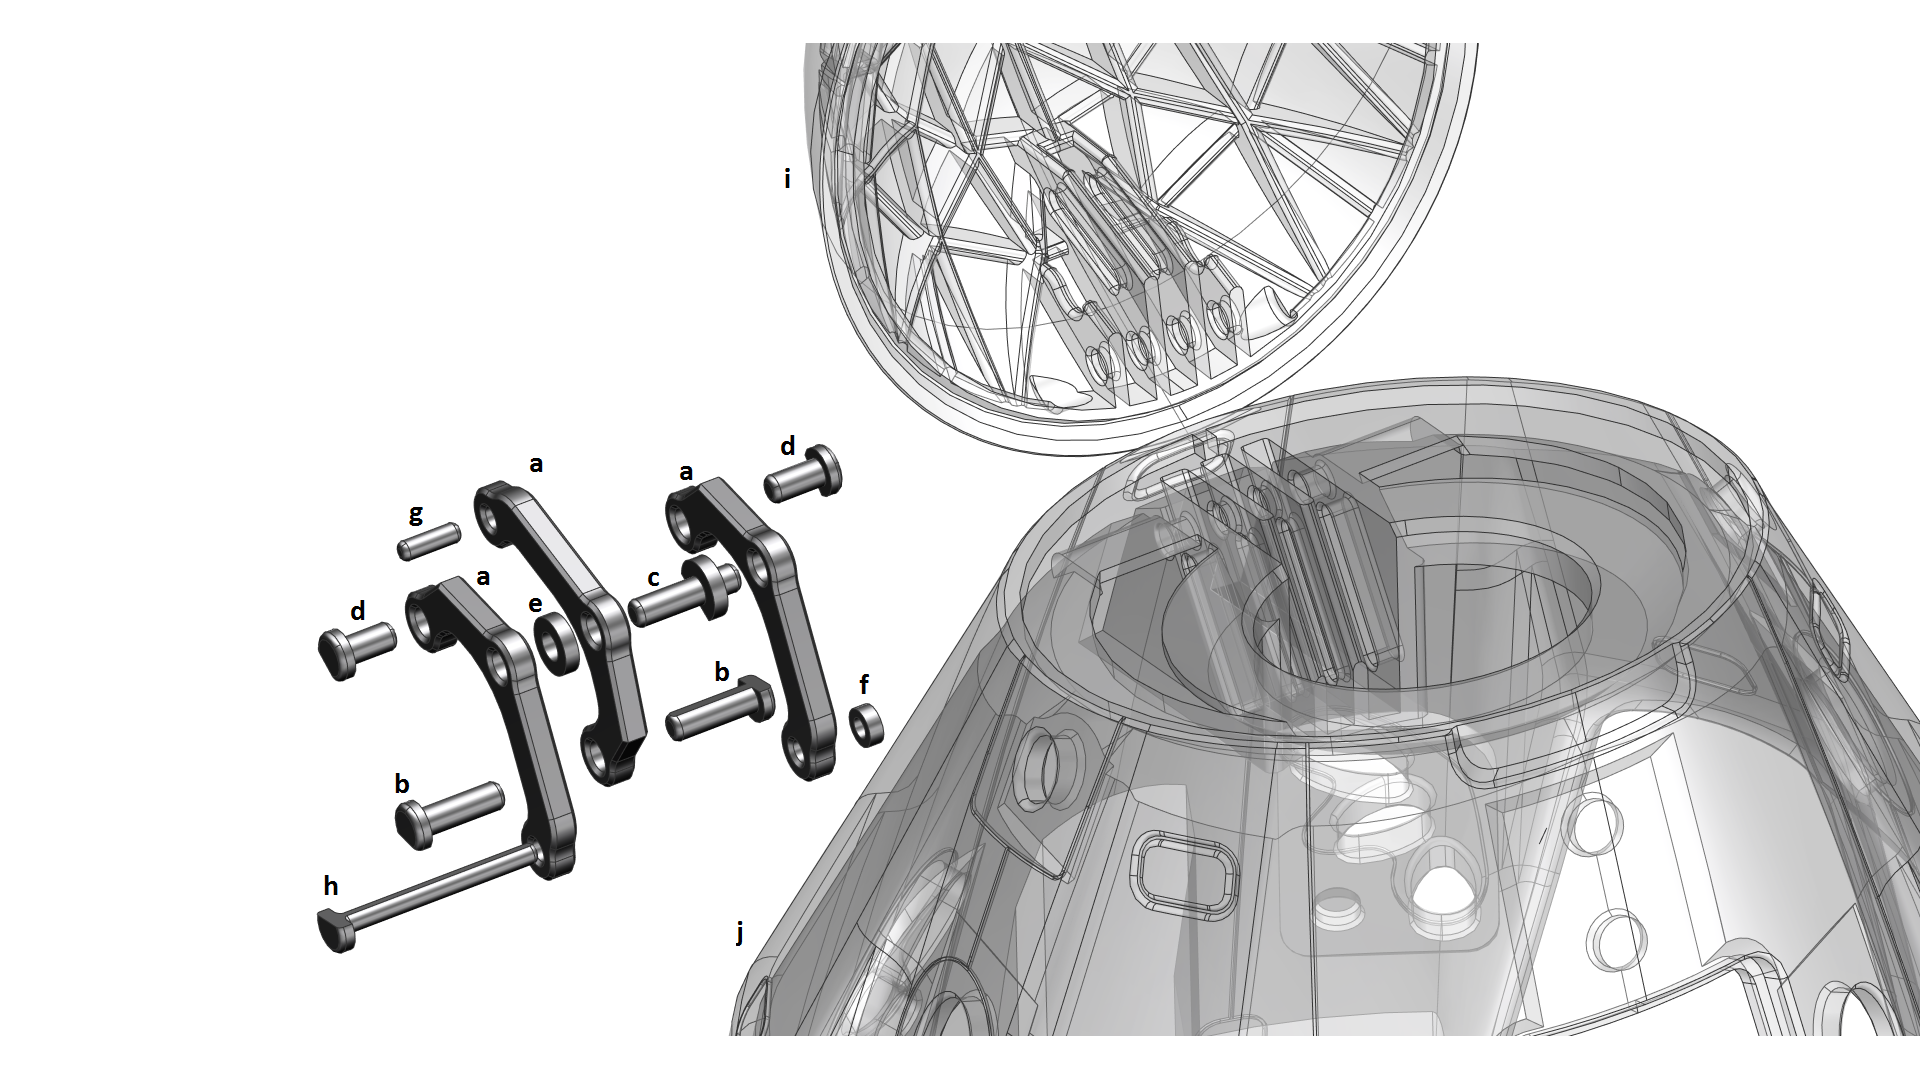
What you need – refer to the photos below:
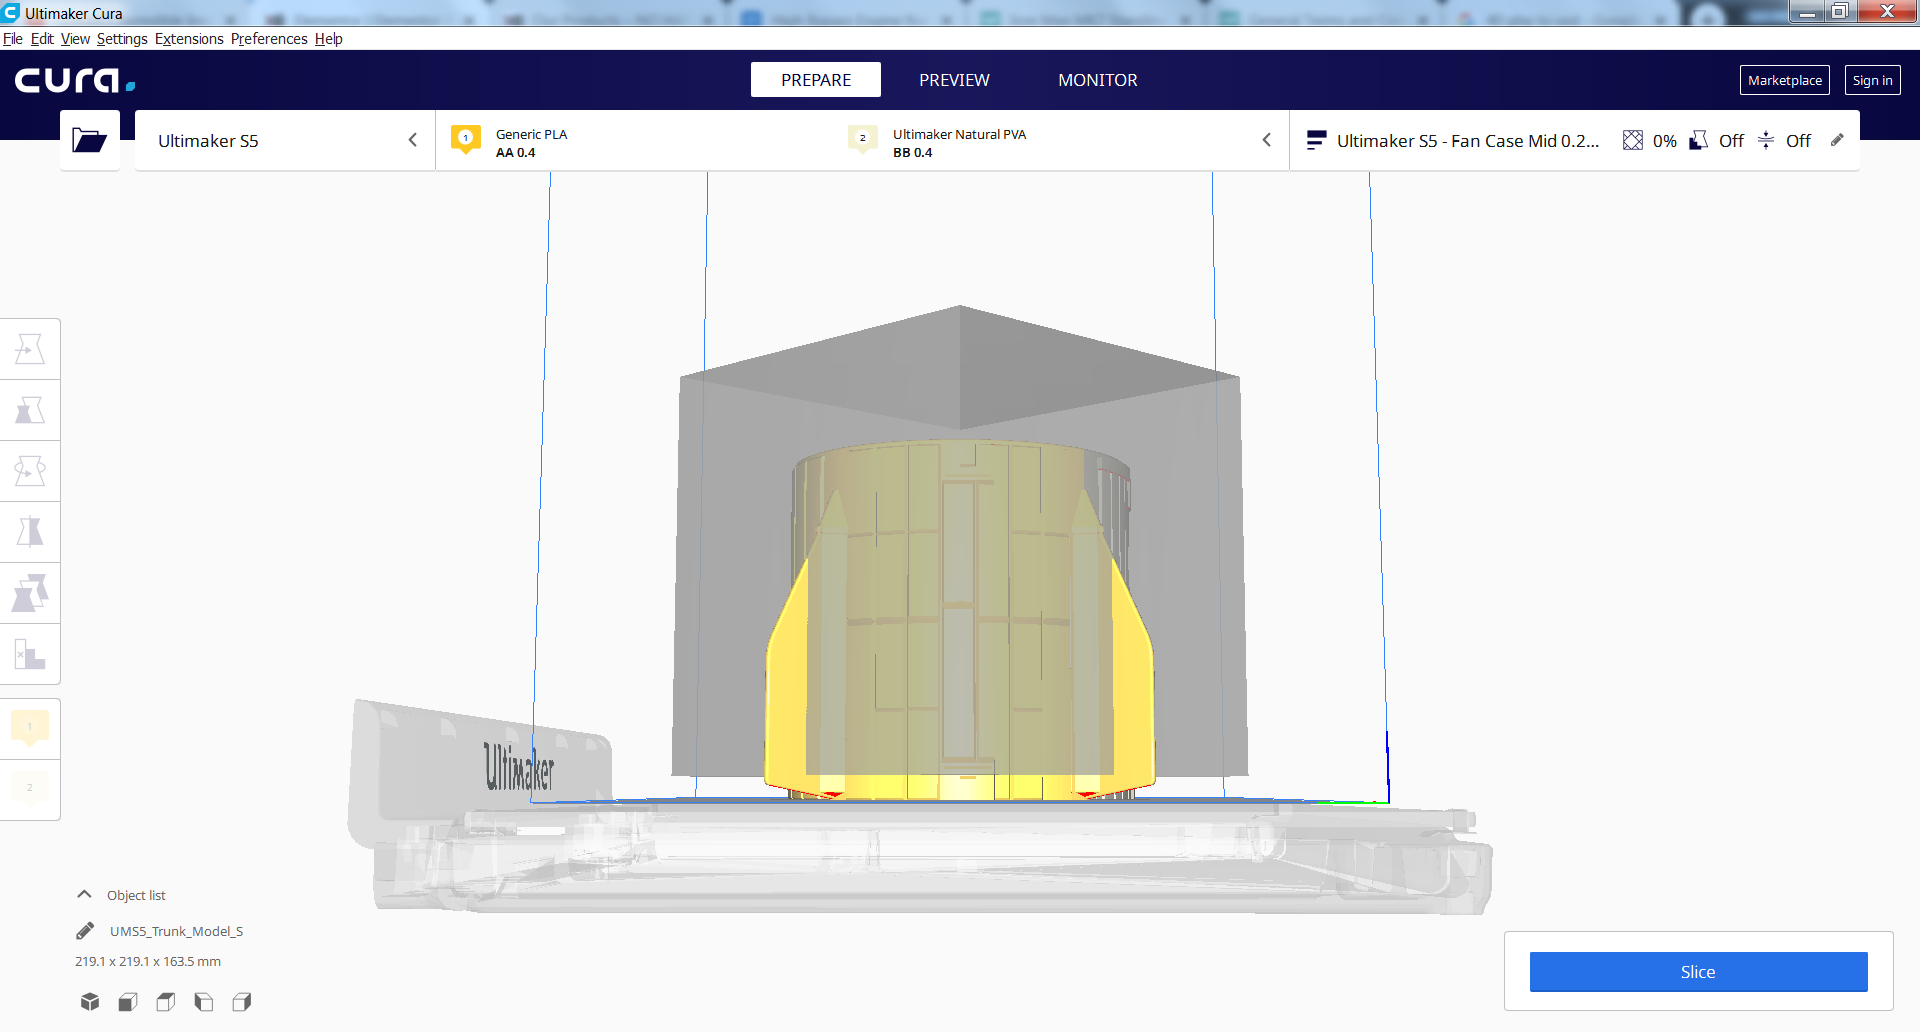
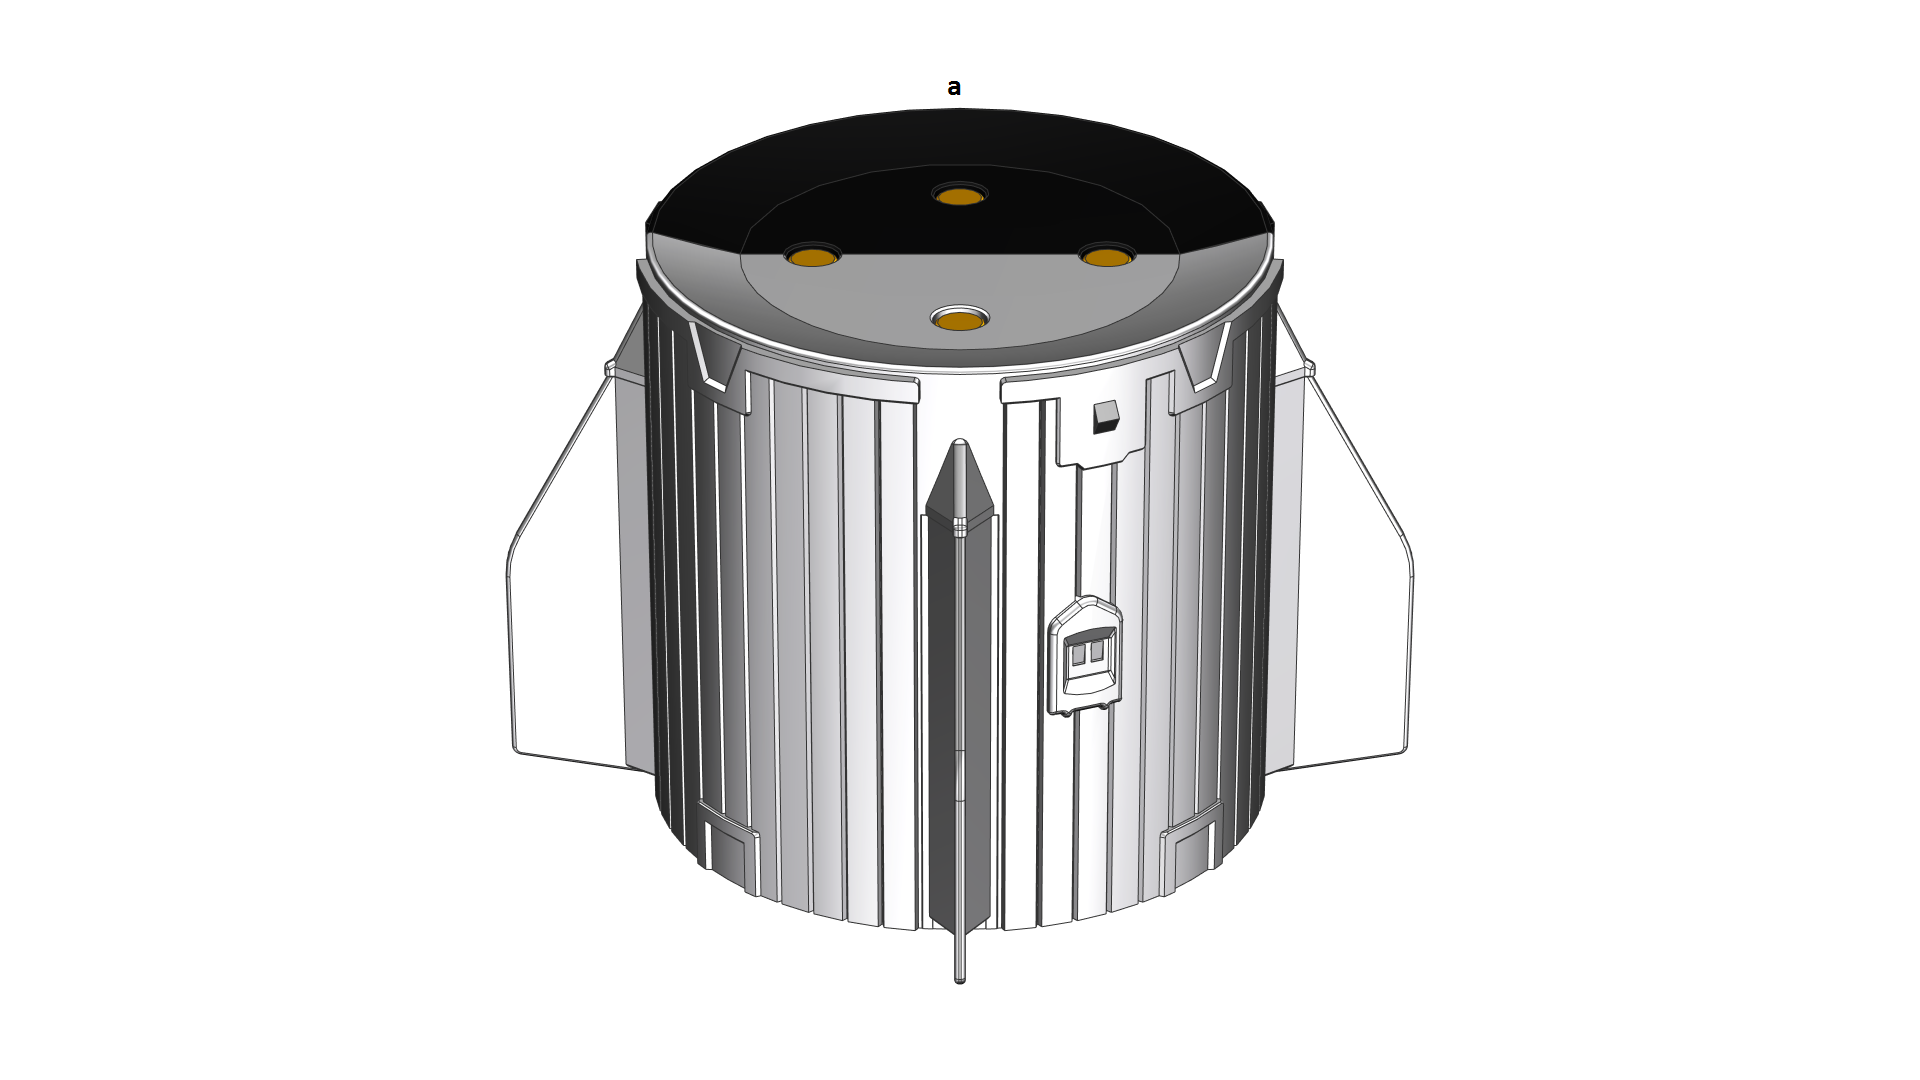
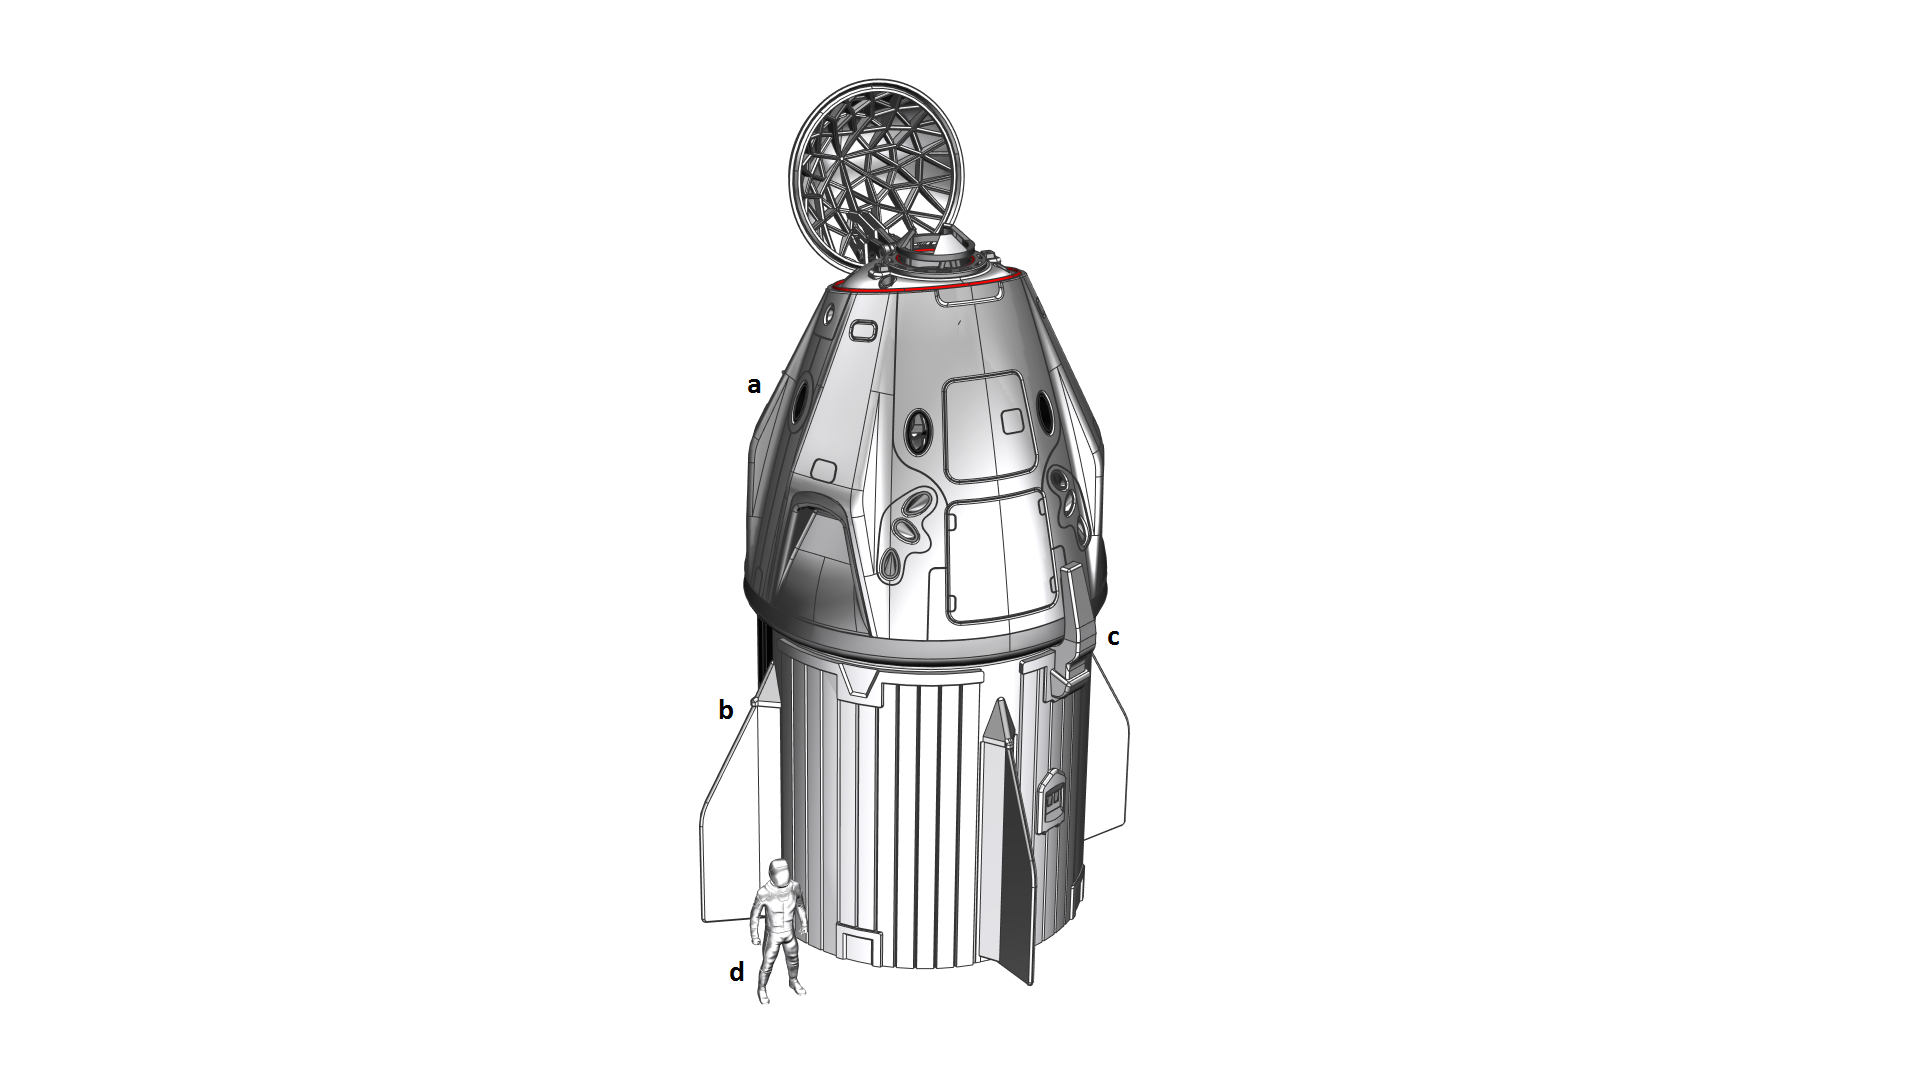
  • 1x Trunk * (a)
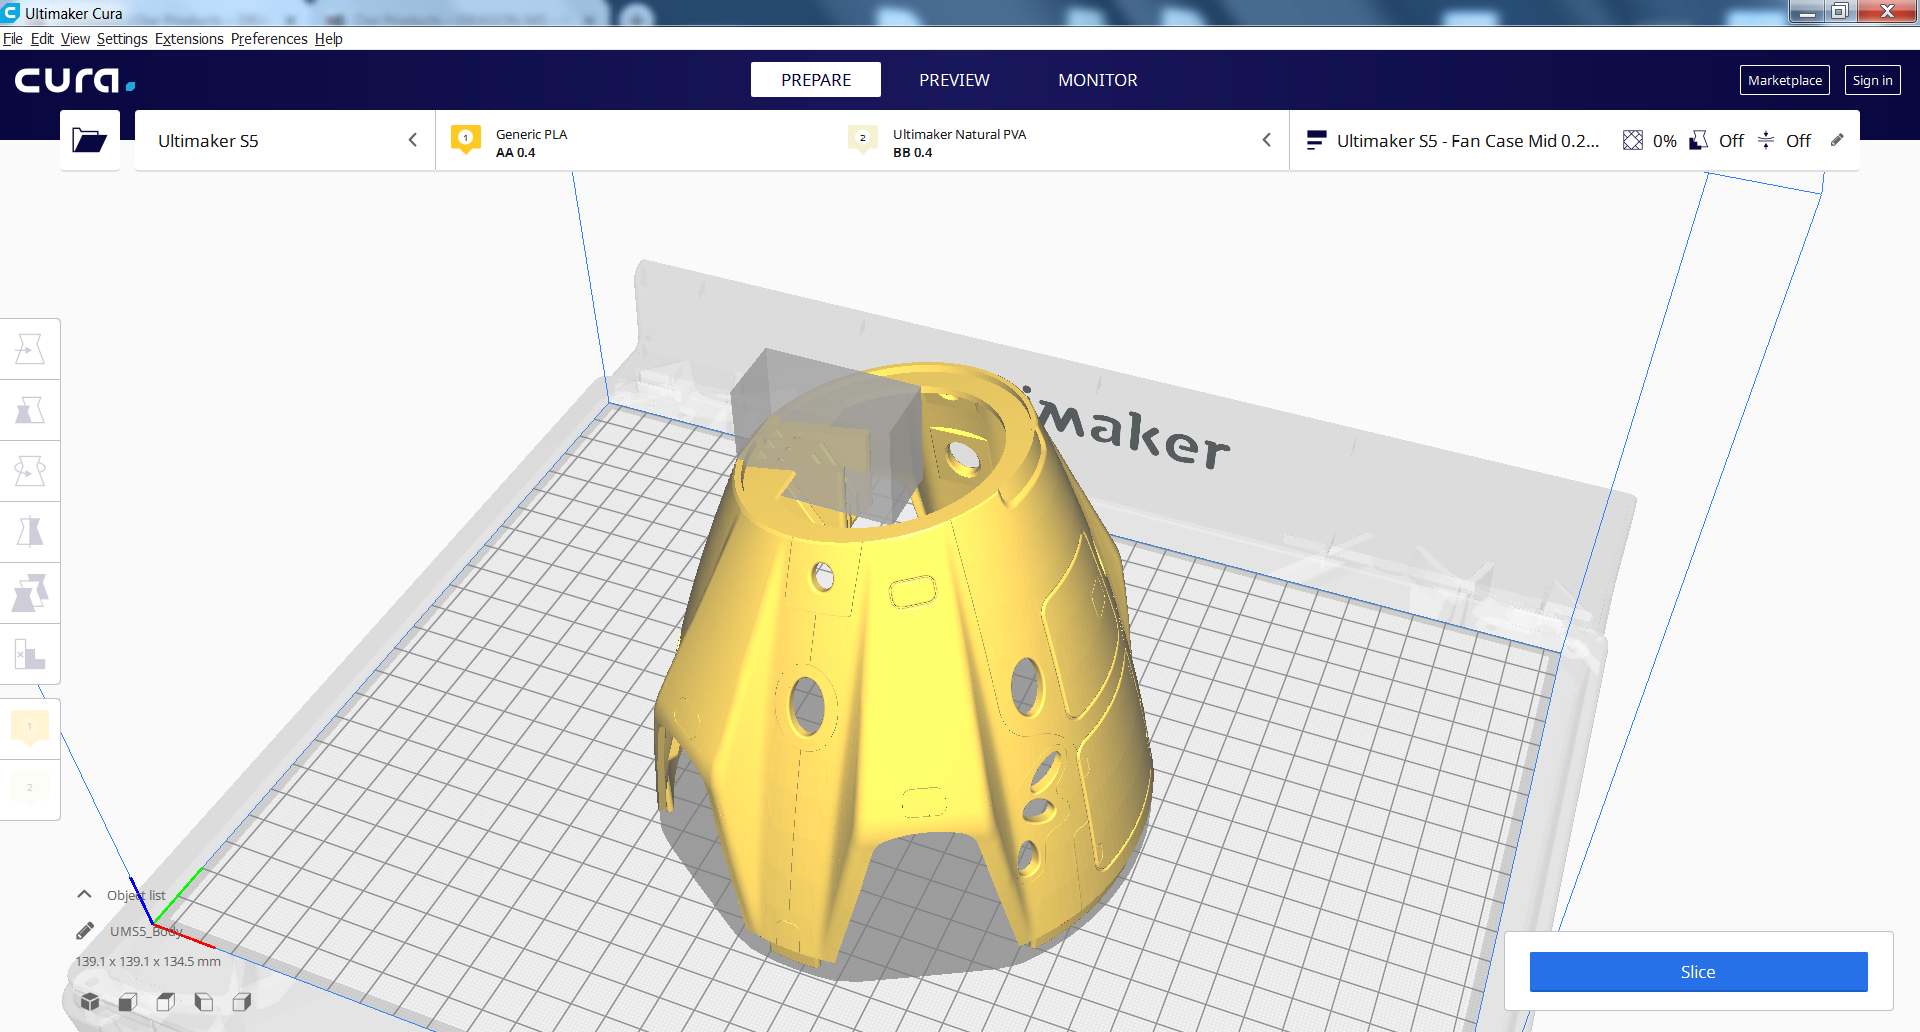
  • 1x Pressurised Crew Section from STEP 5 (b)
  • 1x Latch (c)
  • 8x Magnets (10mm dia x 2mm thick) (highlighted in ORANGE)
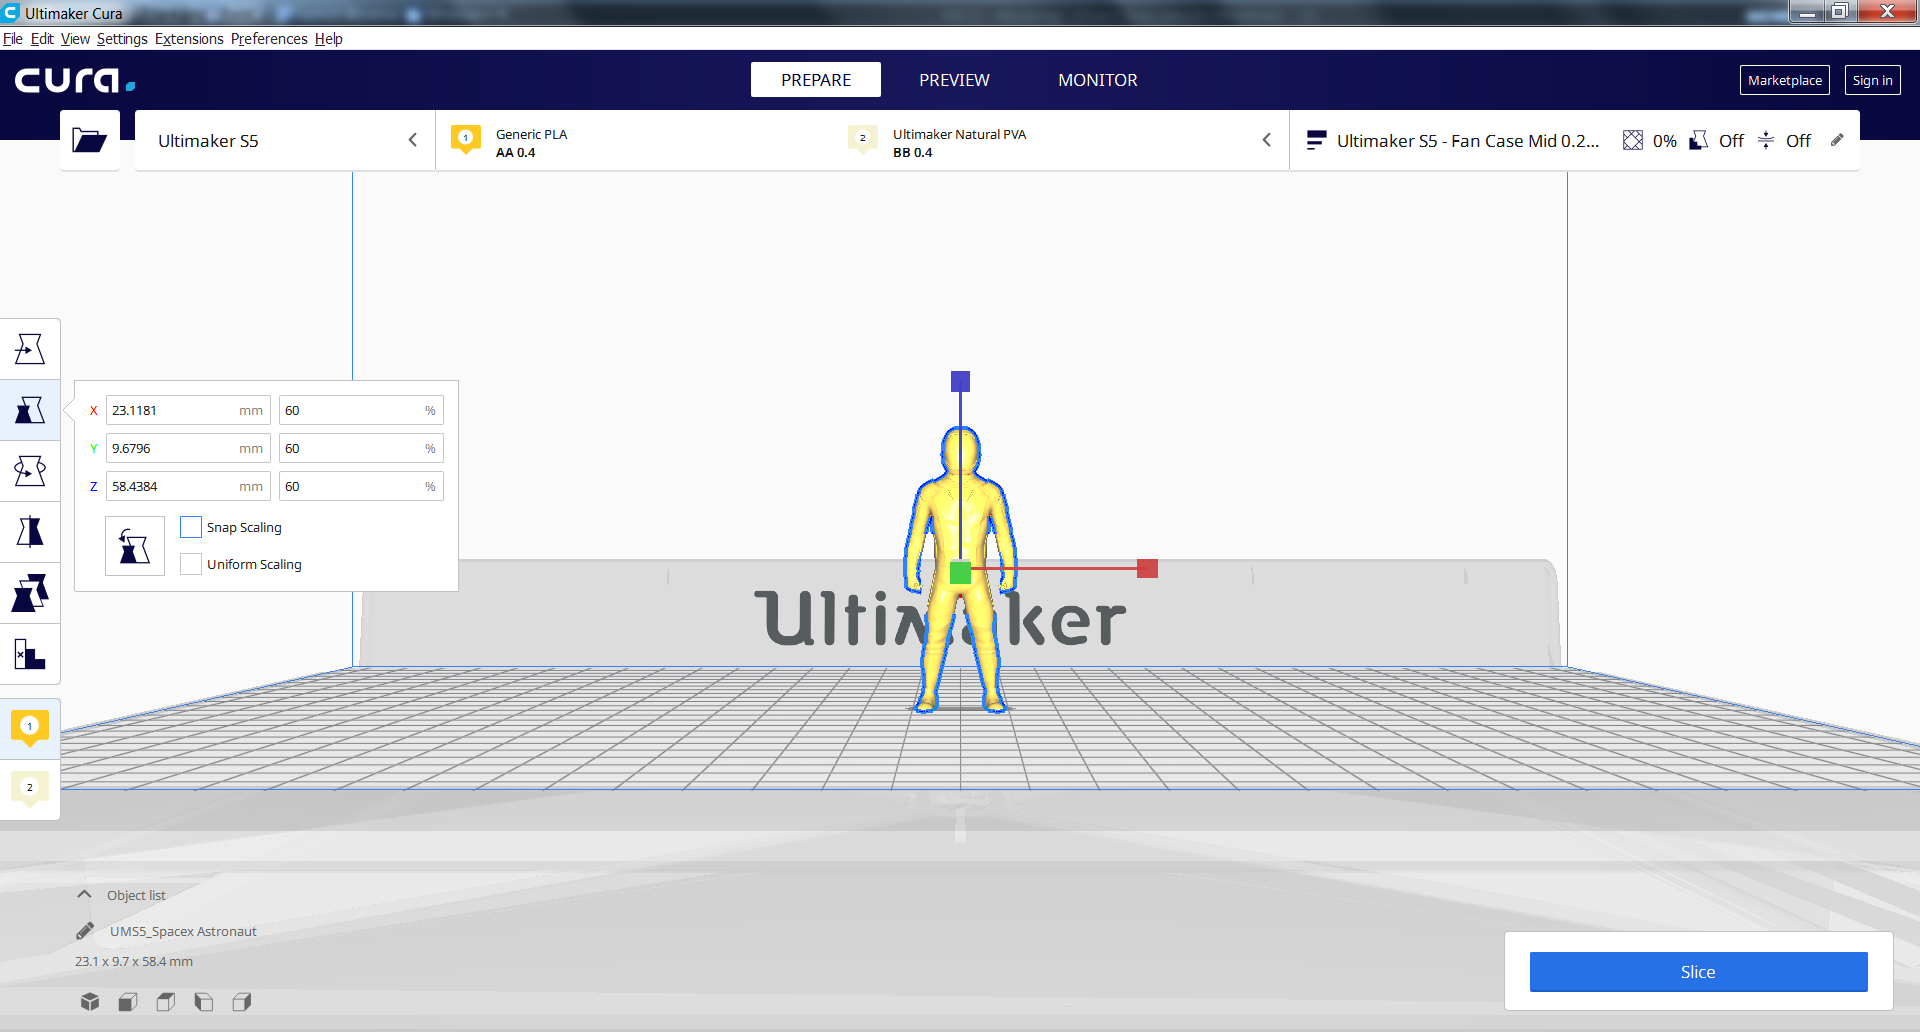
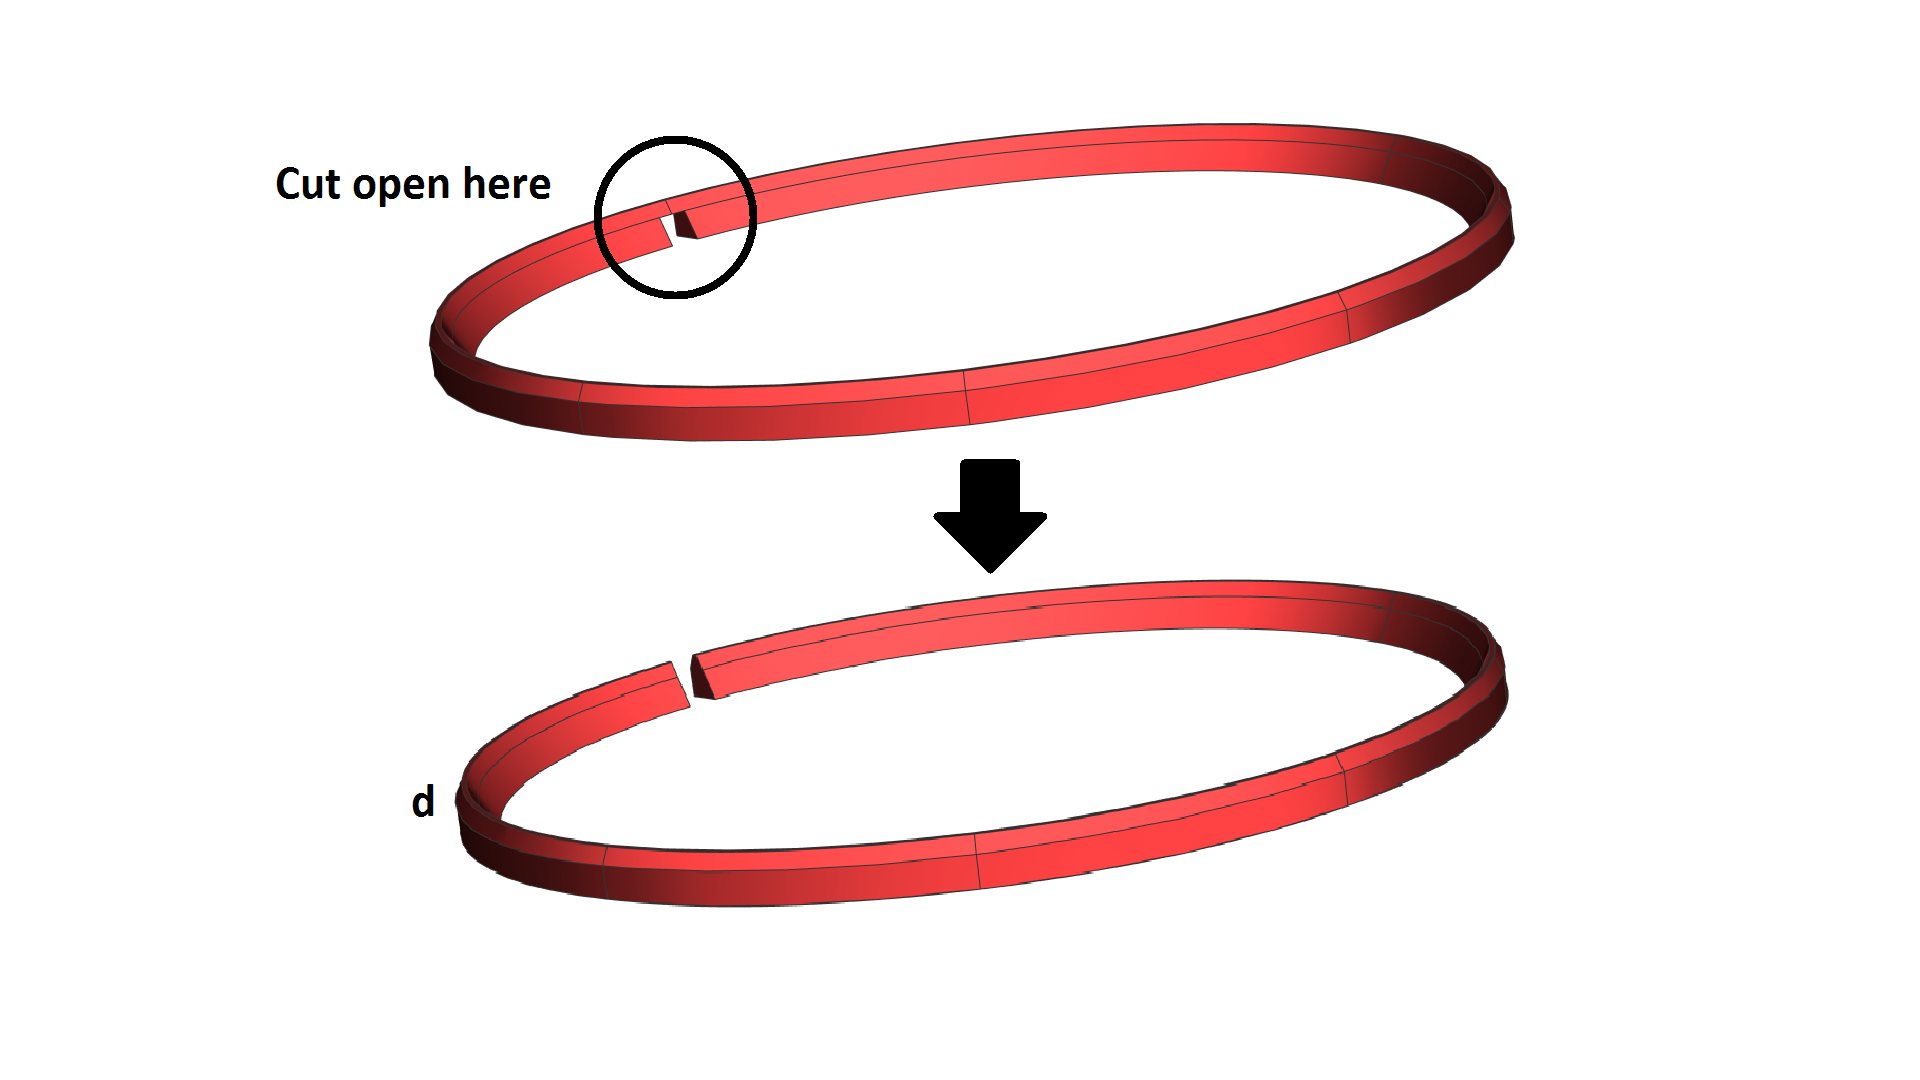
  • 2x Astronauts (d)

Please note: I printed the Trunk on an dual-extrusion printer (Ultimaker S5), therefore, I can print two halves of the Trunk (Front and Rear) at the same time with two different colours (Black & White). If you don’t have a dual-extrusion printer, you can either (1) print the whole Trunk in one colour (use the Trunk (1-piece) STL) and paint half of it with another colour OR (2) print two halves separately in two colours and glue them together.

Assembly:

  1. Super-glue 4 magnets (10mm dia x 2mm thick) into the 4 holes located on the top face of the Trunk
  2. Super-glue 4 magnets (10mm dia x 2mm thick) into the 4 holes located on the bottom face of the Heat Shield (ensure that these magnets are installed correctly so that they attract the ones on the bottom face of the Trunk, instead of repelling them)
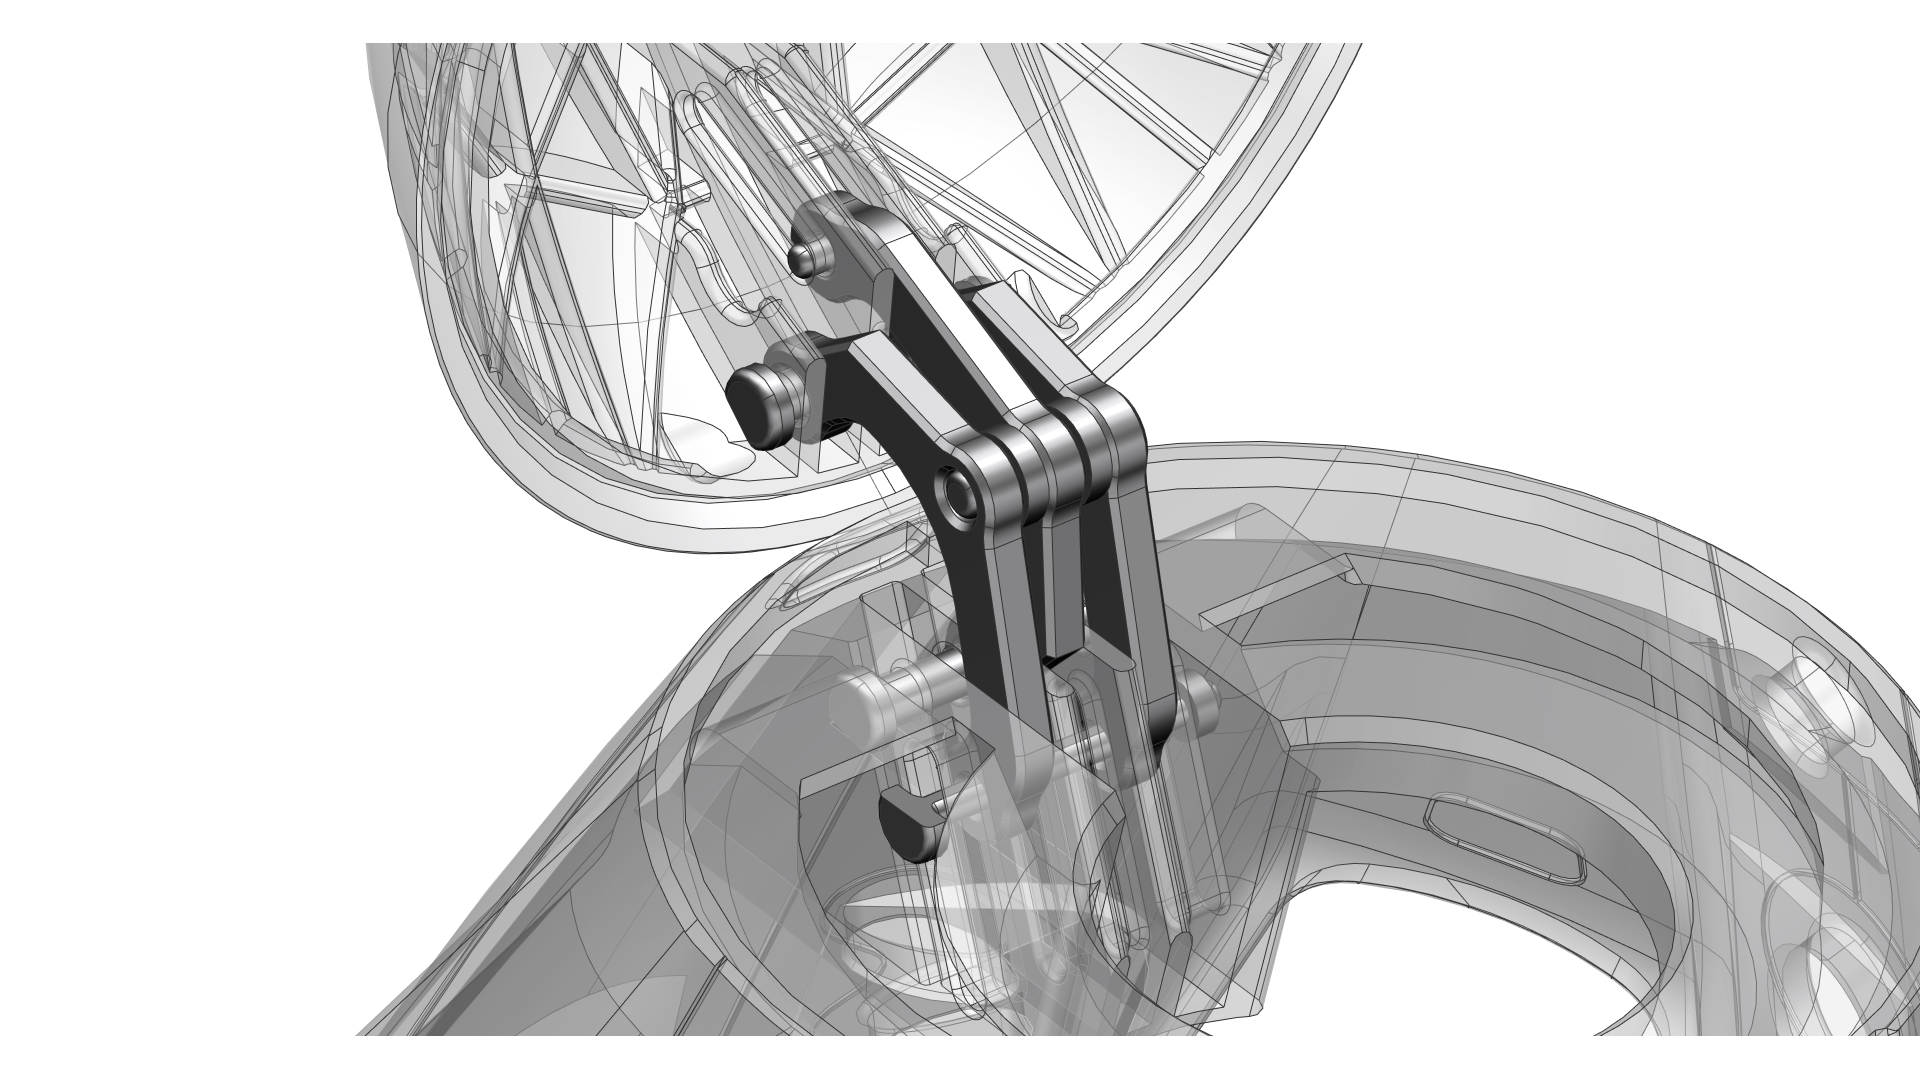
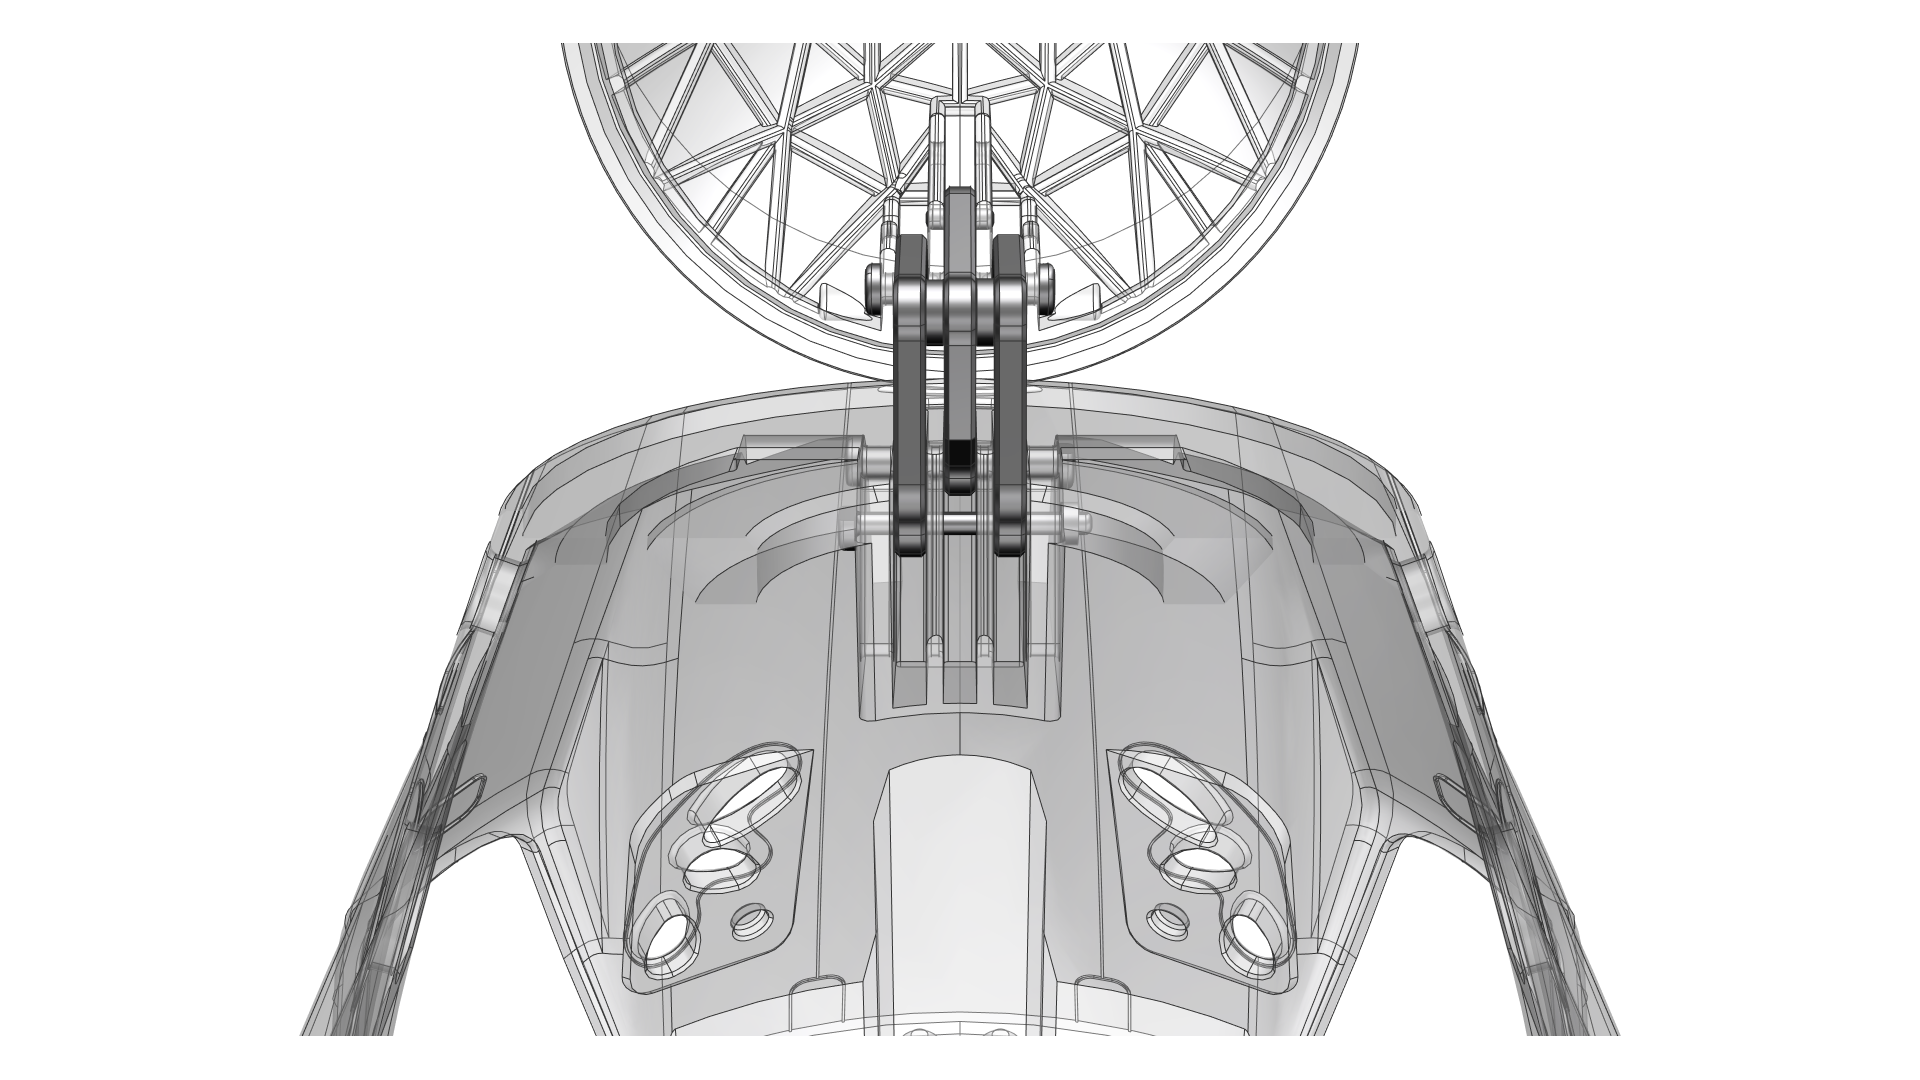
  3. Place the Pressurised Crew Section on the Trunk, the magnets should hold these two sections together beautifully and concentrically to each other.
  4. Press fit the Latch into the Trunk (this can be super-glue to the Trunk if you want) and place astronauts next to the model

And THAT’S ALL DONE! Congratulations, you have just built a super cool spacecraft!

If you really want to take this model to the next level, why not check out the upgraded and visually enhanced DRAGON-MS, or the DRAGON-MS’ bigger and even more impressive sibling, the DRAGON-MJ?

Subscribe
Notify of
guest
6 Comments
Inline Feedbacks
View all comments
JOHN FIOTT
JOHN FIOTT
September 17, 2023 6:55 pm

This will be my biggest print yet.
I have a Prusa Mk3S+ with a 0.6 nozzle installed so hope it can tackle the smaller parts well.

Just some things I wanted to ask please..

  1. What sort of support should I use, given that this is FDM printing?
  2. Would it be possible to indicate which parts should be in black and which in white (or red for some parts apparently)? Not sure I can tell from the provided images..
  3. How much material should I plan for this? Is a 1Kg reel of white PLA and another 1Kg of Black enough?
  4. What infill setting is recommended?

Thanks for providing this for free!

Ryan Hitzeroth
Ryan Hitzeroth
June 11, 2023 3:20 am

Thanks. Just download the files. I’m using a Elegoo Saturn. The main body is outside the print area. I hate trying to scale down and then use the same scale down % for all other parts.
Is that my only option?

Adam Ross
Adam Ross
May 22, 2023 2:15 am

Thank you An Duong and co. I cannot wait to make this!!

6
0
Please vote & feedback on this product :)x