
If you want to save this How-To instruction as a pdf file (and print it out later if needed), simply copy the URL of this page and paste it to https://www.printfriendly.com/ . Printfriendly will generate a printer-friendly pdf of the page with all the texts and images for you.
First of all, I would like to give my special thank to Trevor Page from Tesla Owners Online for the amazing review on YouTube about this model – very detail and informative! Please watch his video below the instructions if you want some more hints and tips to get this model printed successfully on your 3D printers! If you would like to subscribe to his YouTube channel, please click here.
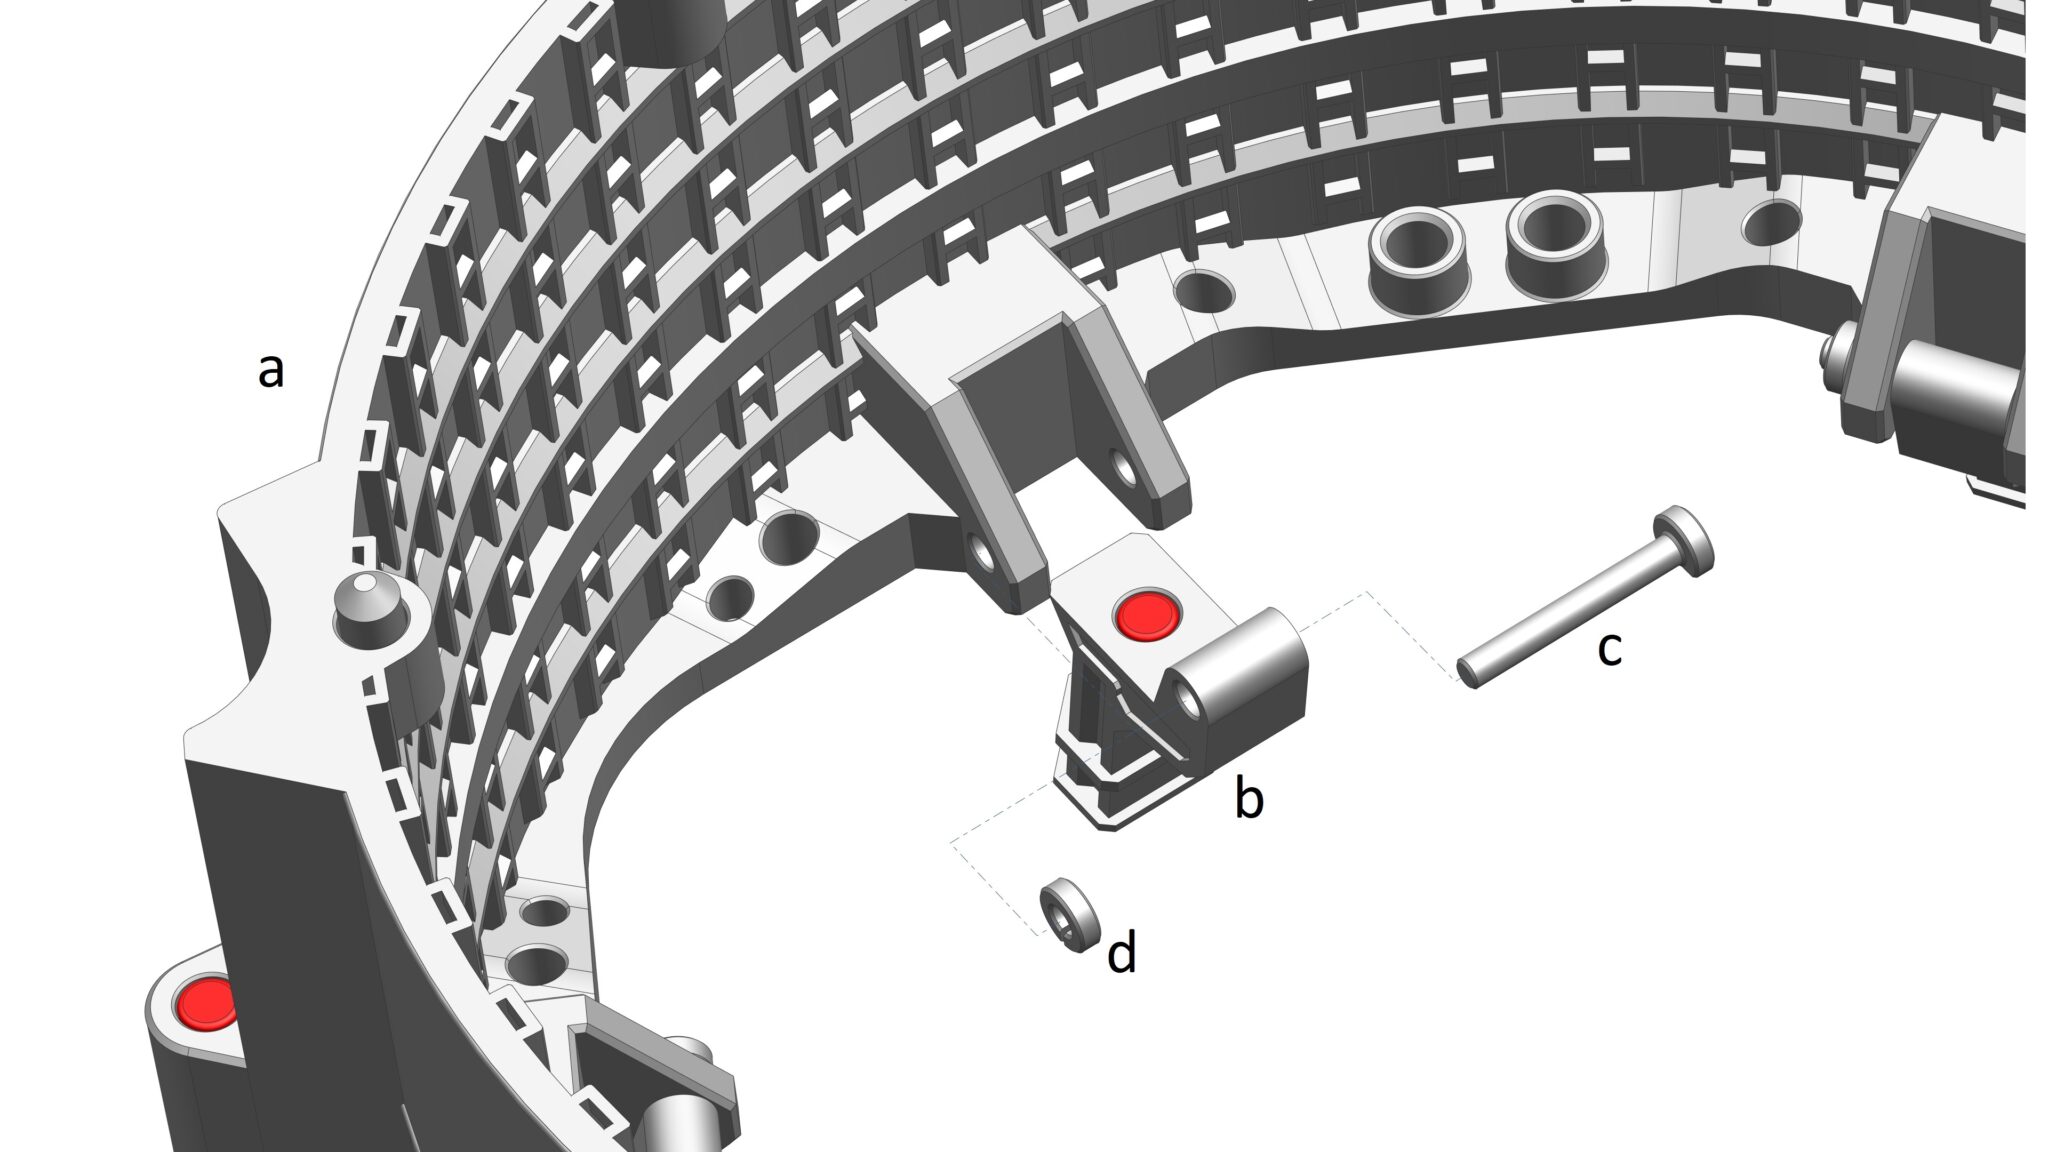
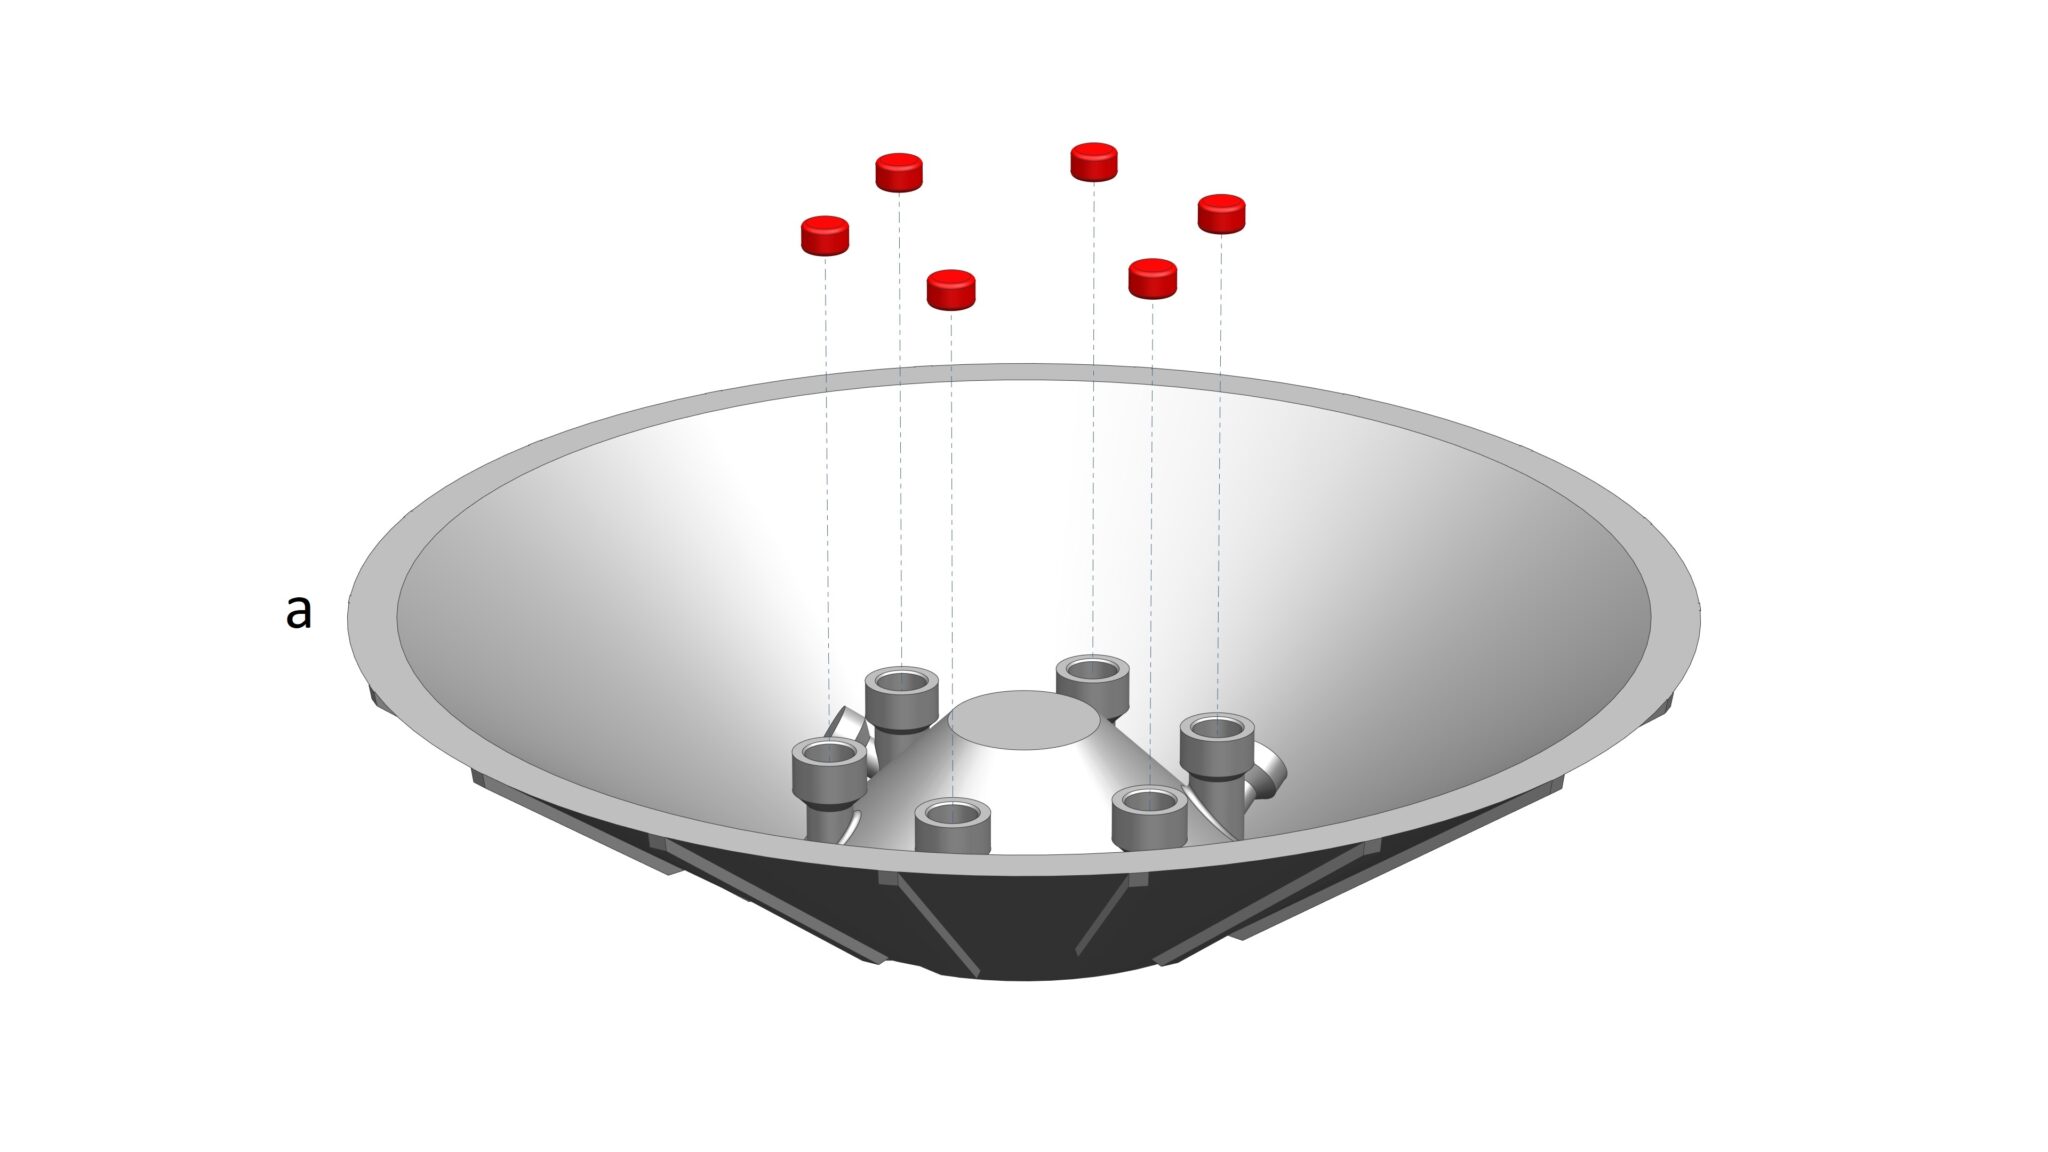
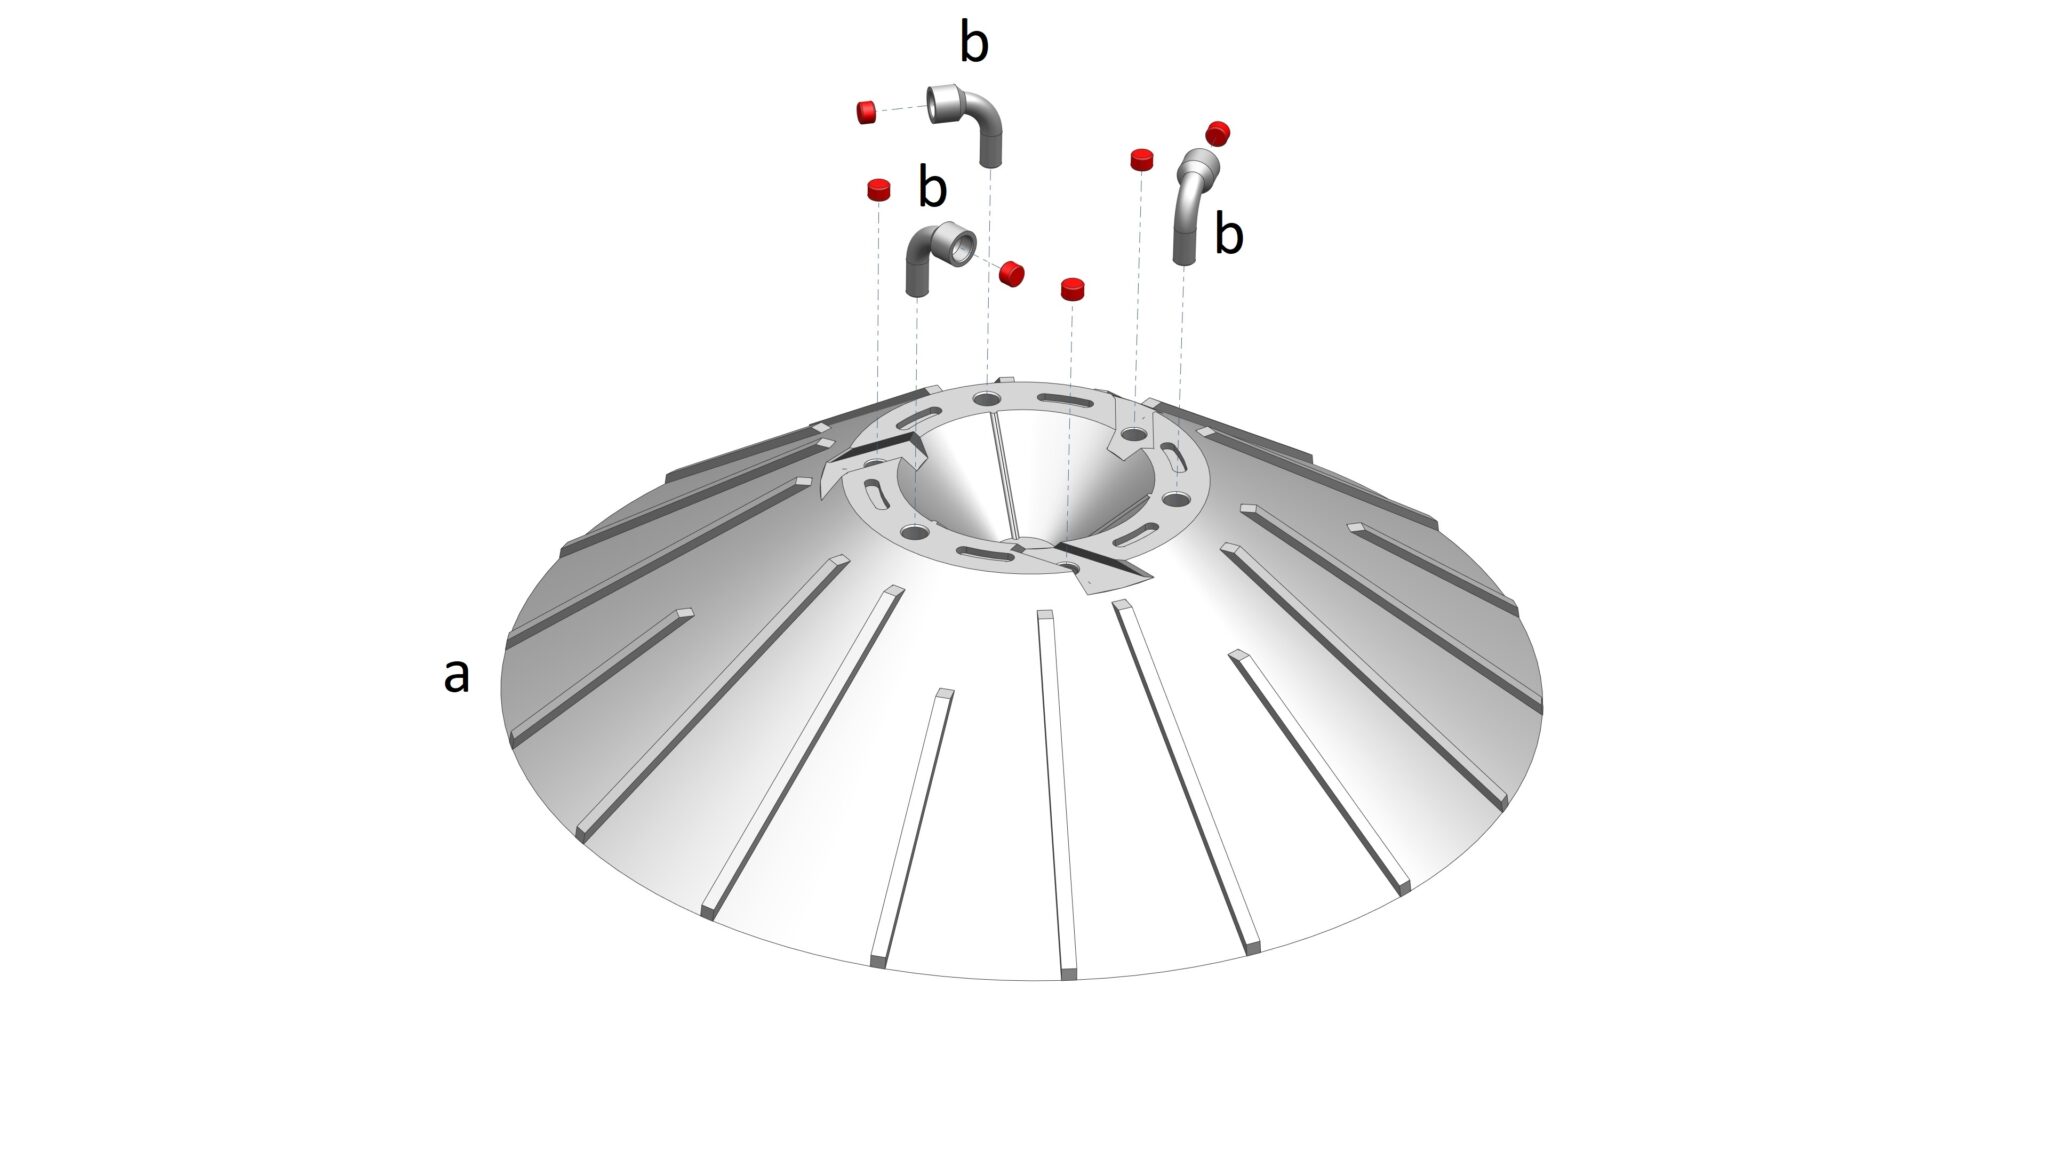
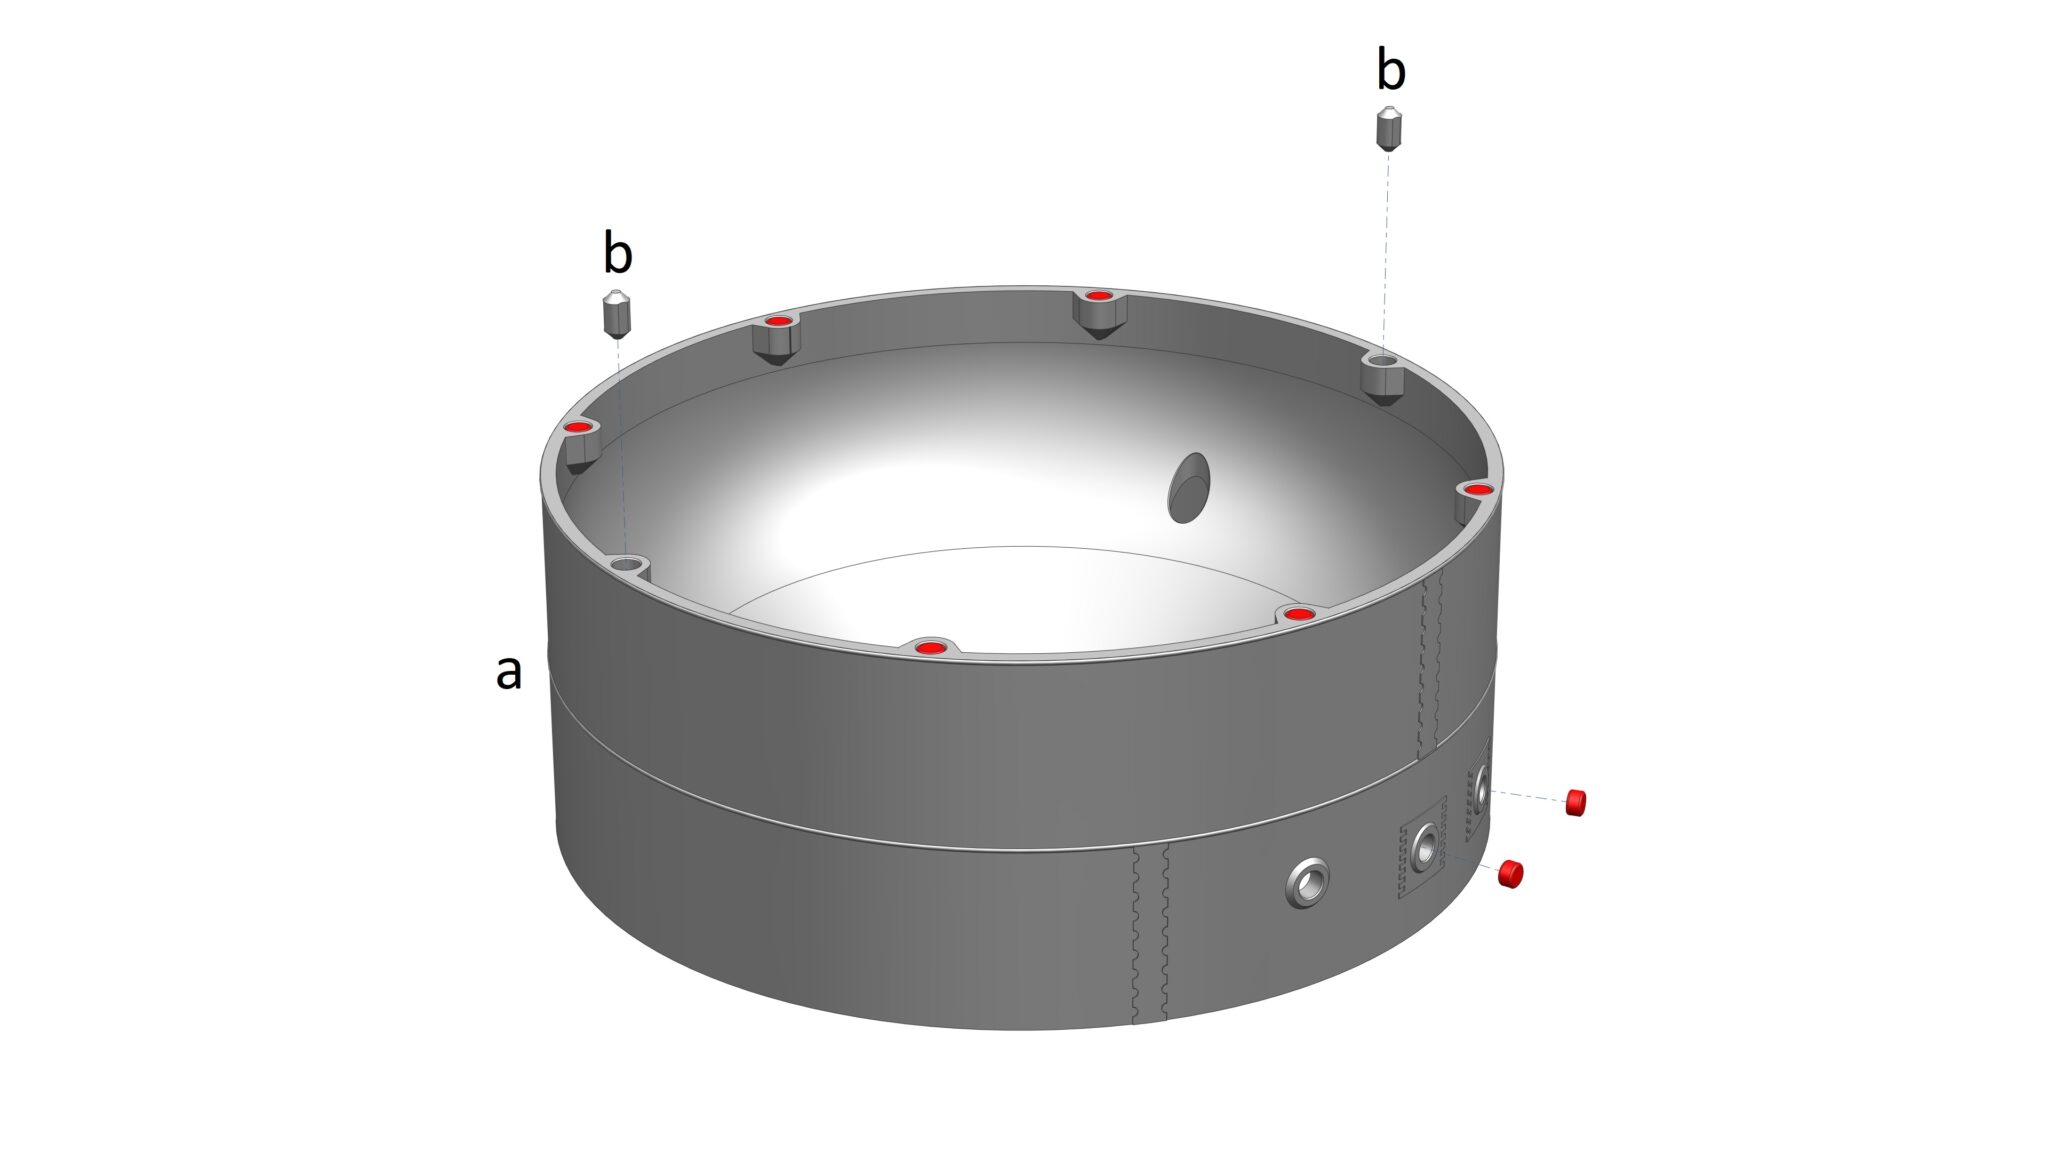
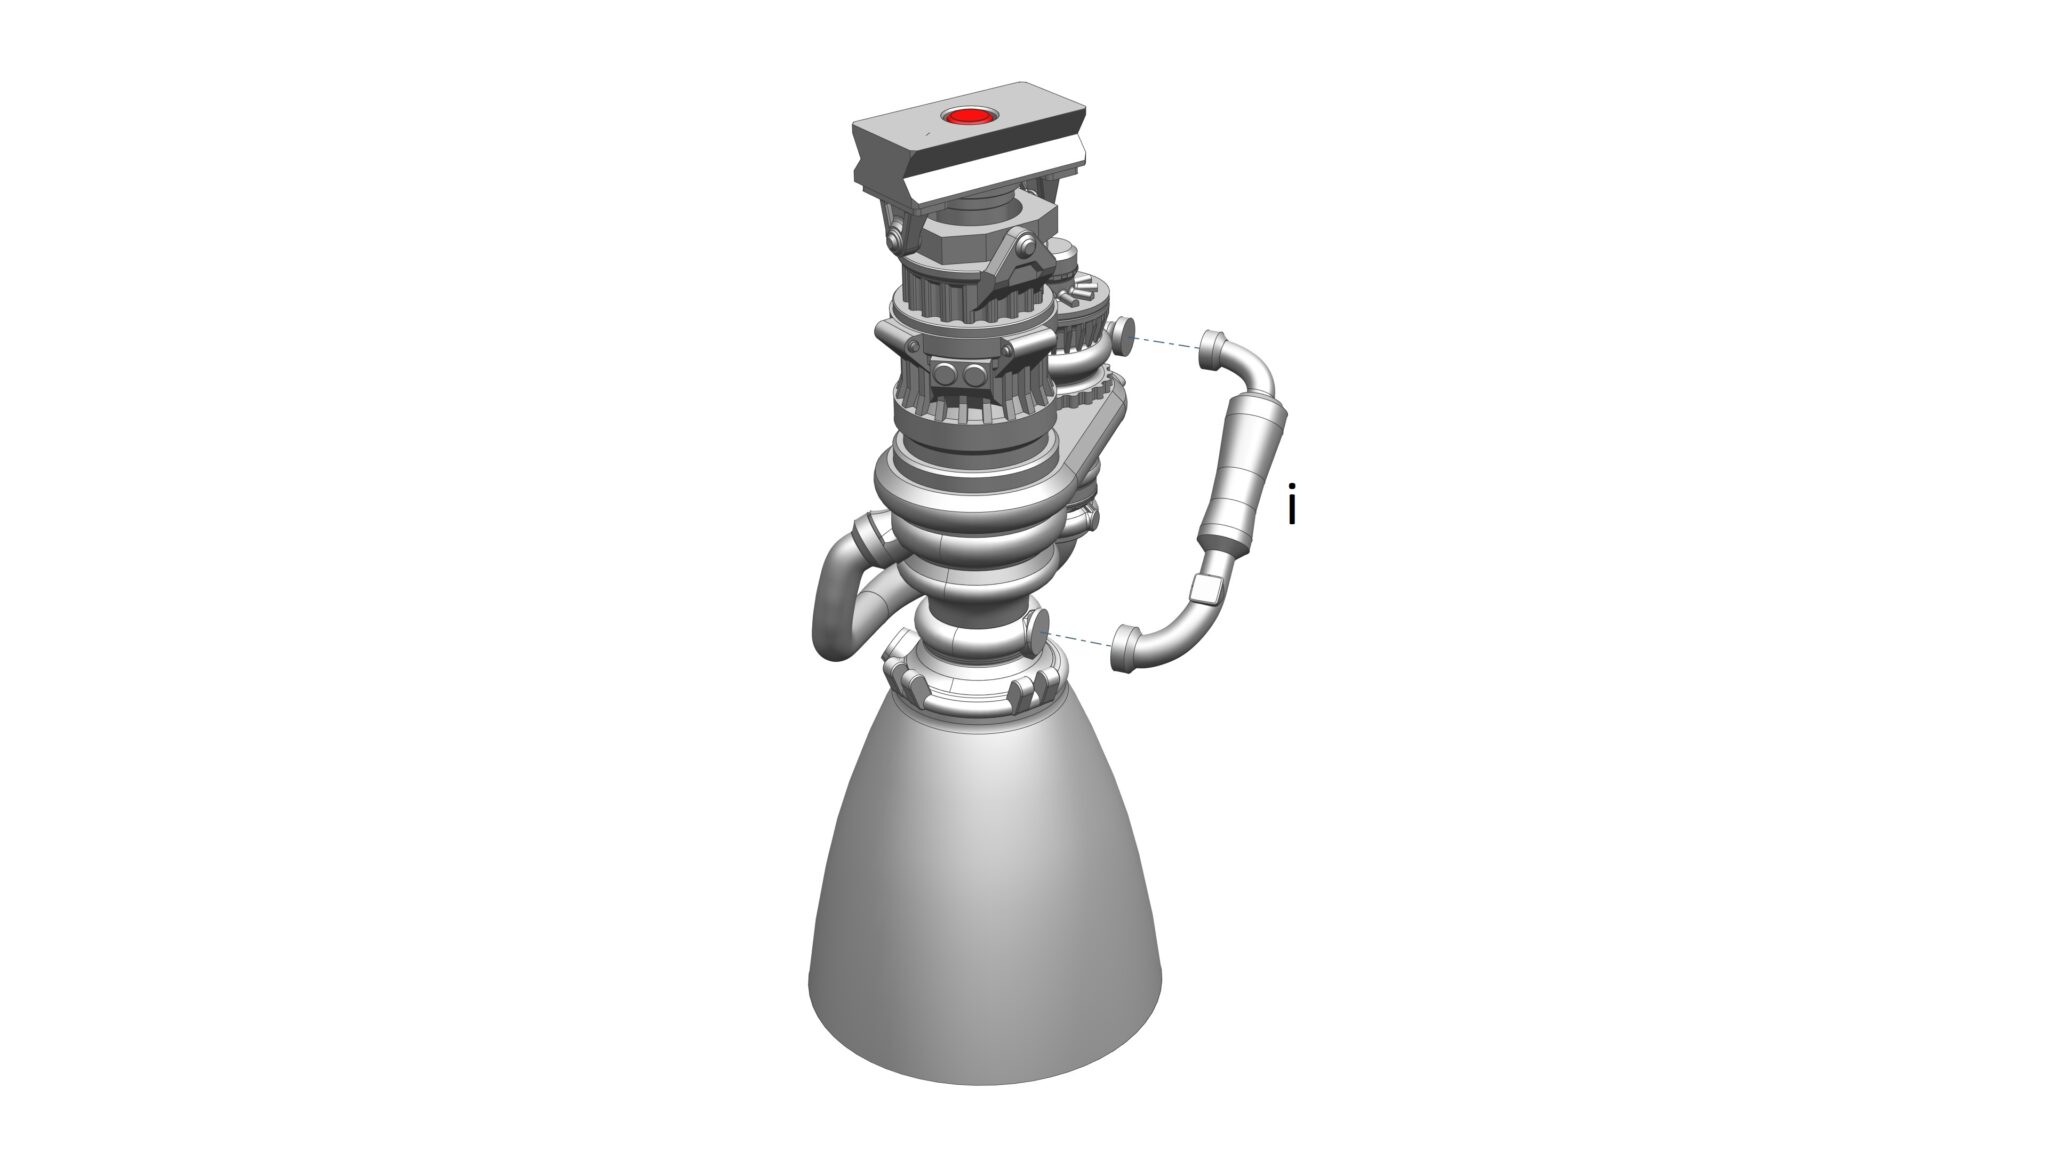
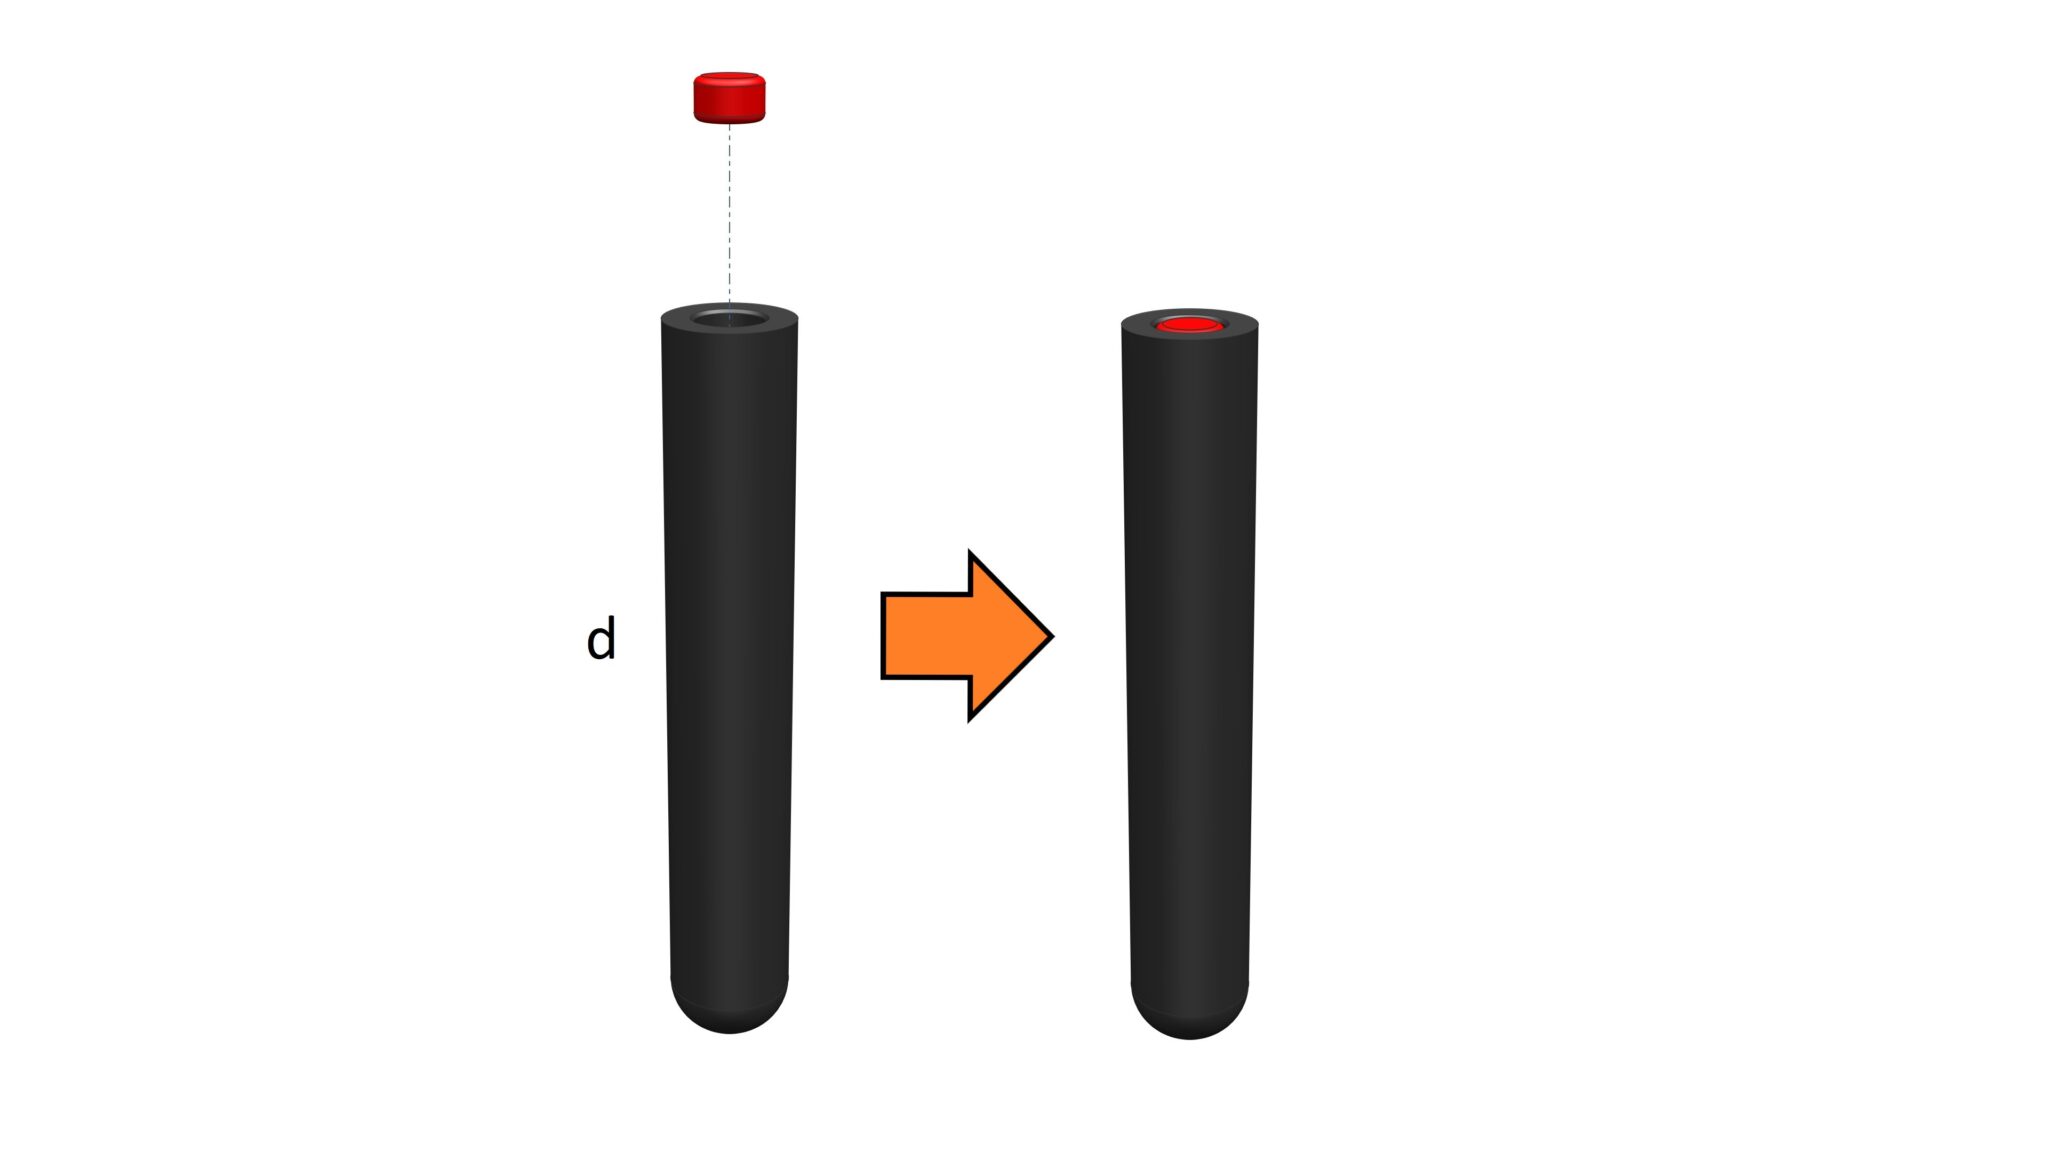
All of the STL files are really straight forward to print. All you need to do is load them into your slicer software (I use Cura), select your desirable settings (e.g. layer height, infill percentage, etc.) and slice the parts. I used 0.4mm nozzle 0.2mm layer height to print large parts and 0.25mm nozzle 0.1mm layer height to print small parts (e.g. Raptor engine parts, pins, c-clips, etc.)
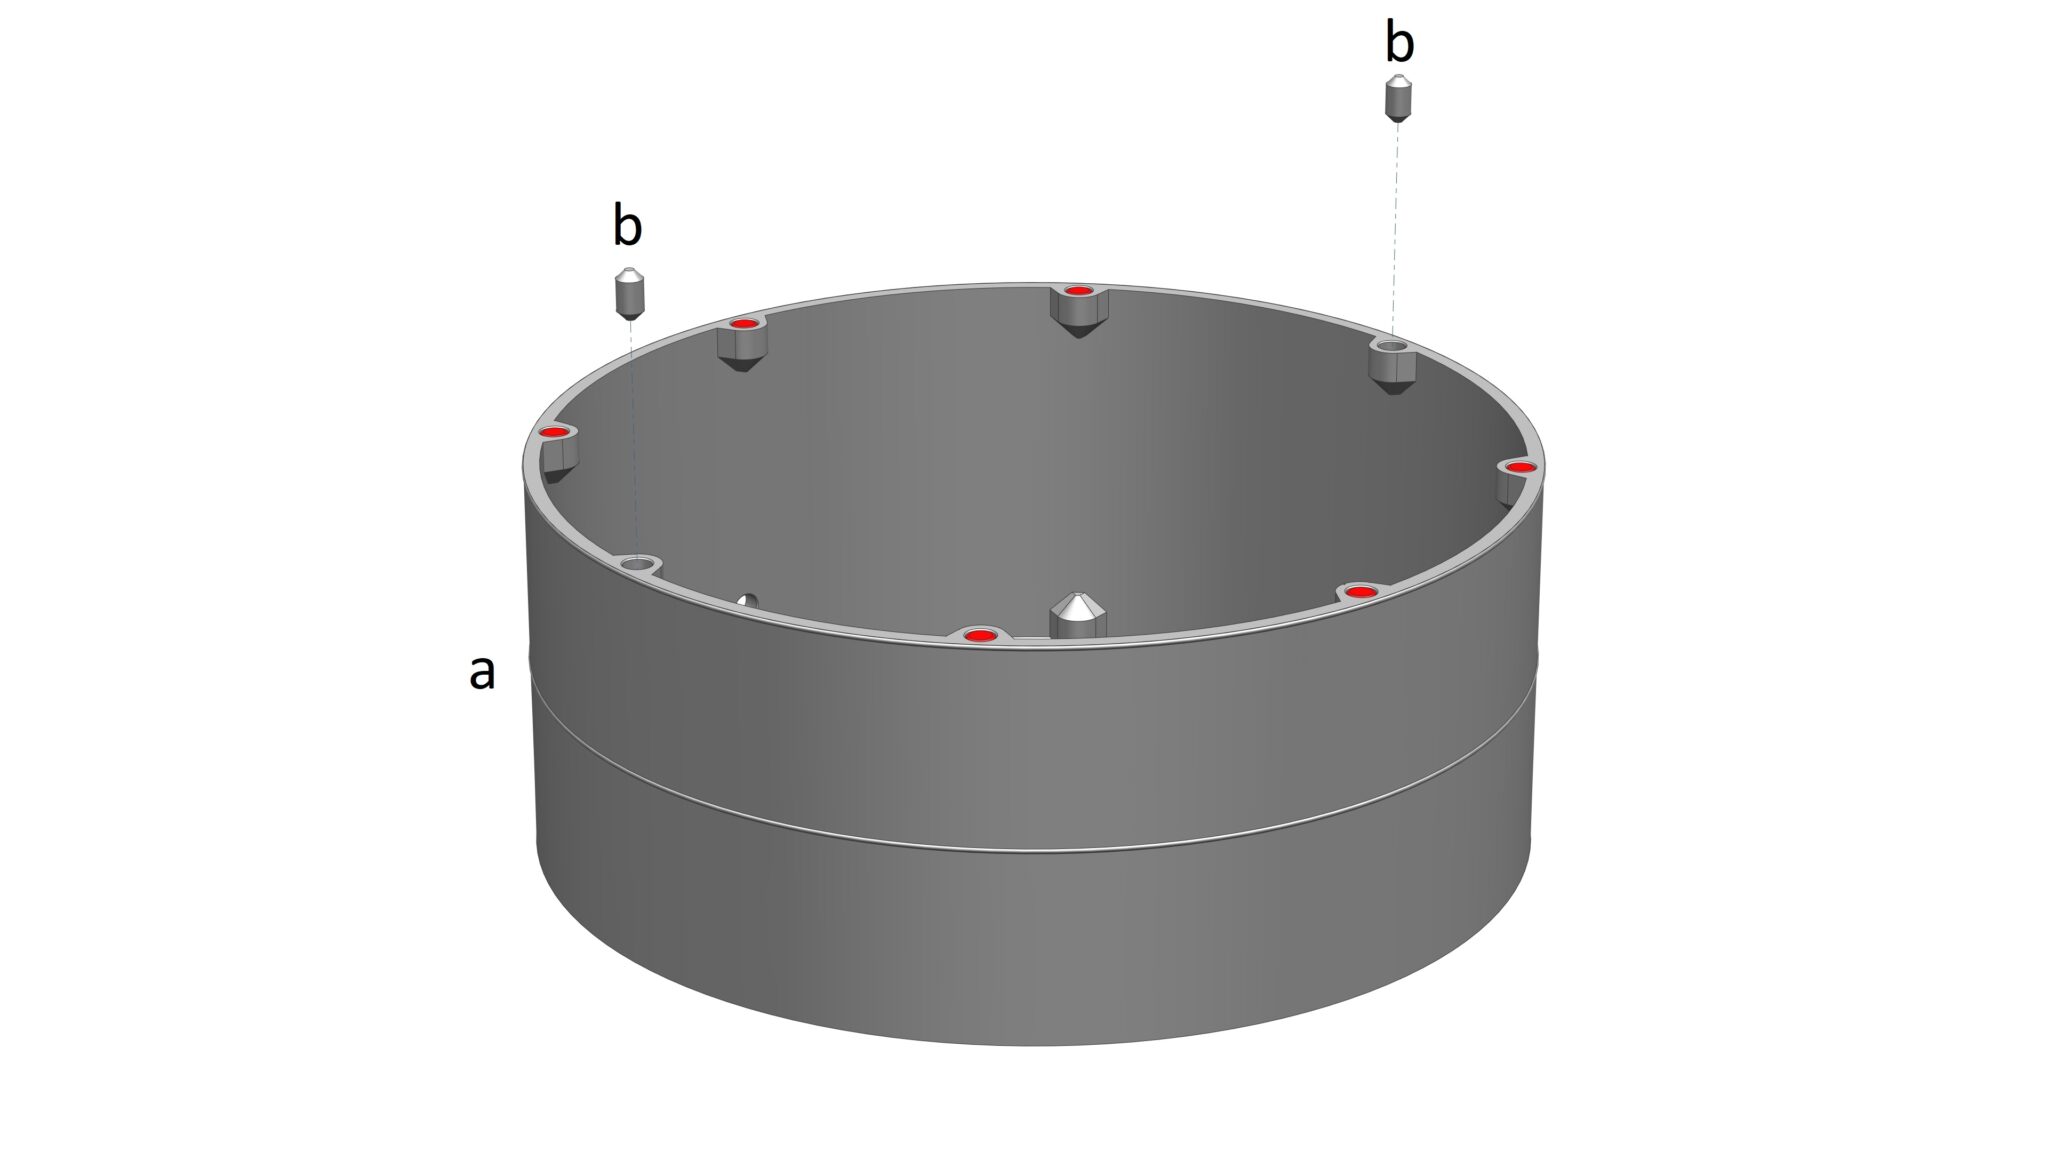
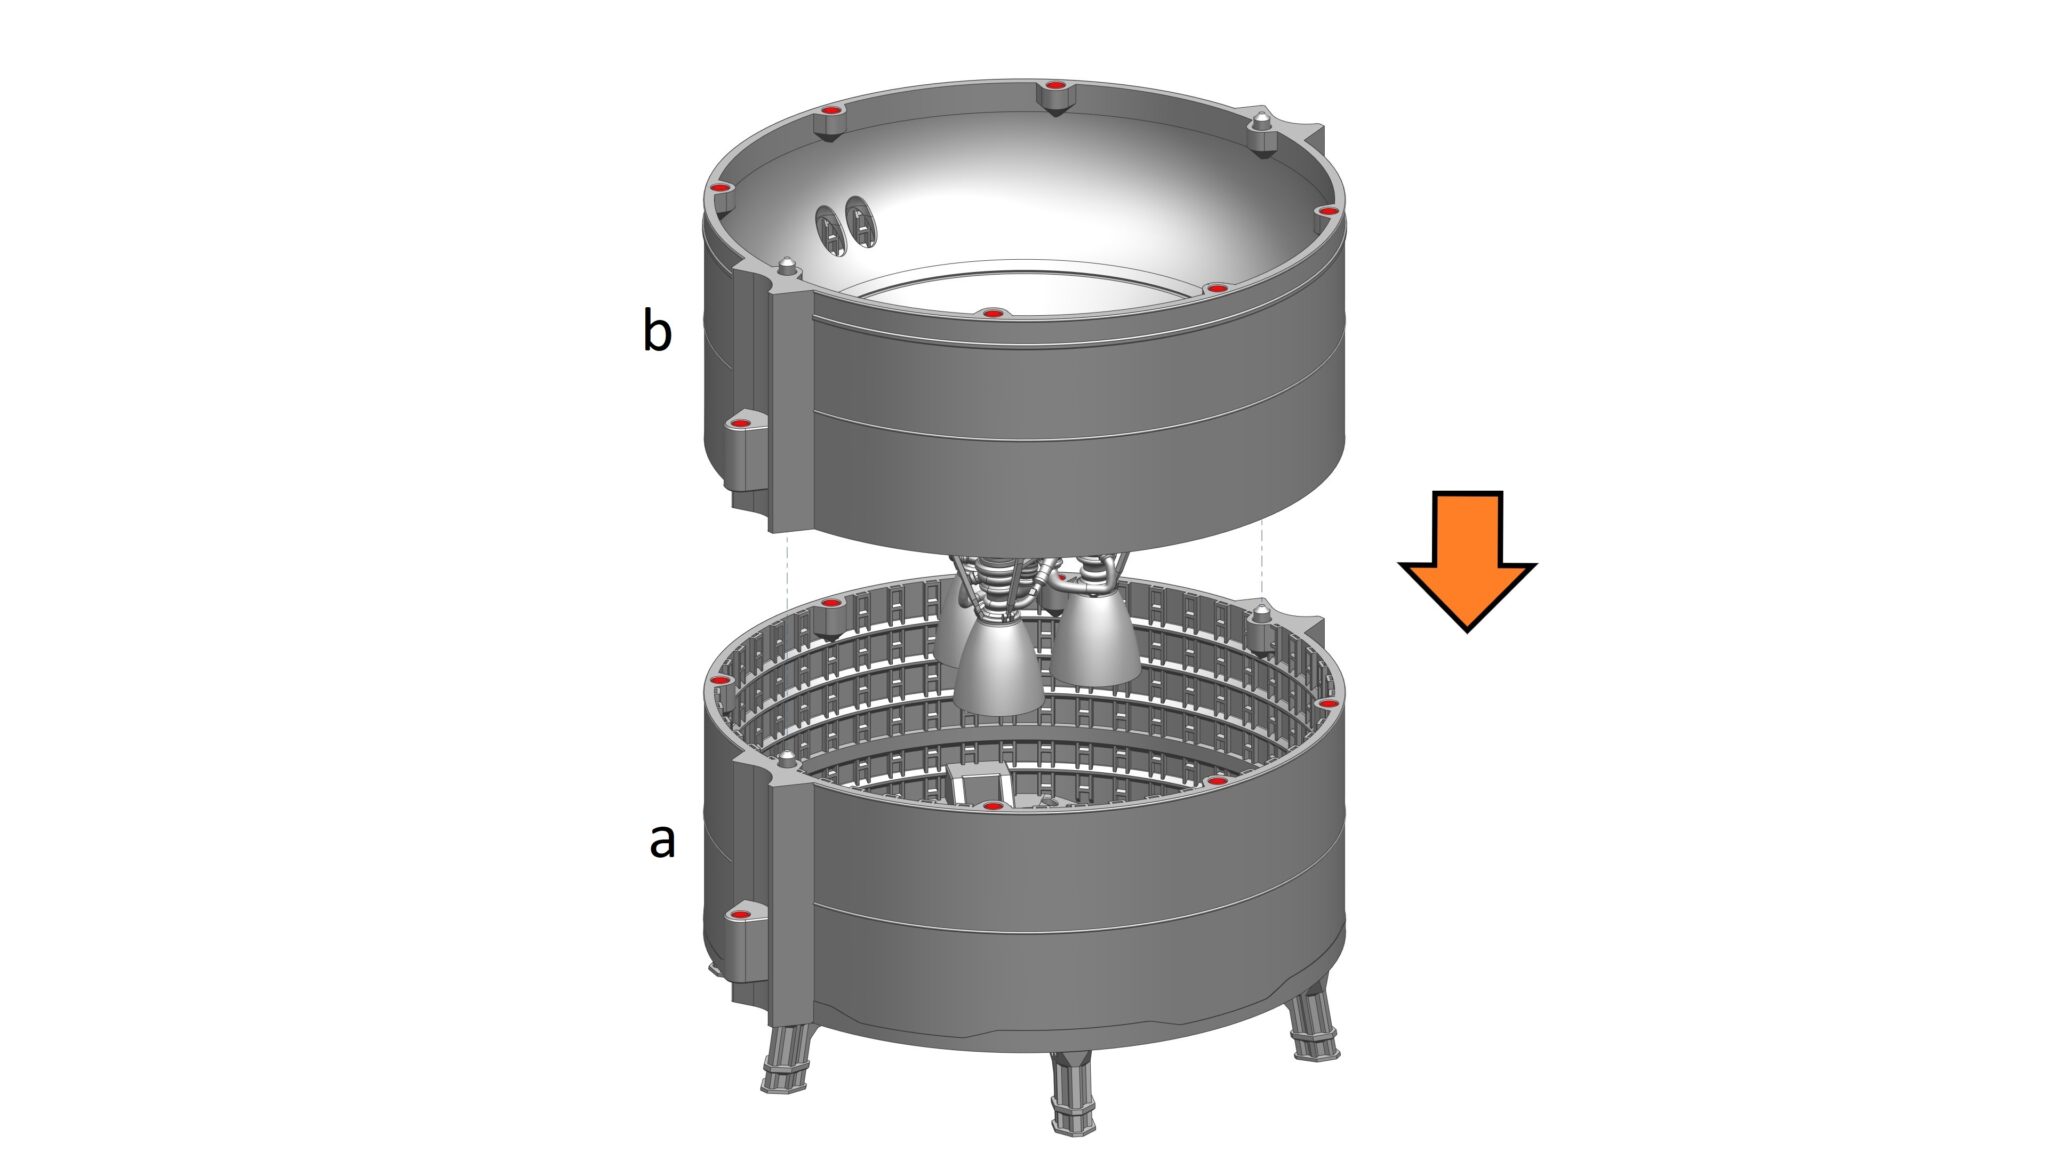
Please note: I already saved the STL for each part in the orientation I printed them on my FDM printer. Hence, when you load the STL in your slicer software, you don’t need to orientate them again, unless you want to try to print them in a different orientation.


I found if I changed the css –e-global-color-text field to be #000 then it prints fine.
The instructions don’t print very well on a good colour laser writer. The font has little contrast and is quite hard to read.
Awesome Model. Best Starship Model ever made. Thx to An and your Team