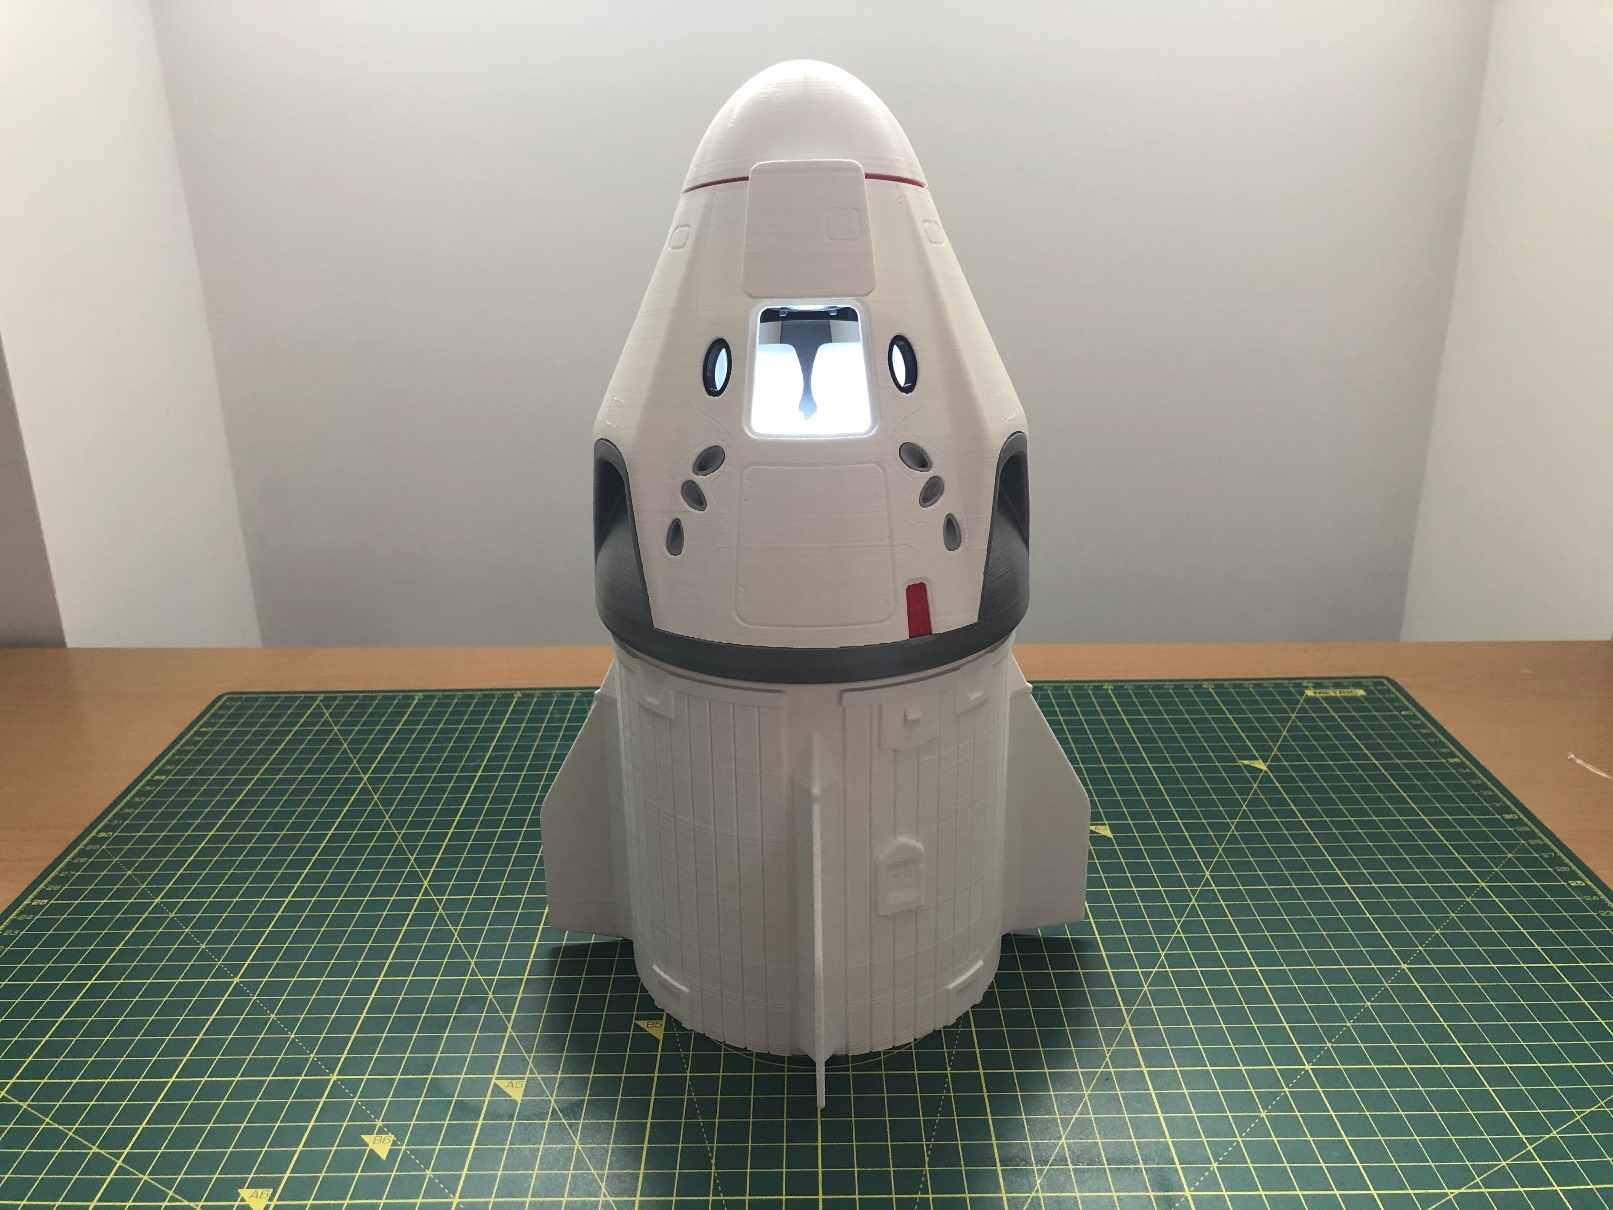
In this tutorial, I’ll explain how you can set up & install the interior lighting upgrade into your DRAGON-MSmodel!
Before we start, you need to purchase these items:
In this tutorial, I’ll explain how you can set up & install the interior lighting upgrade into your DRAGON-MSmodel!
Before we start, you need to purchase these items:
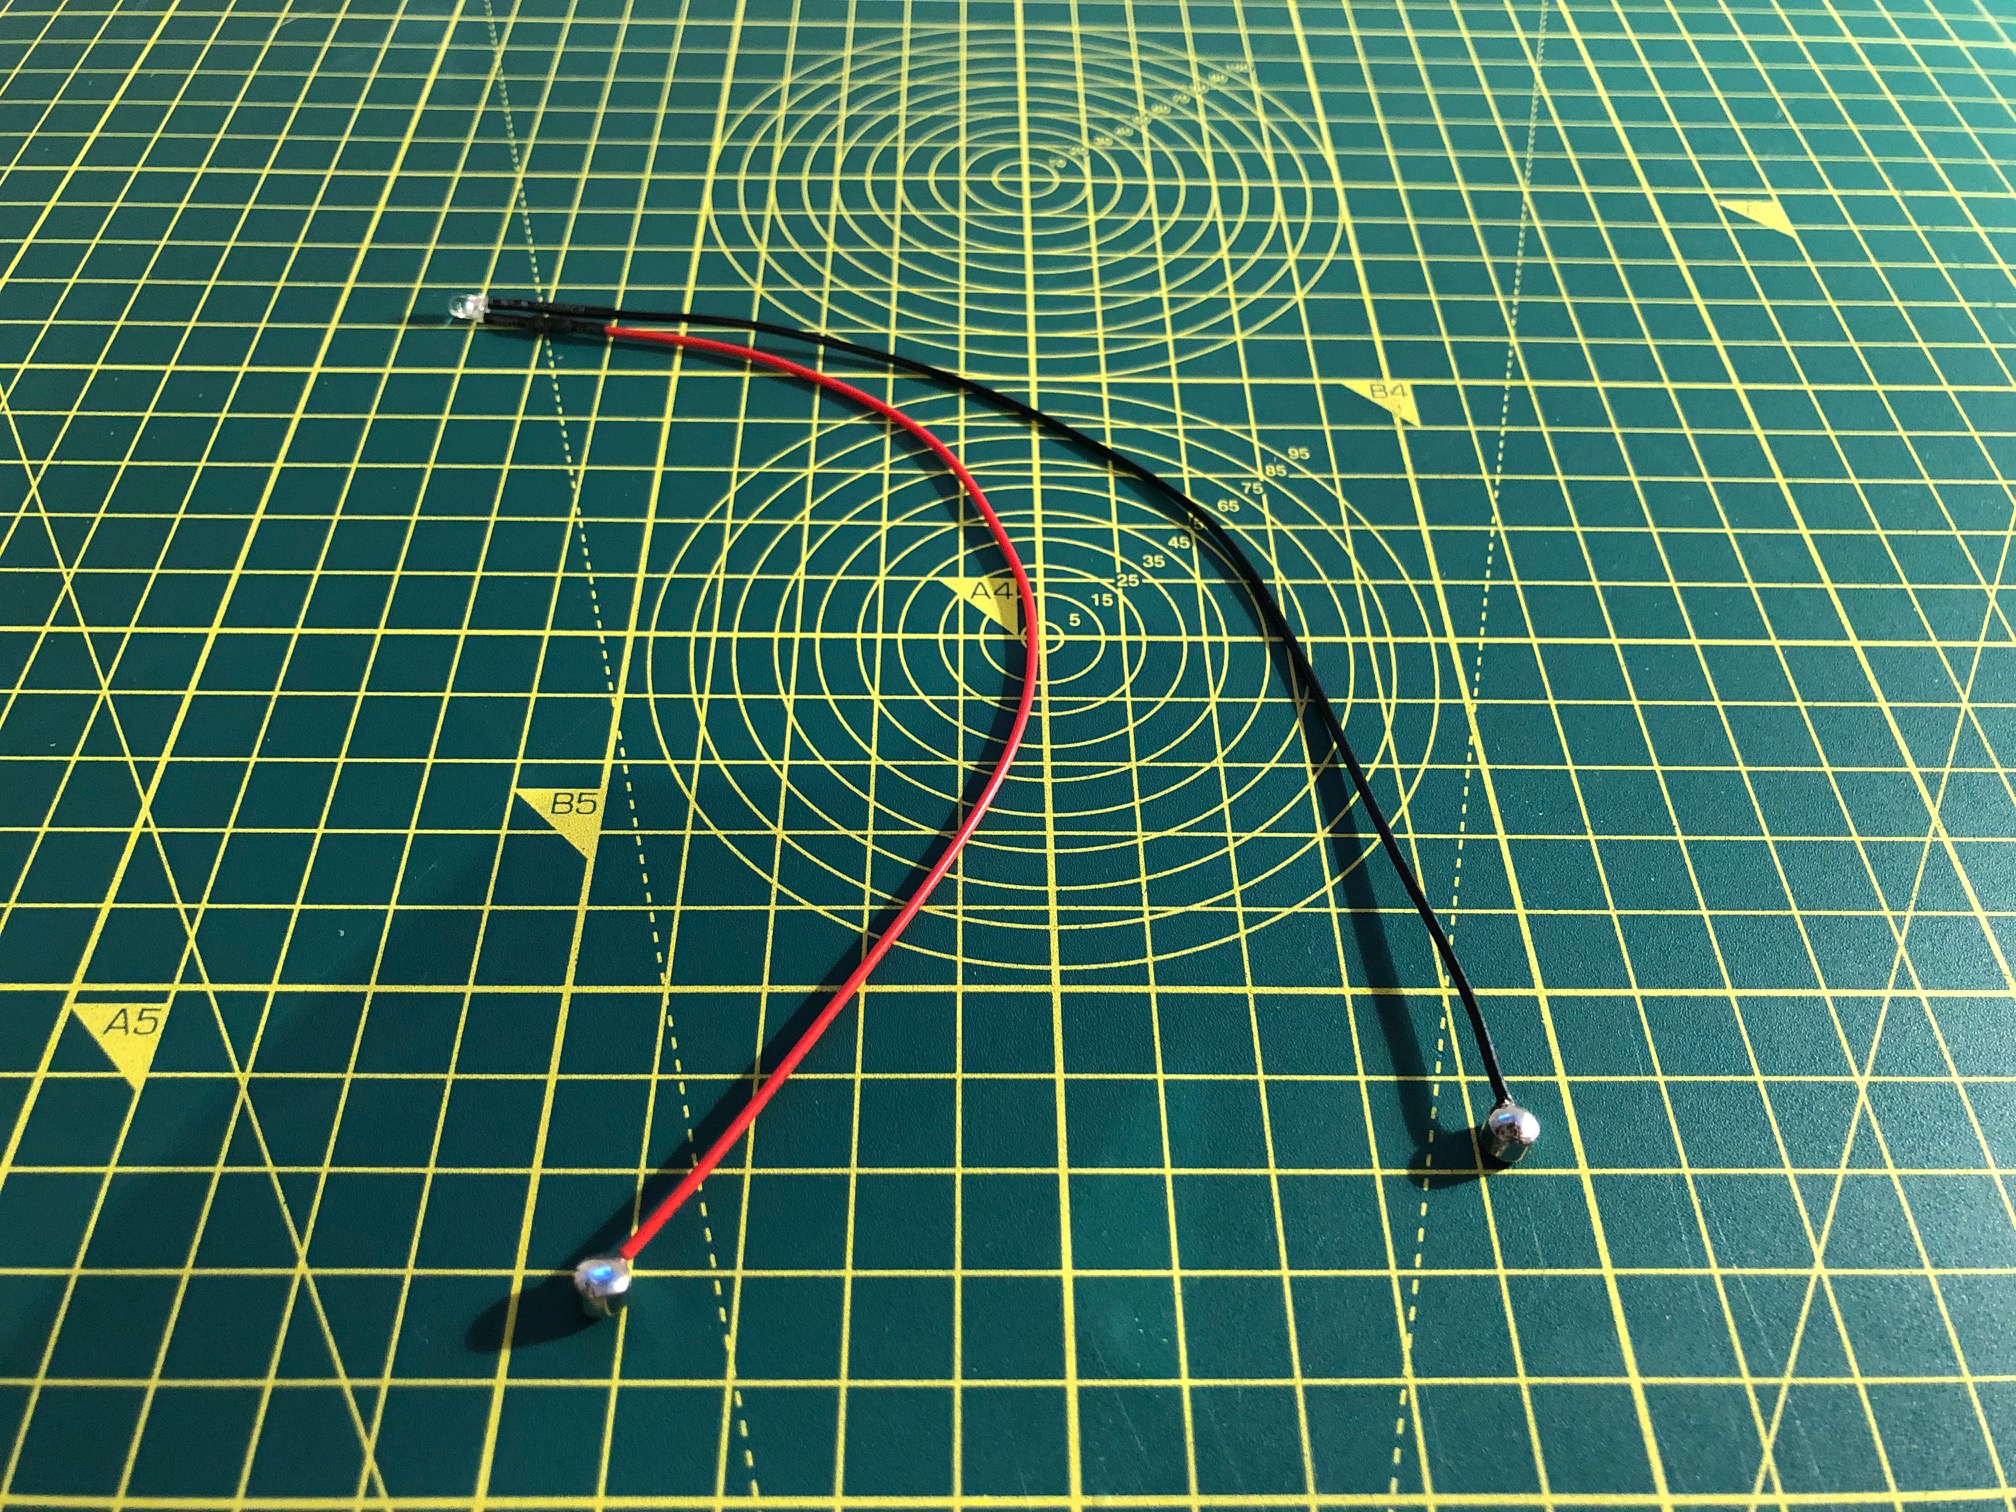
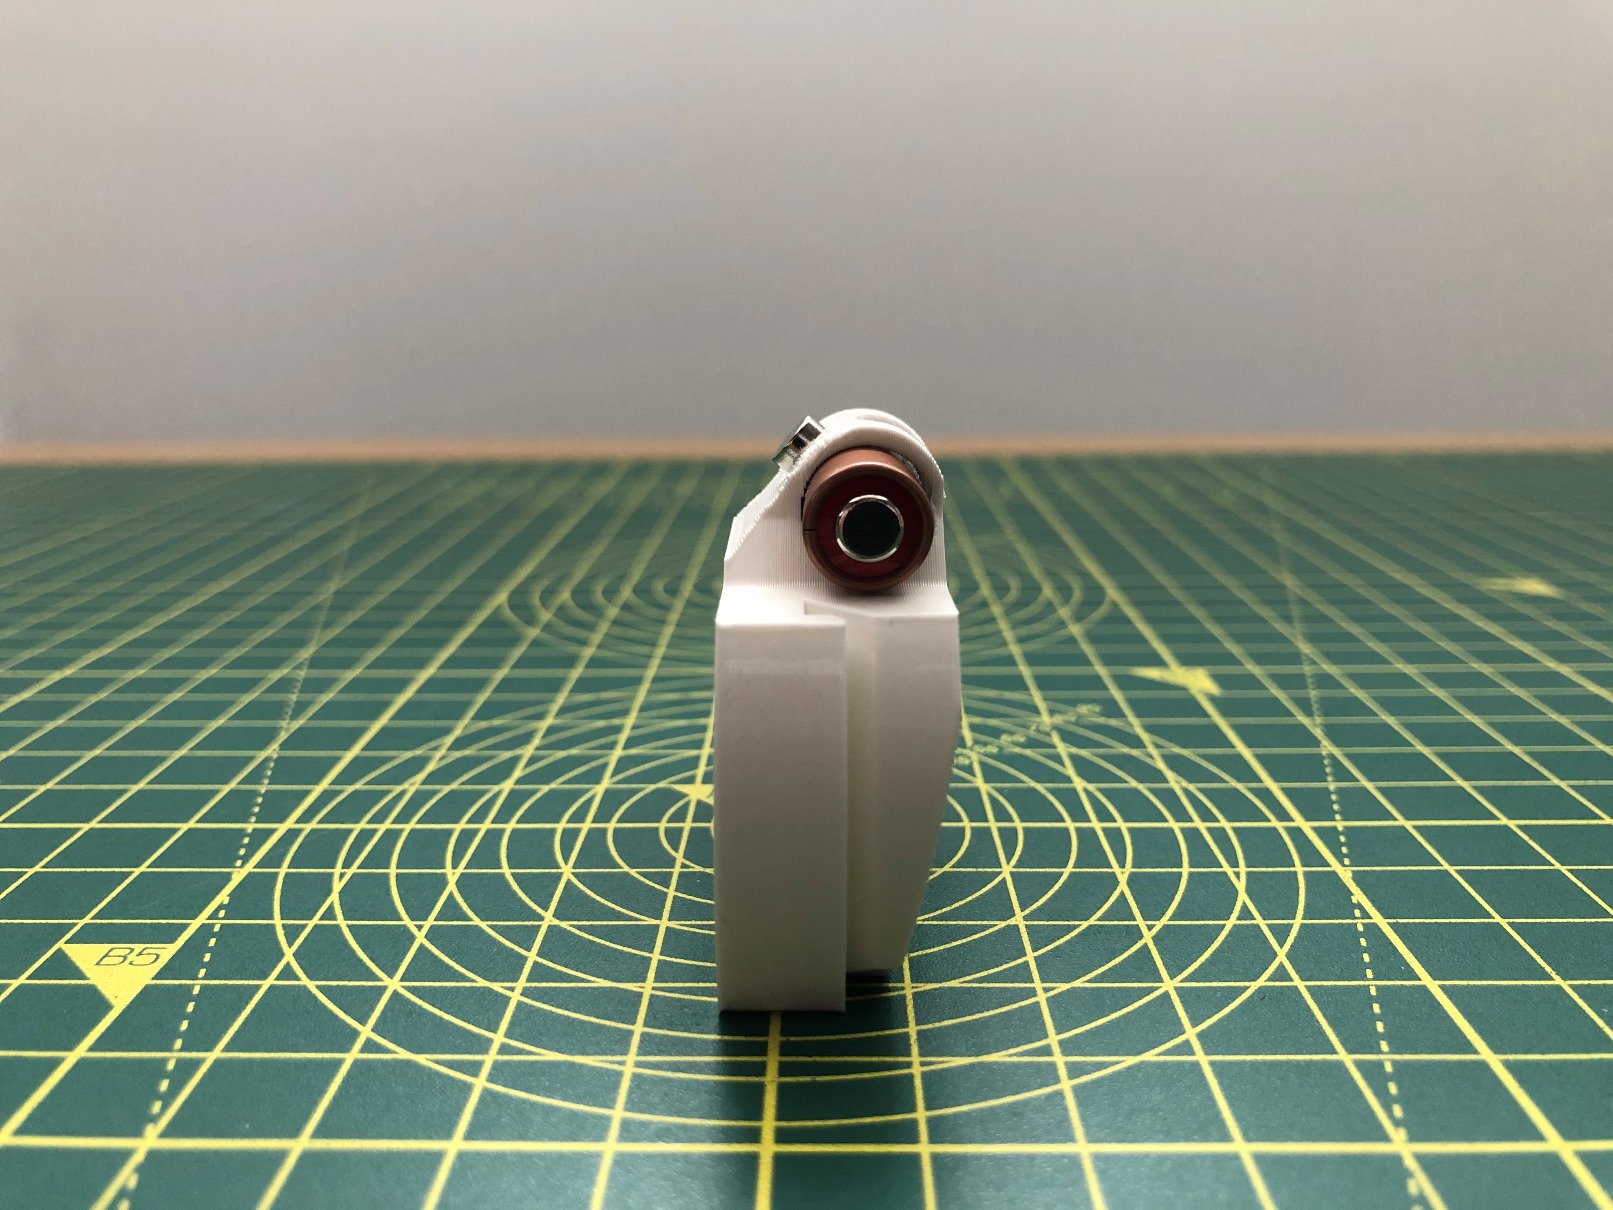
Part required (refer to the photos below):
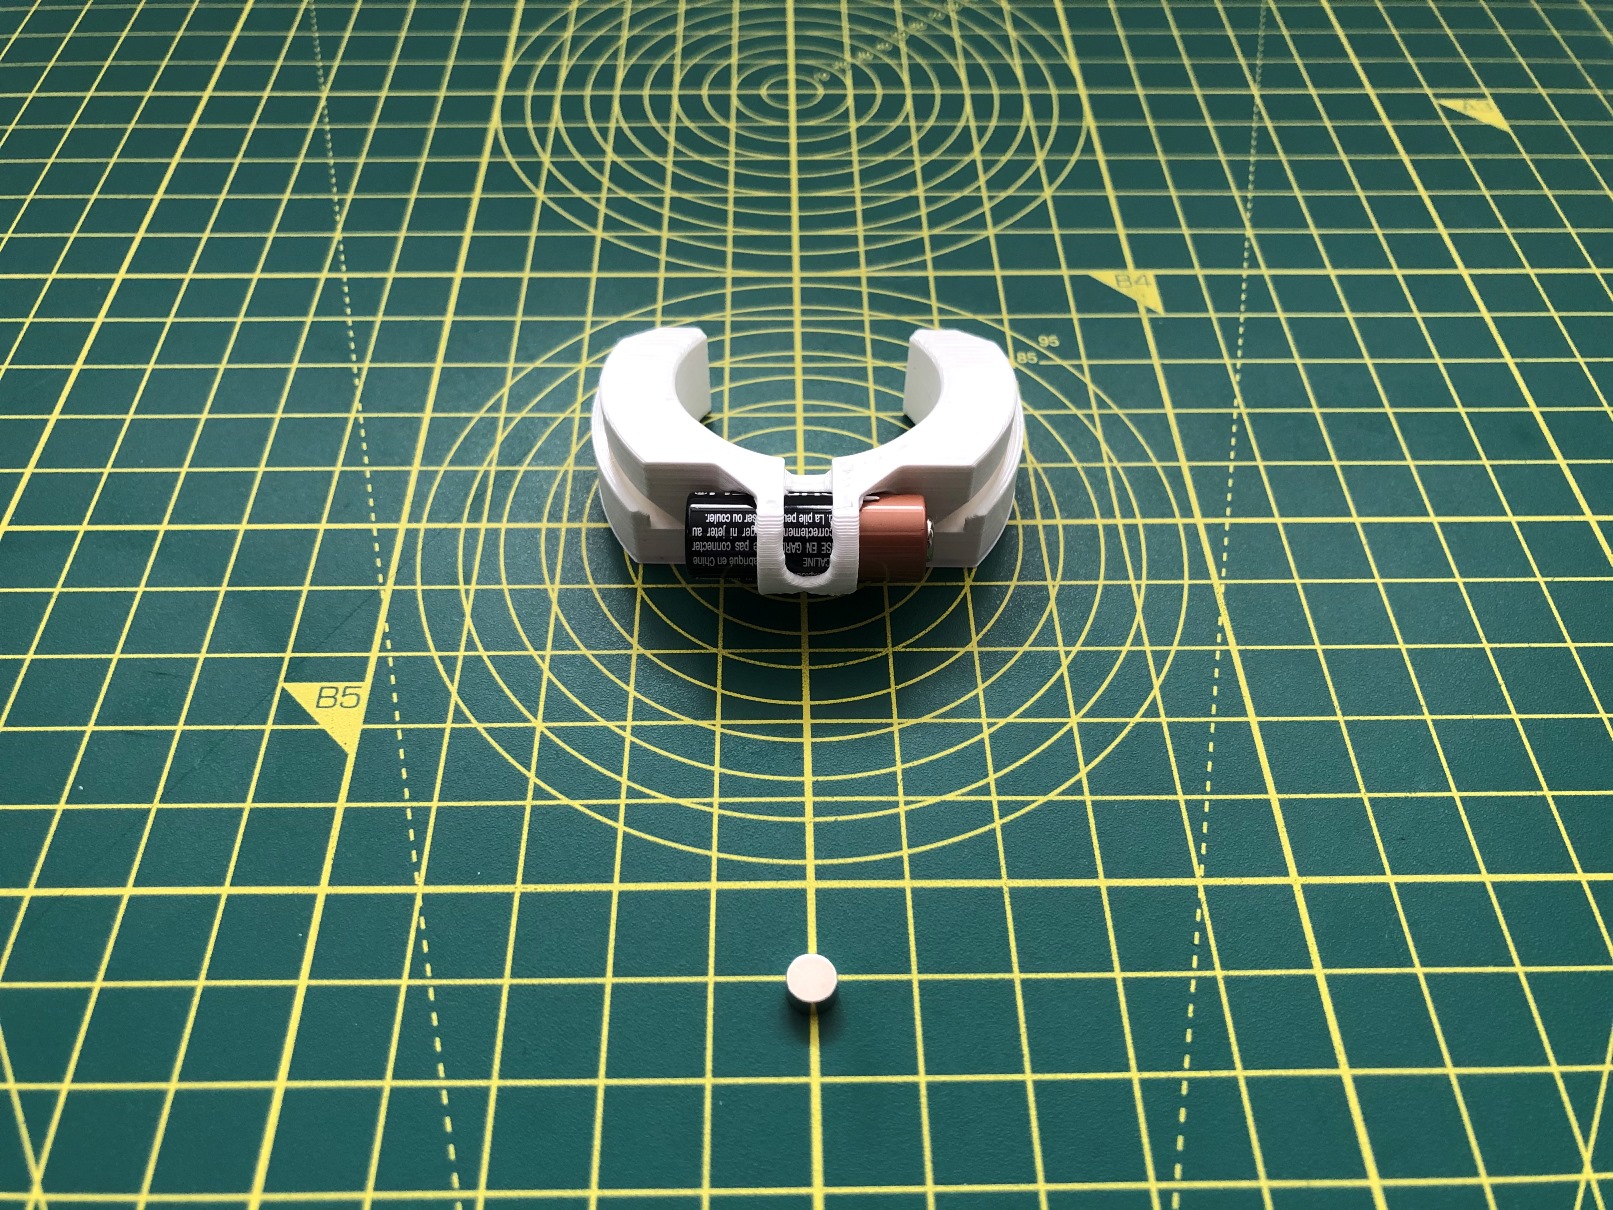
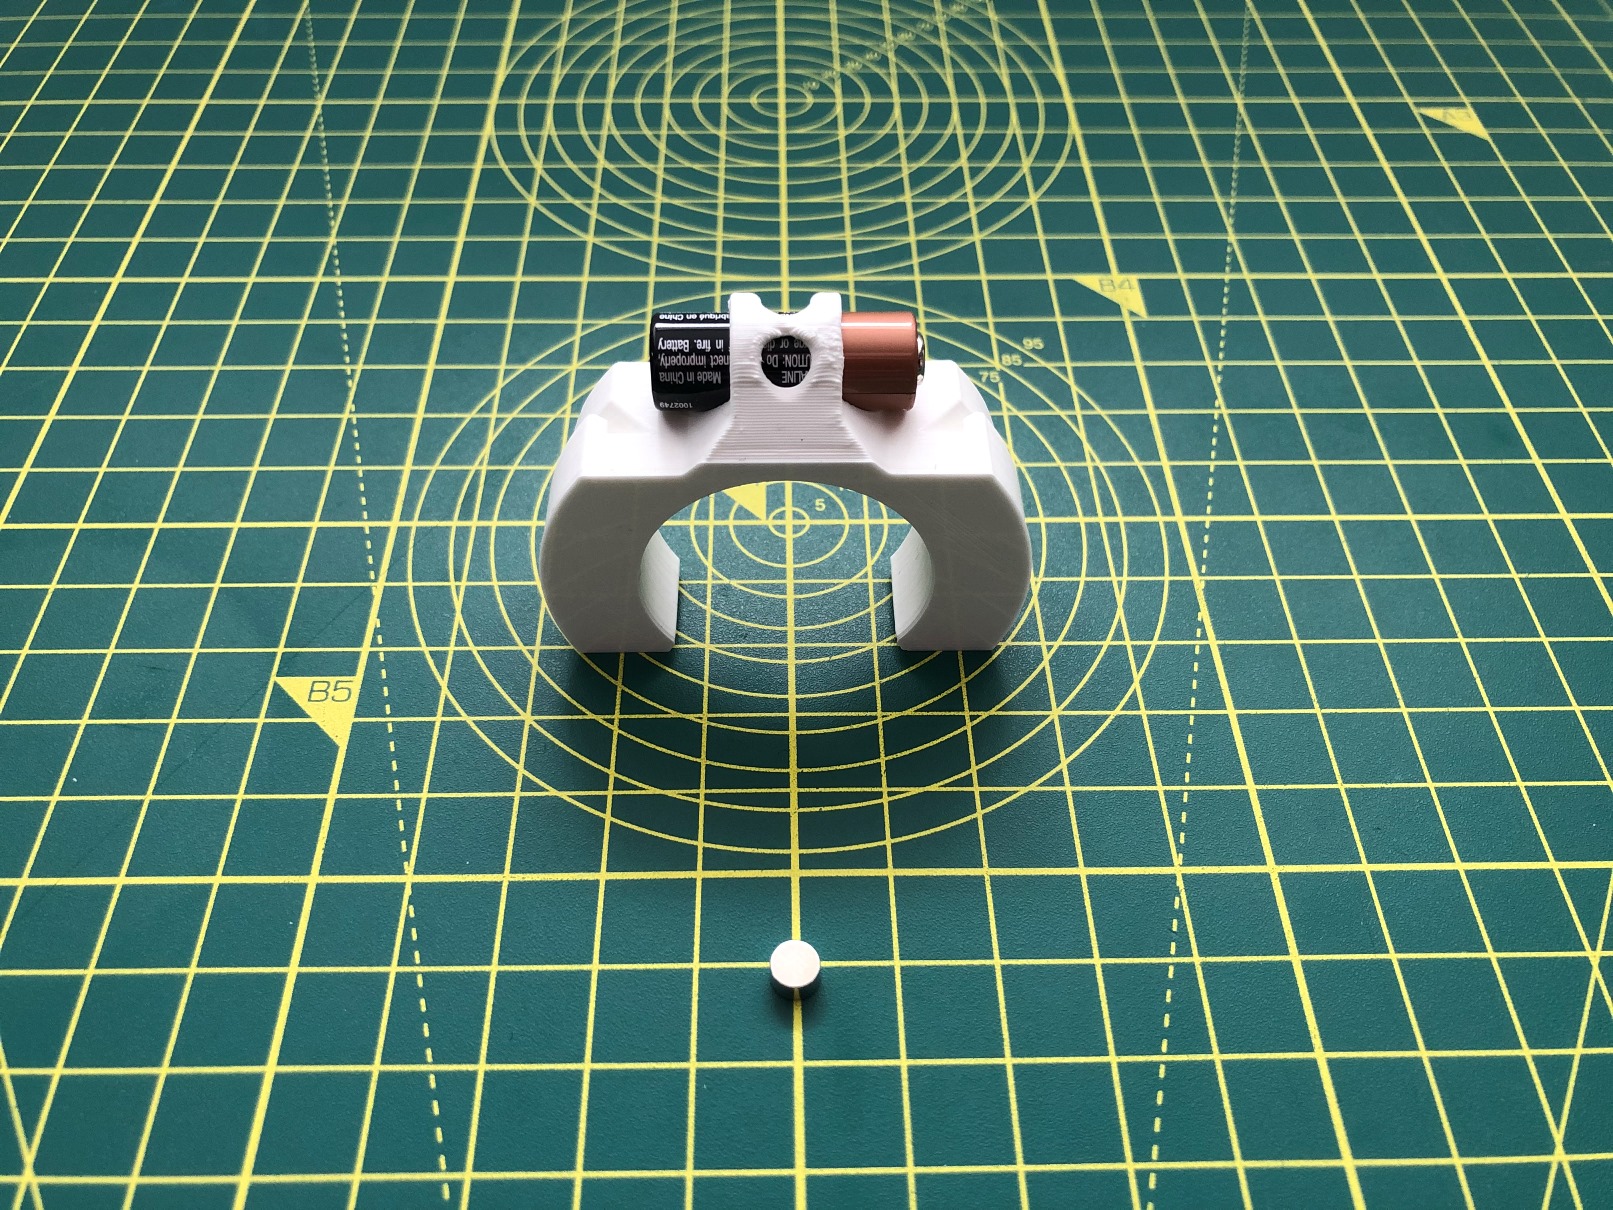
Assembly process:
Part required (refer to the photos below):
Assembly process:
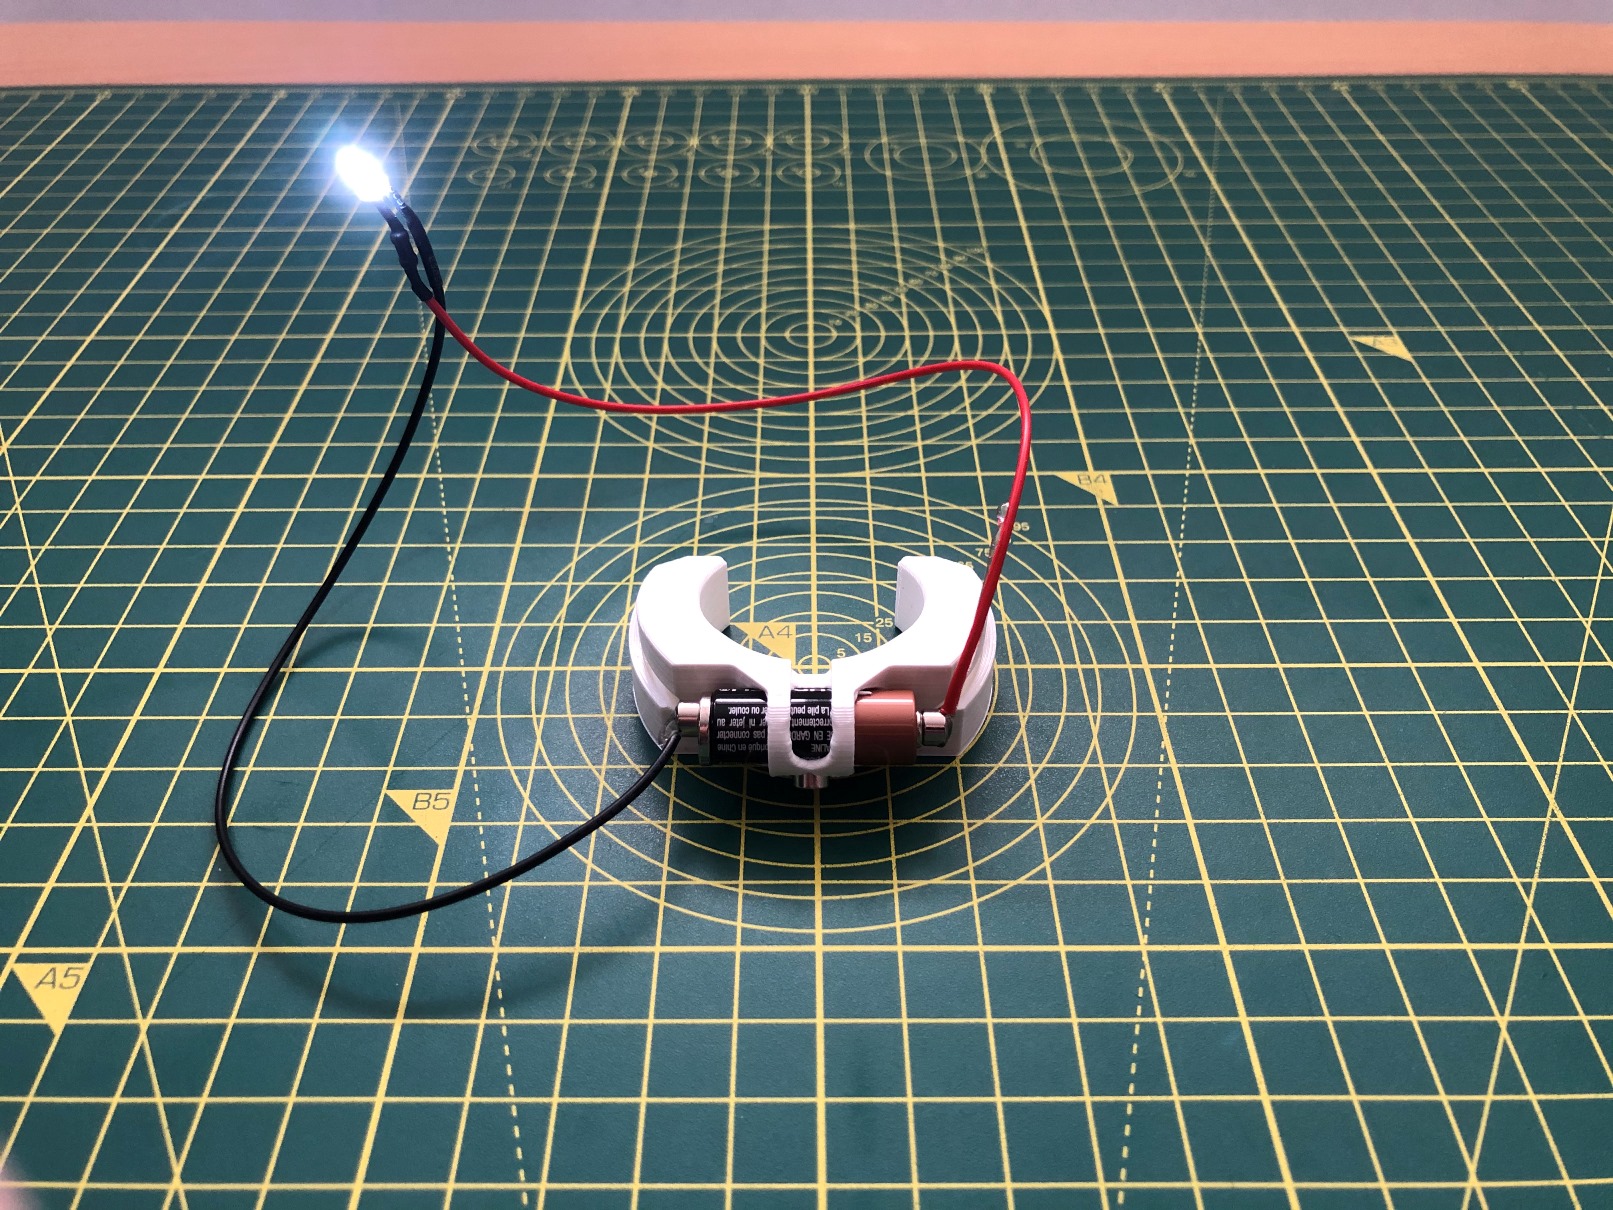
Part required (refer to the photos below):
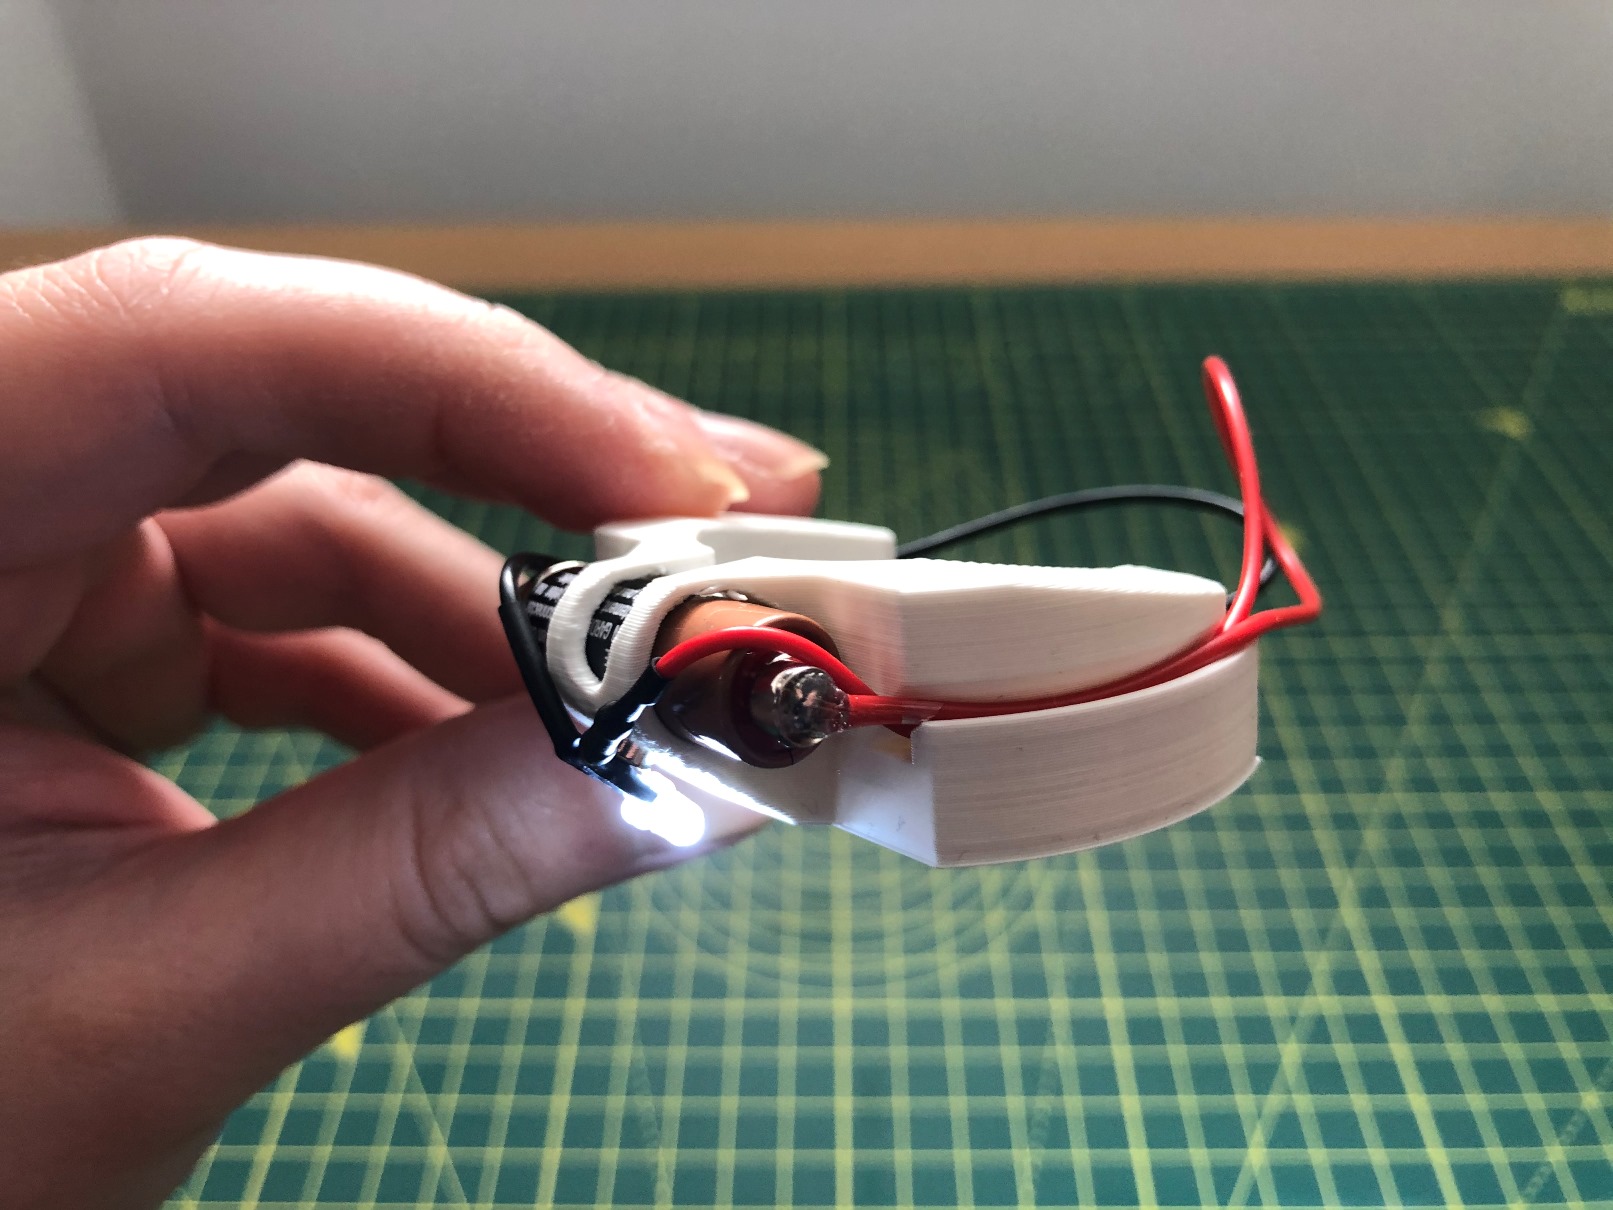
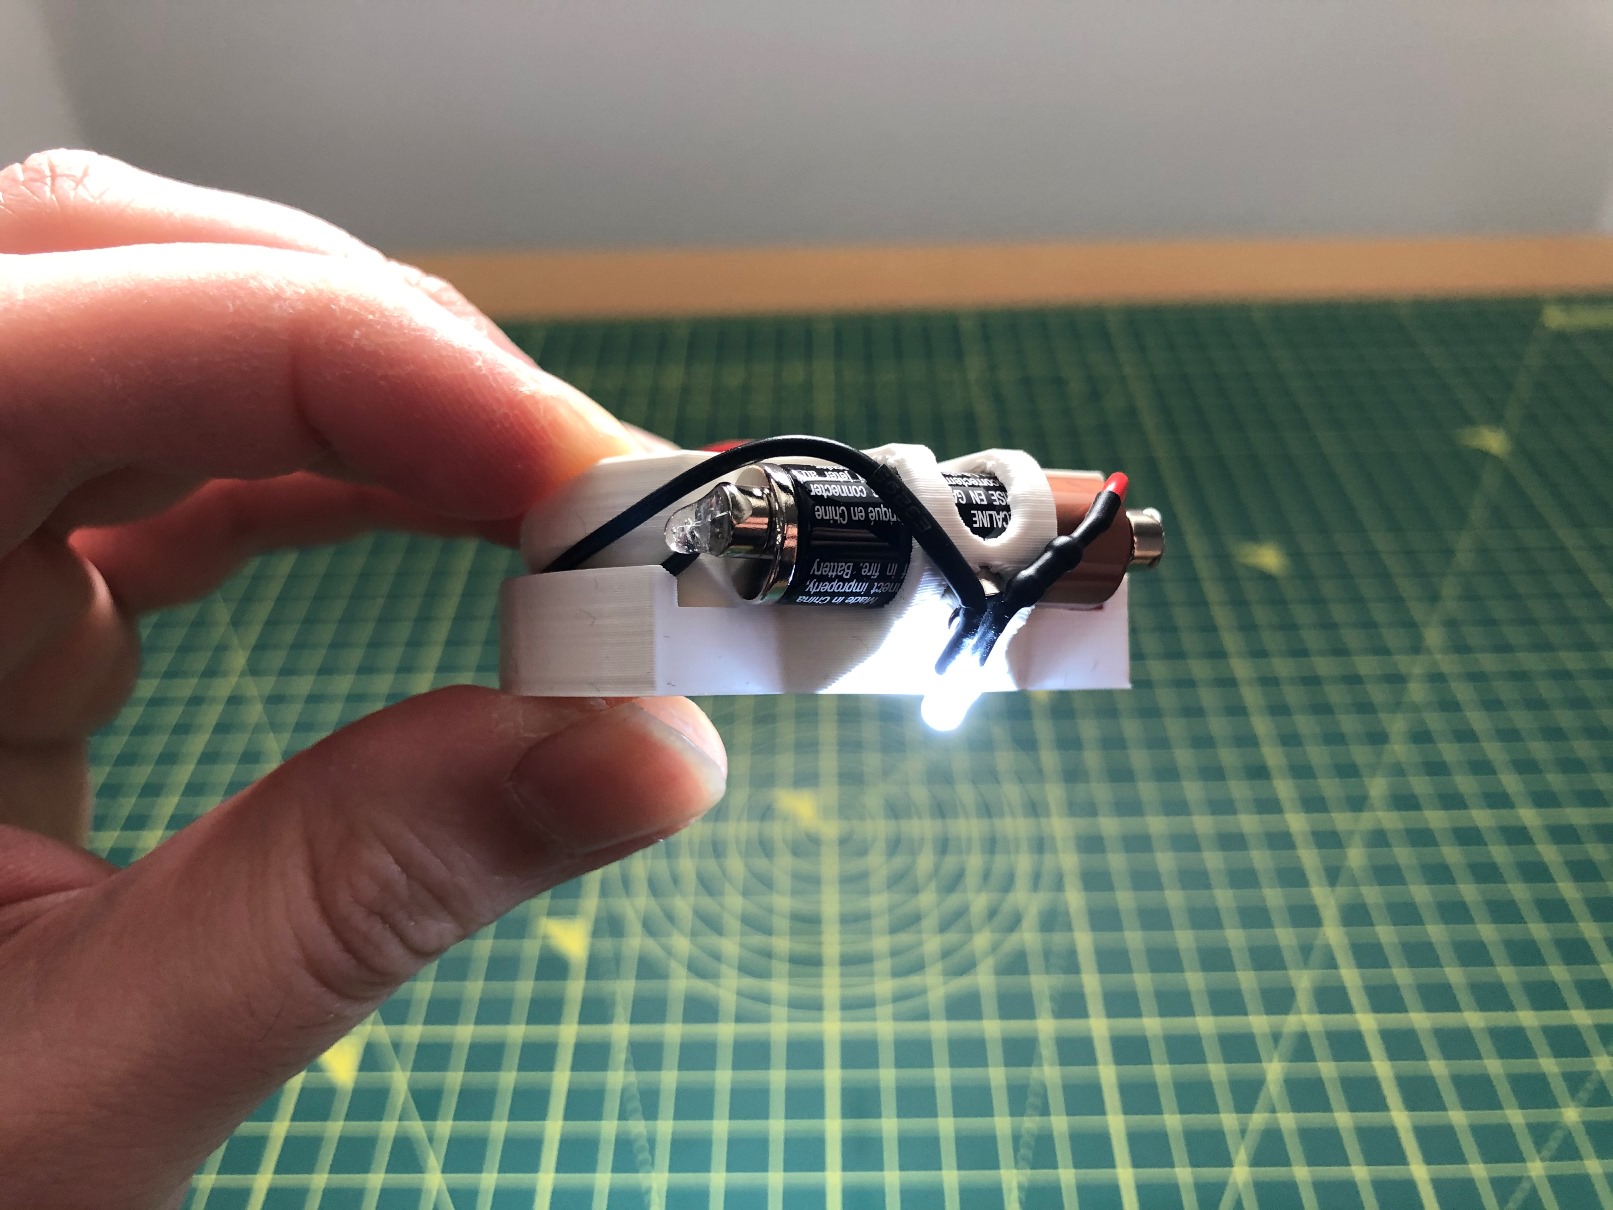
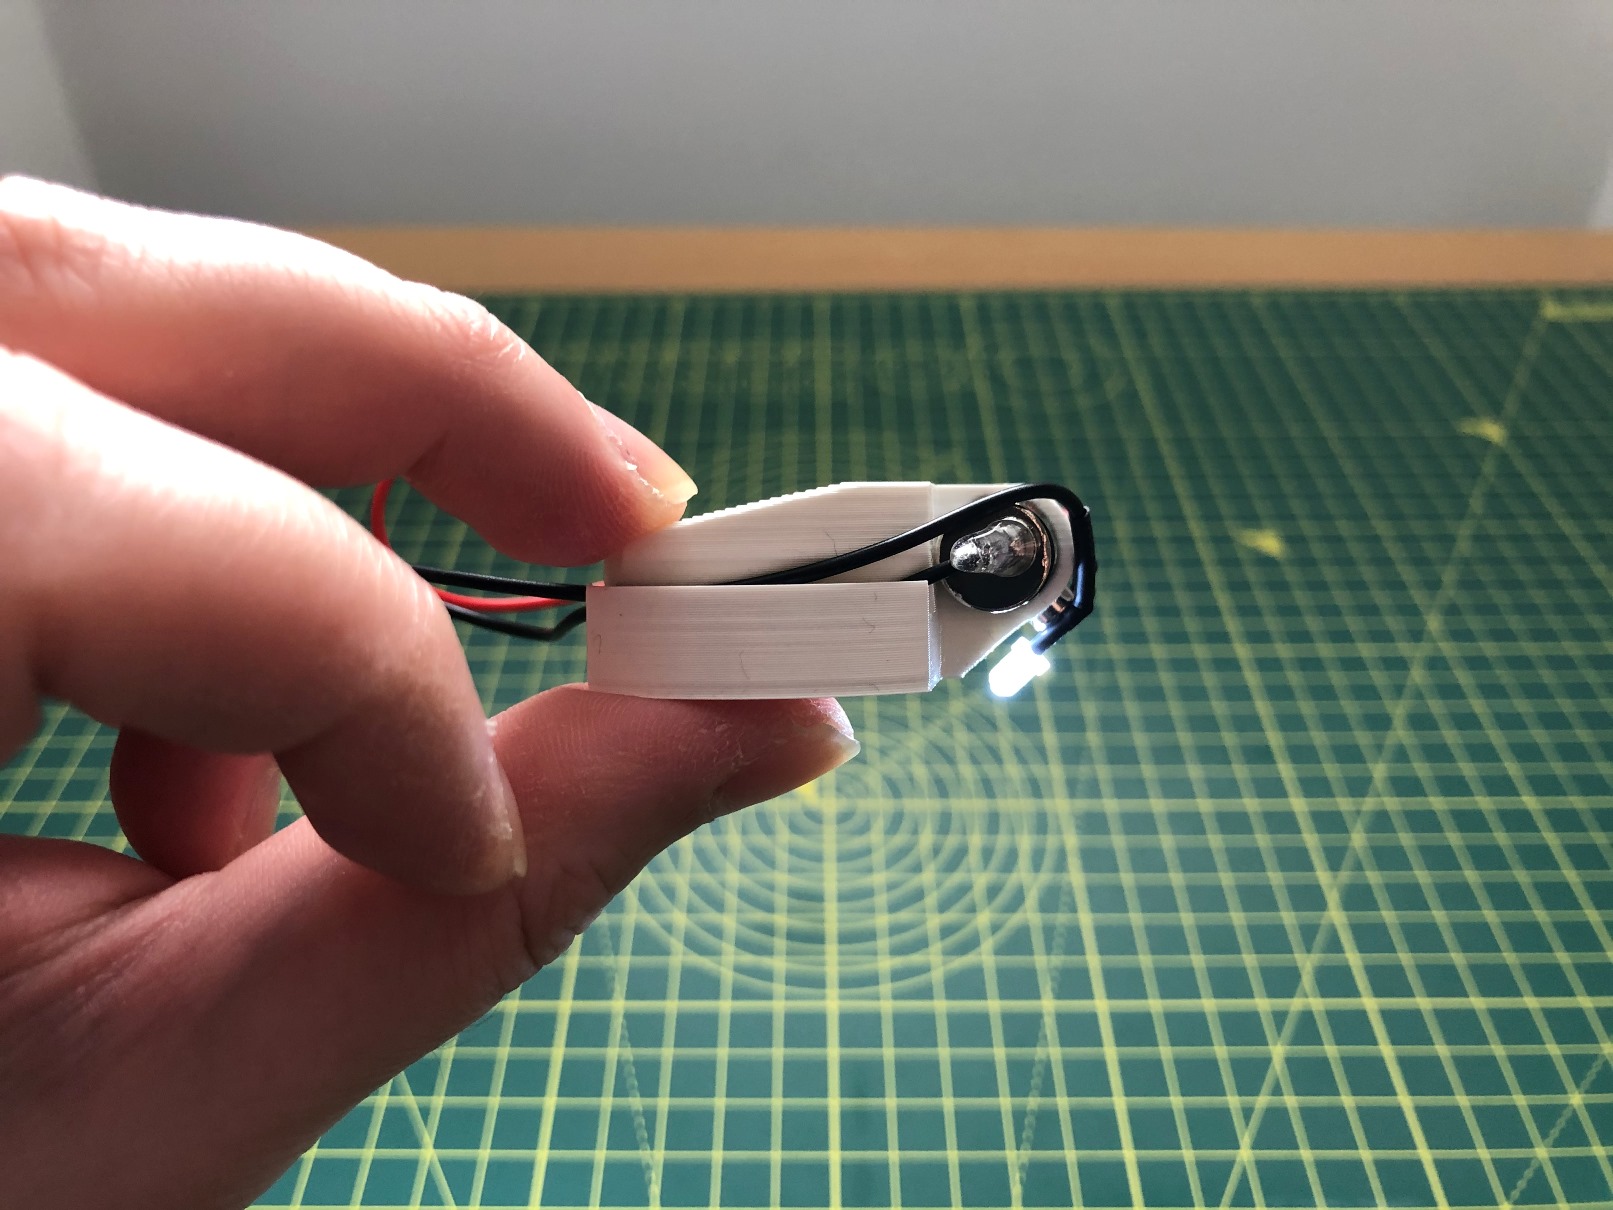
Assembly process:
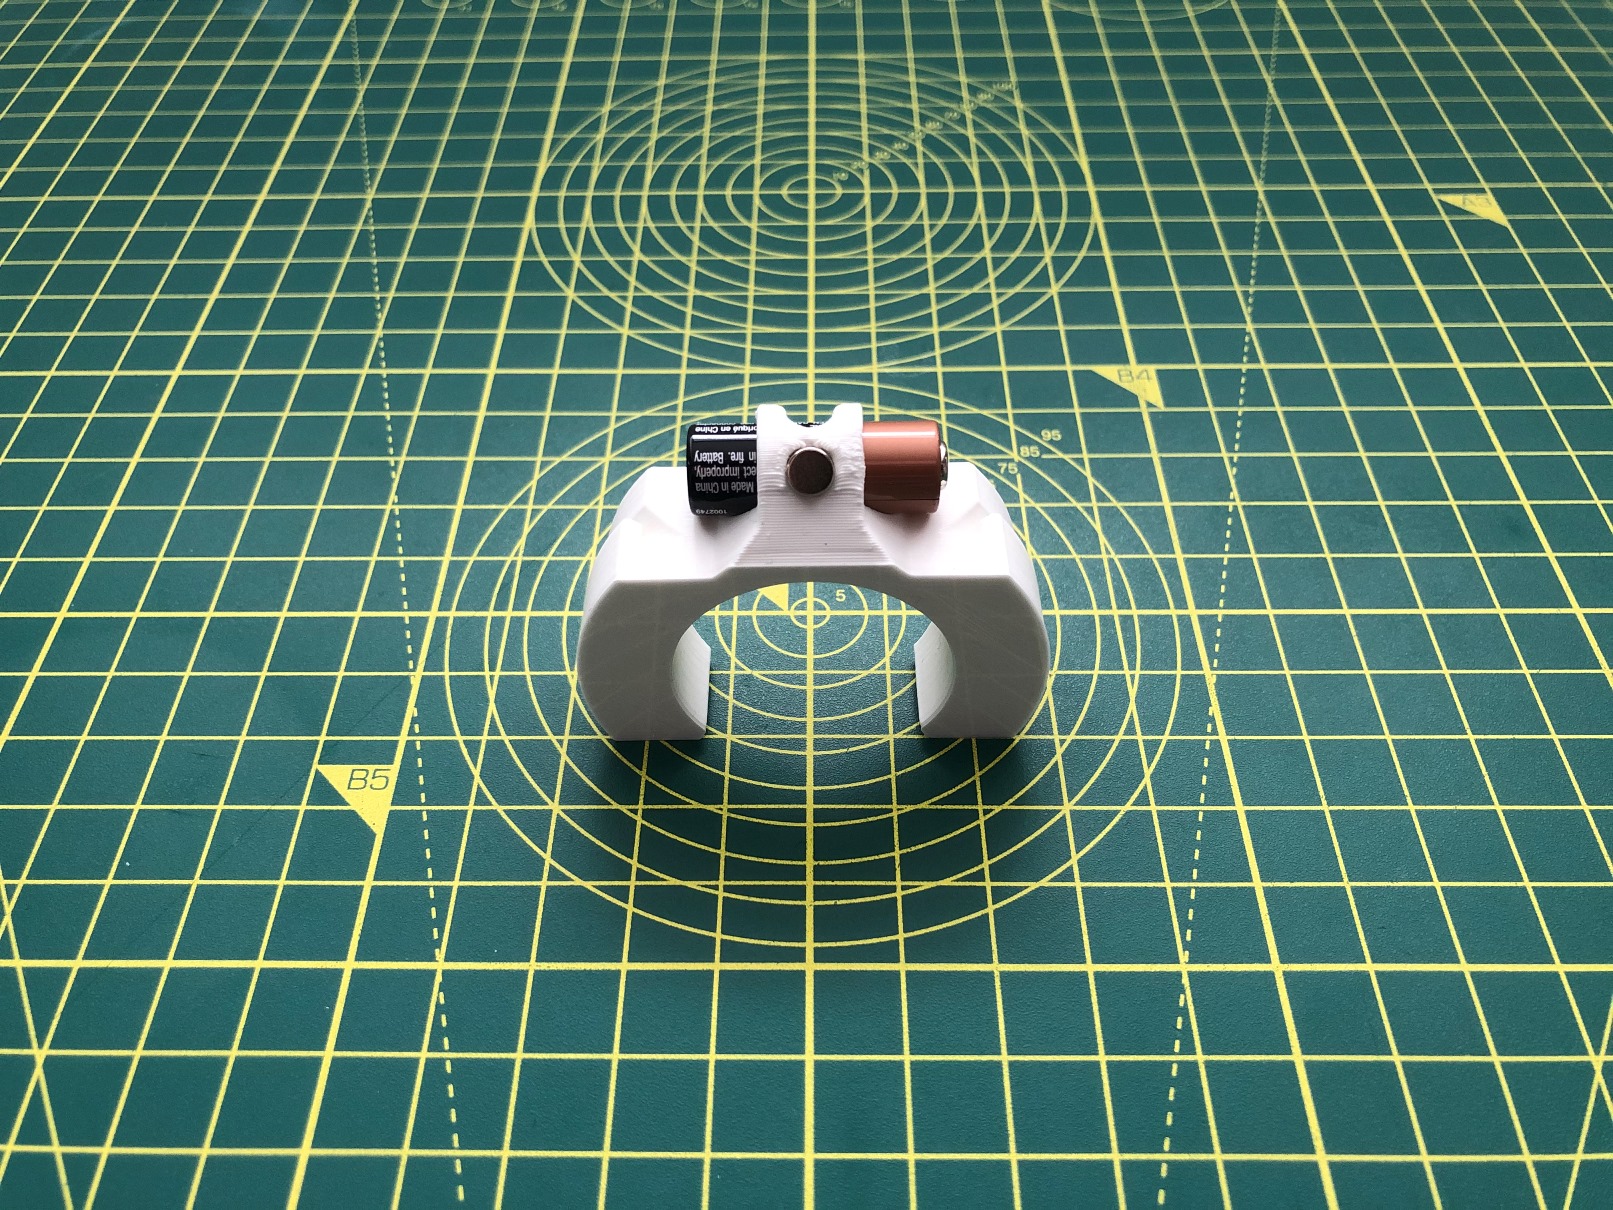
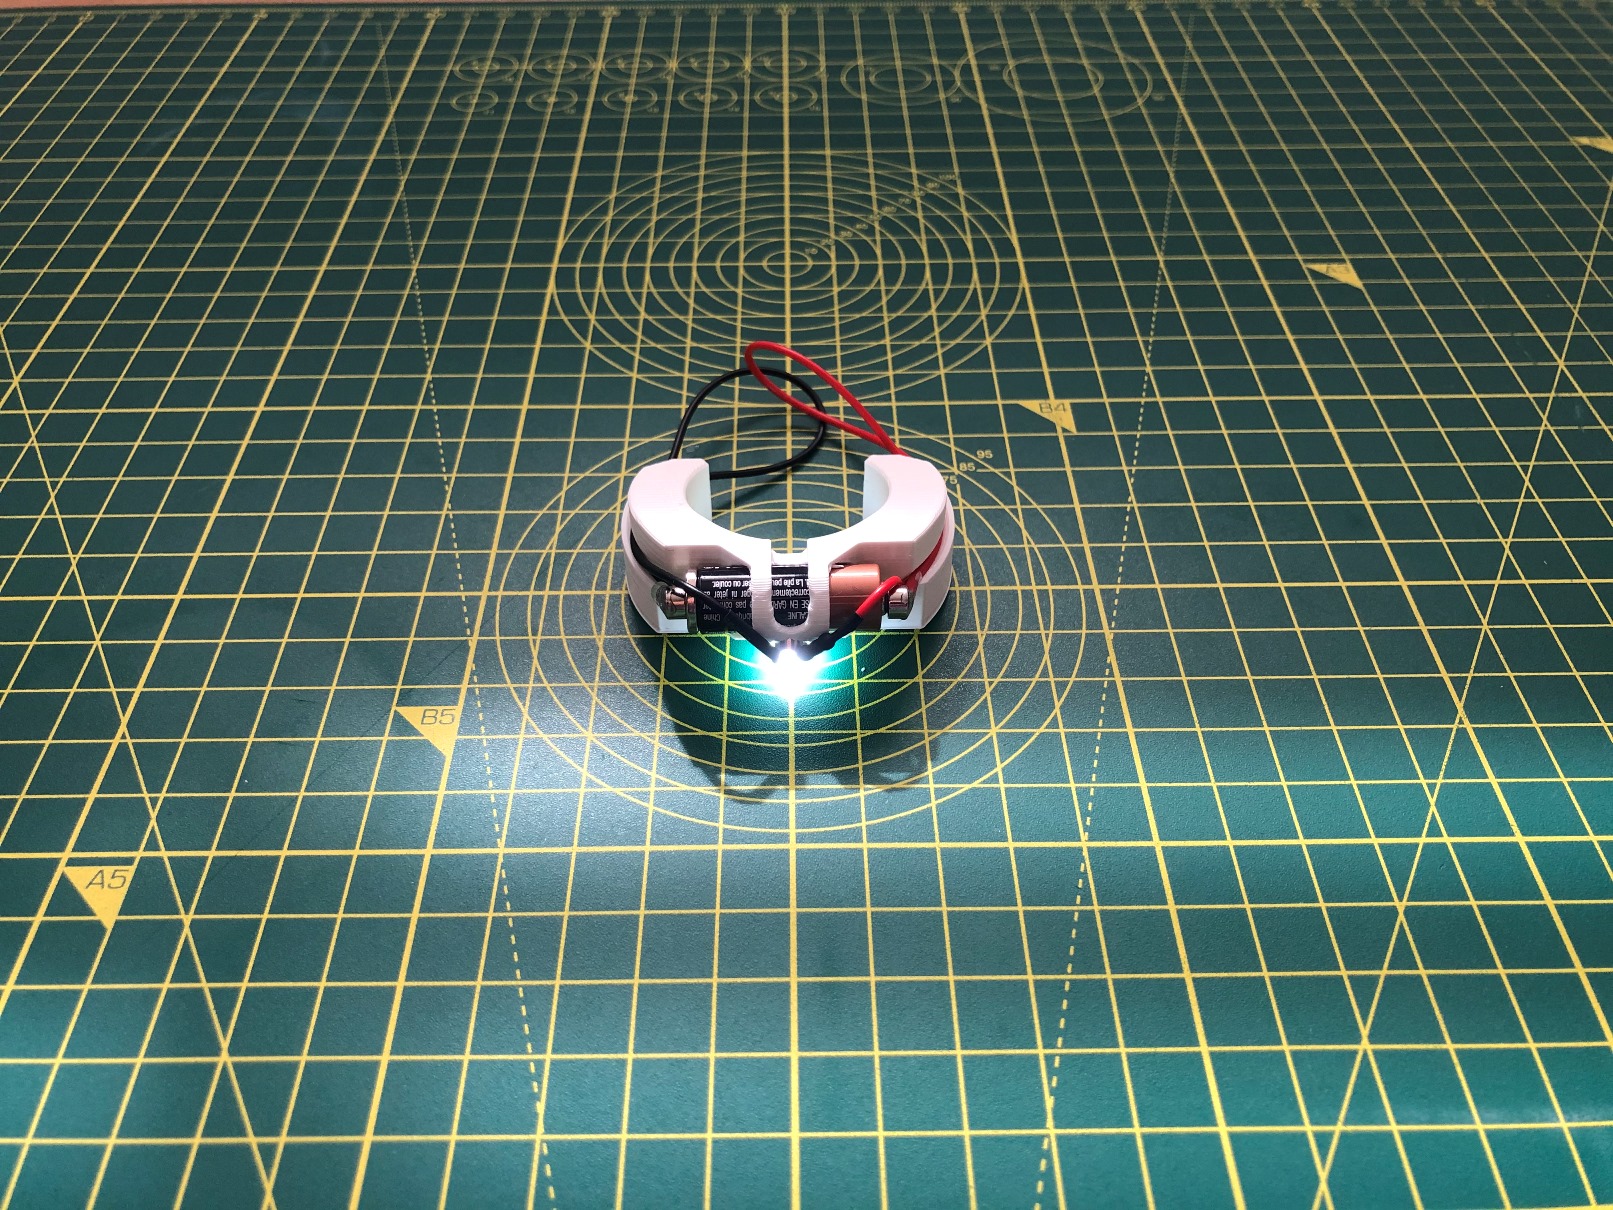
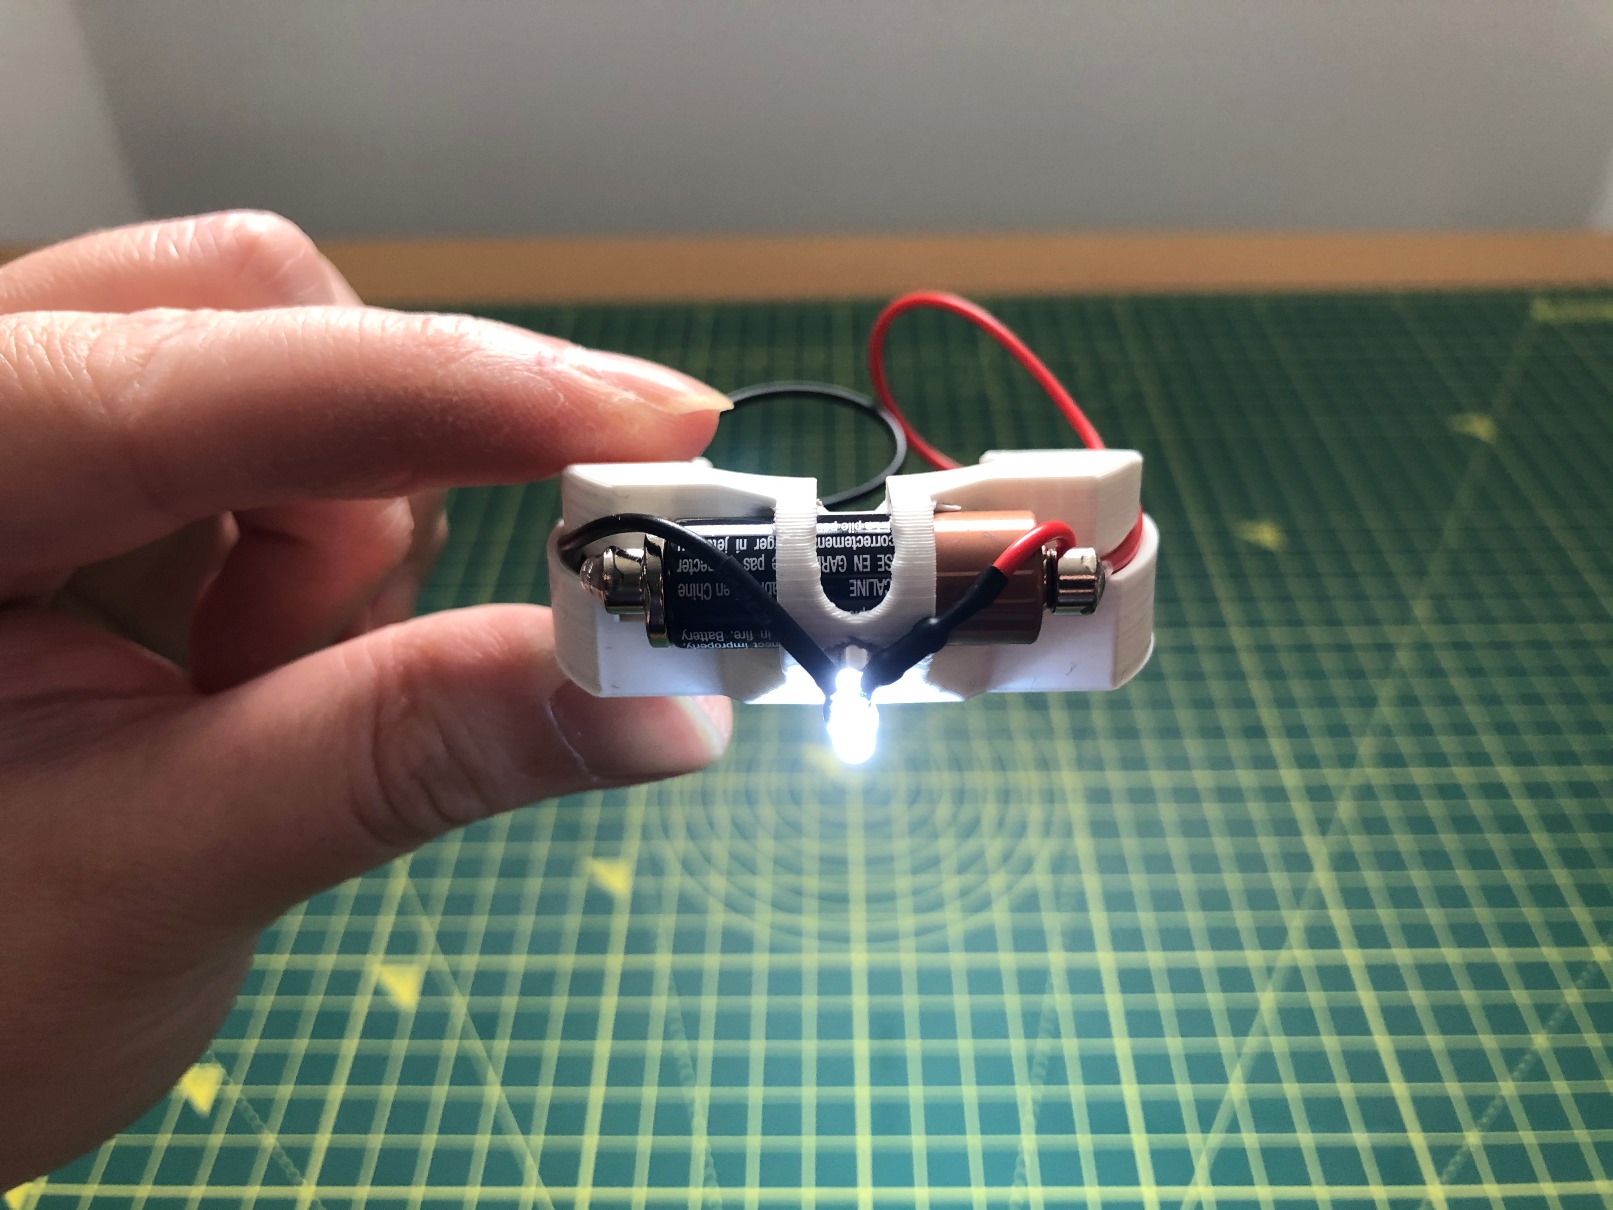
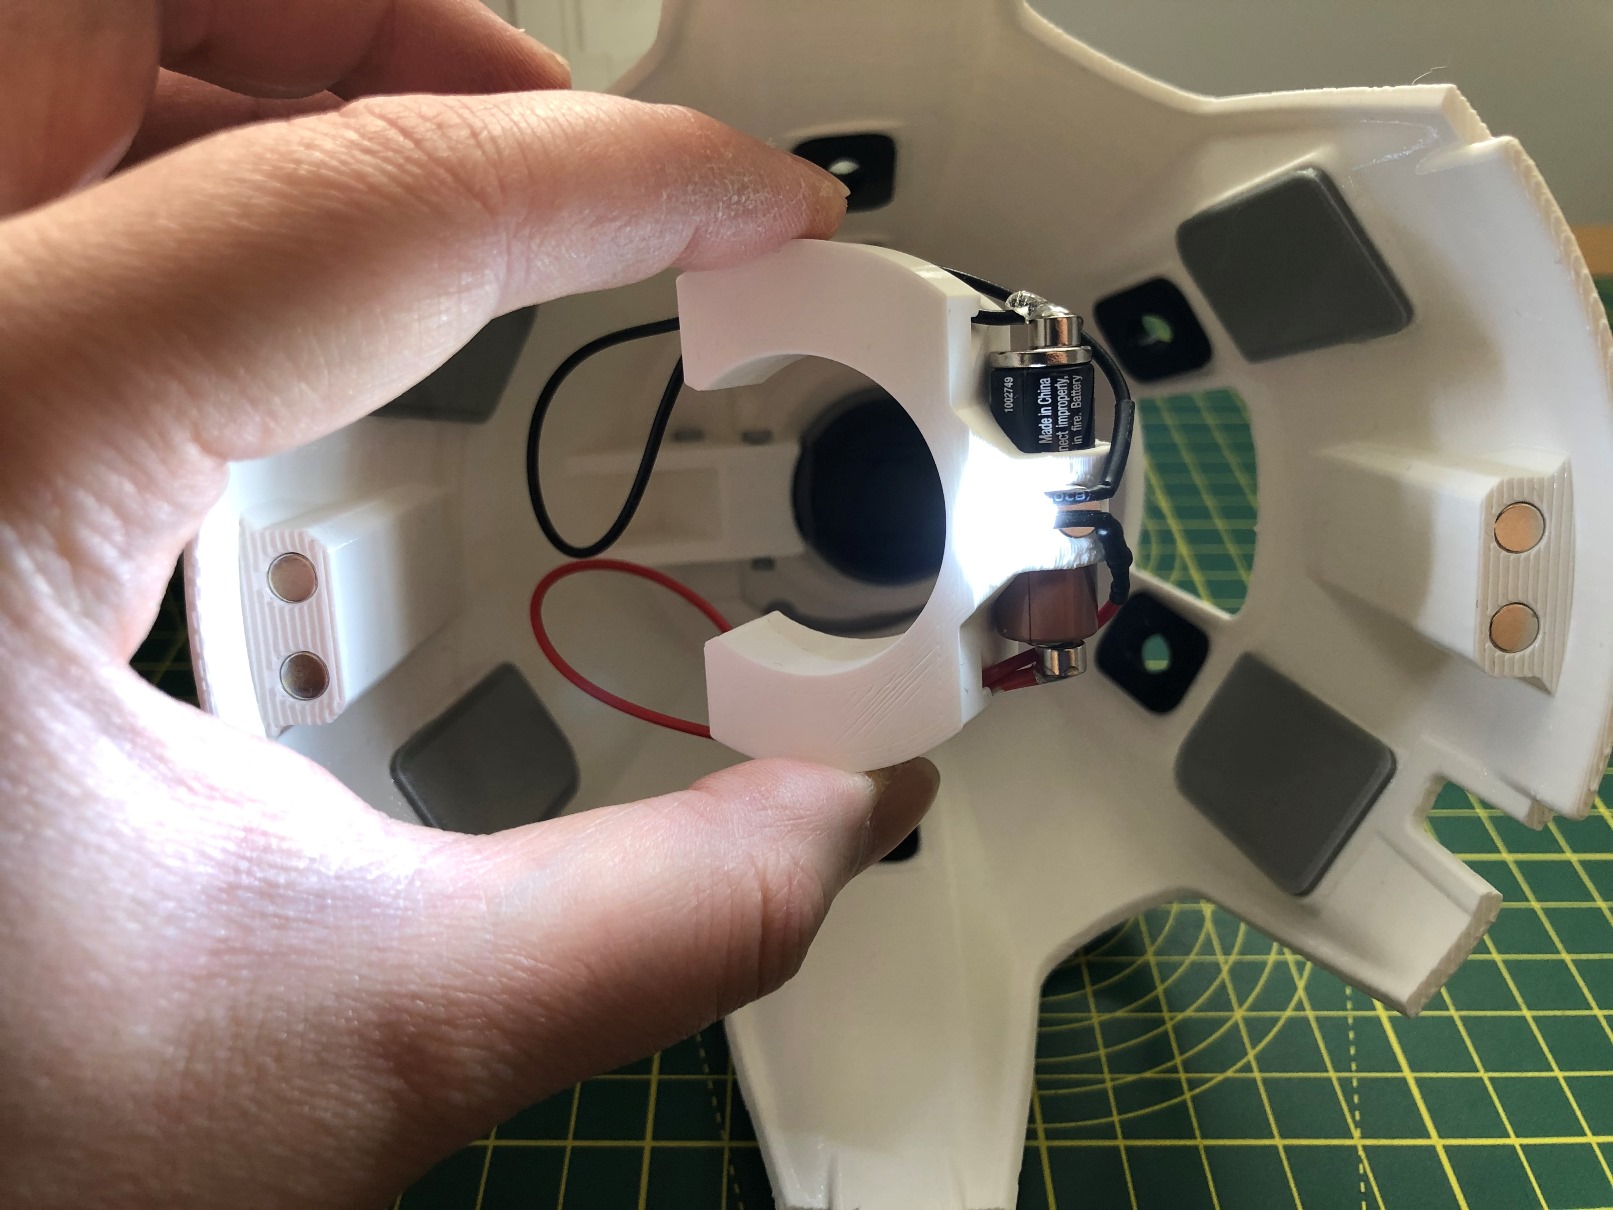
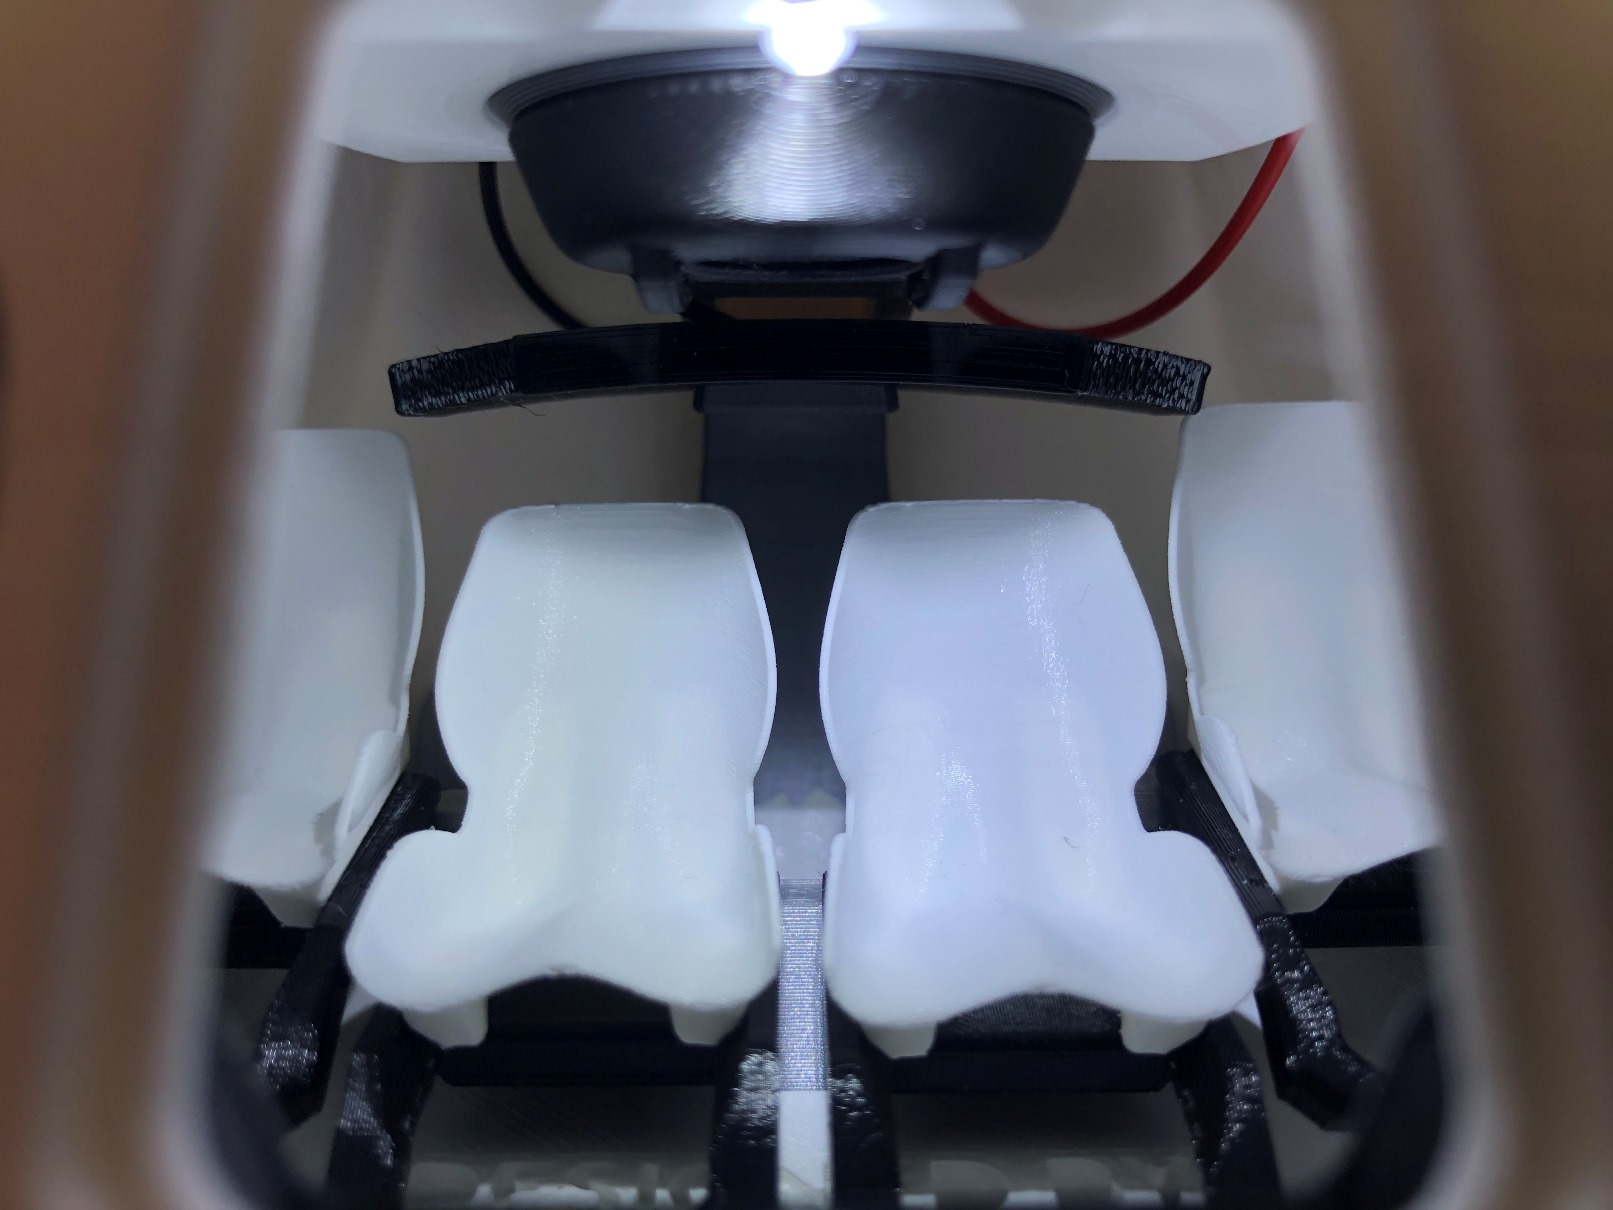
This is the fully assembled Interior Lighting Module!
Part required (refer to the photos below):
Assembly process:
Note: You won’t be able to rotate the interior lighting unit once it’s correctly installed. (Ensure that you get the orientation correct – the flat face of the 3D printed bracket is facing down and the sloped face is facing up)
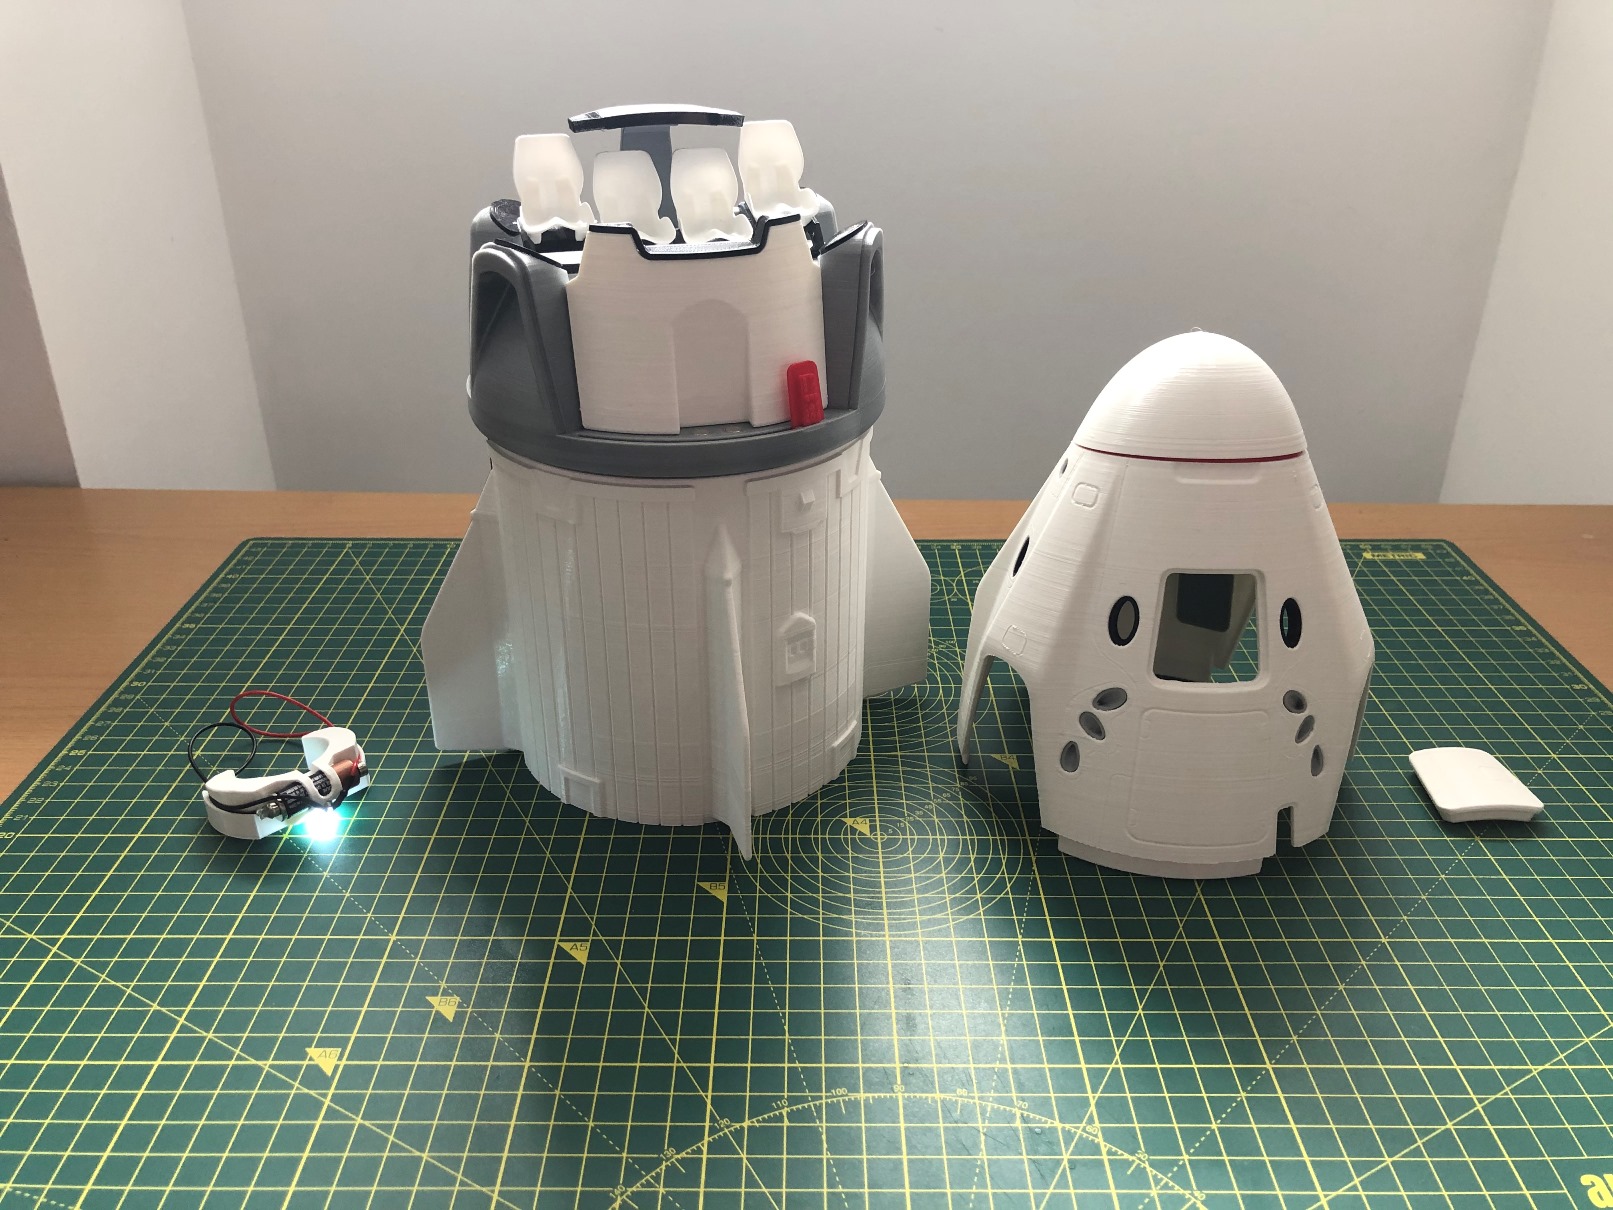
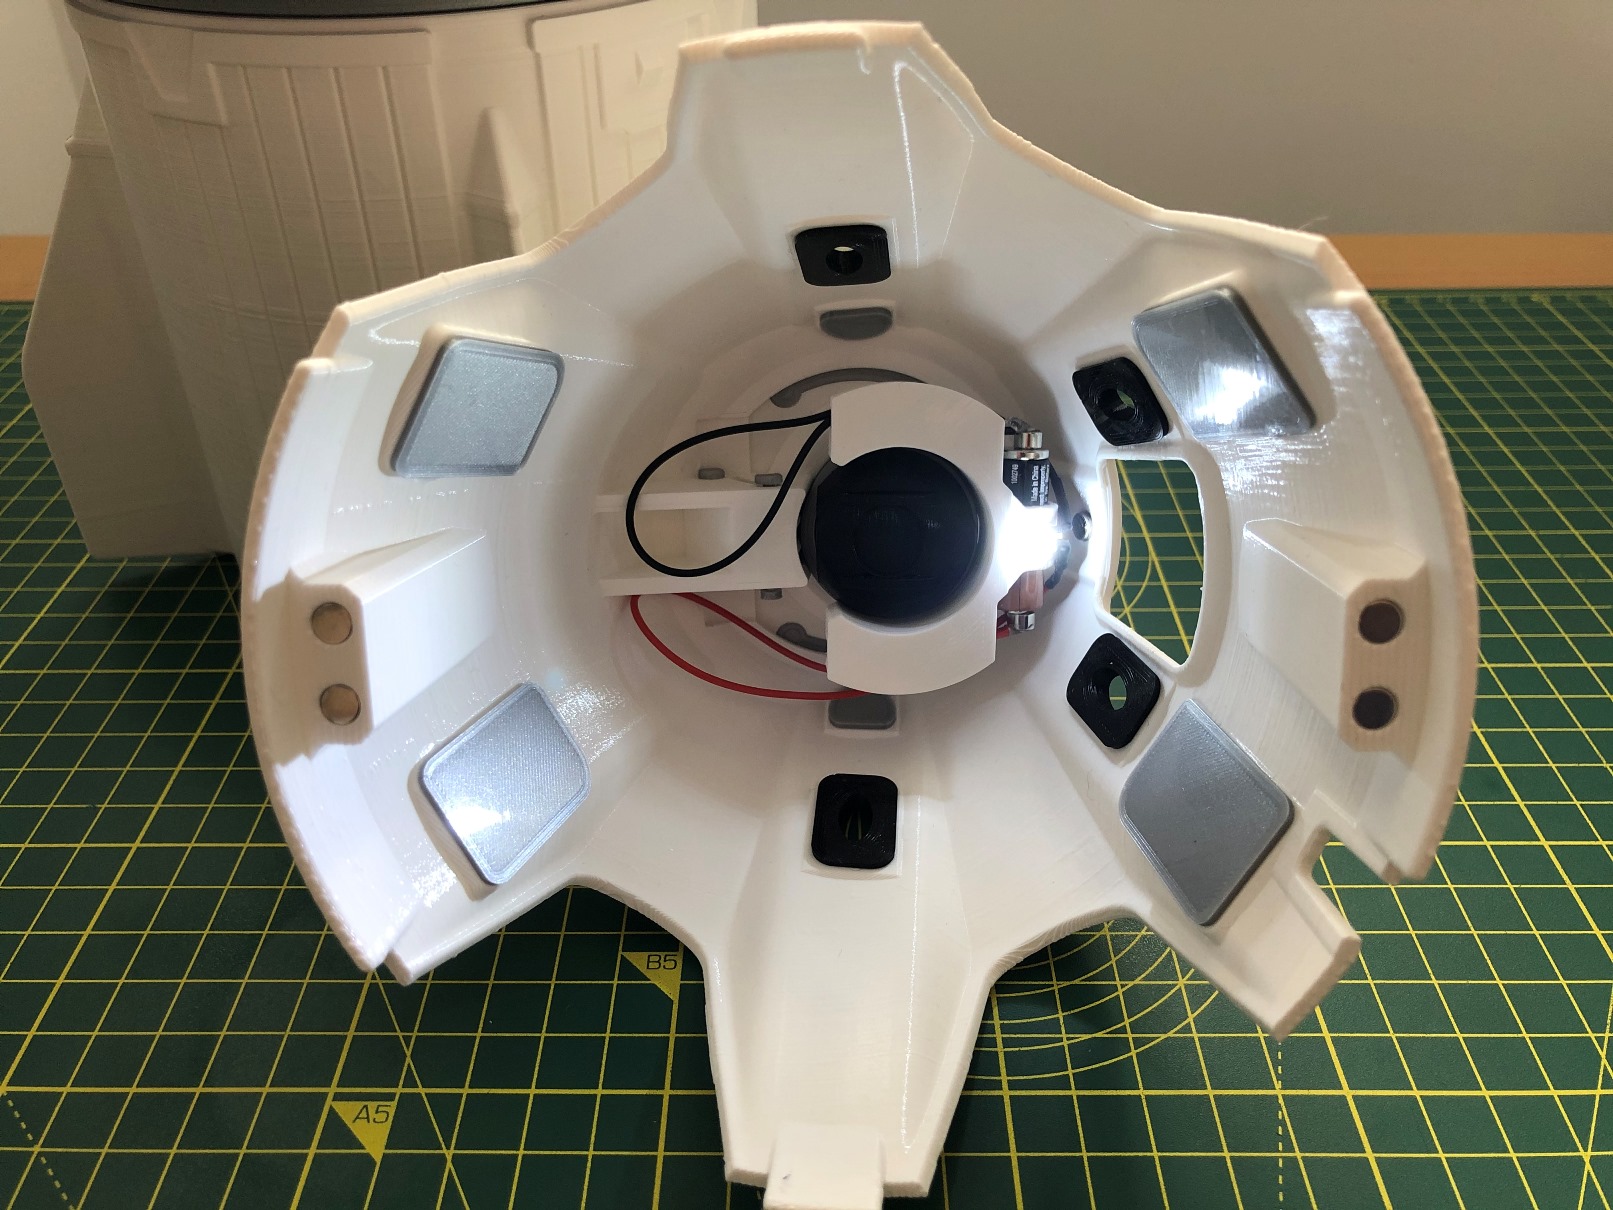
Re-install the Body Panel to the DRAGON-MS.
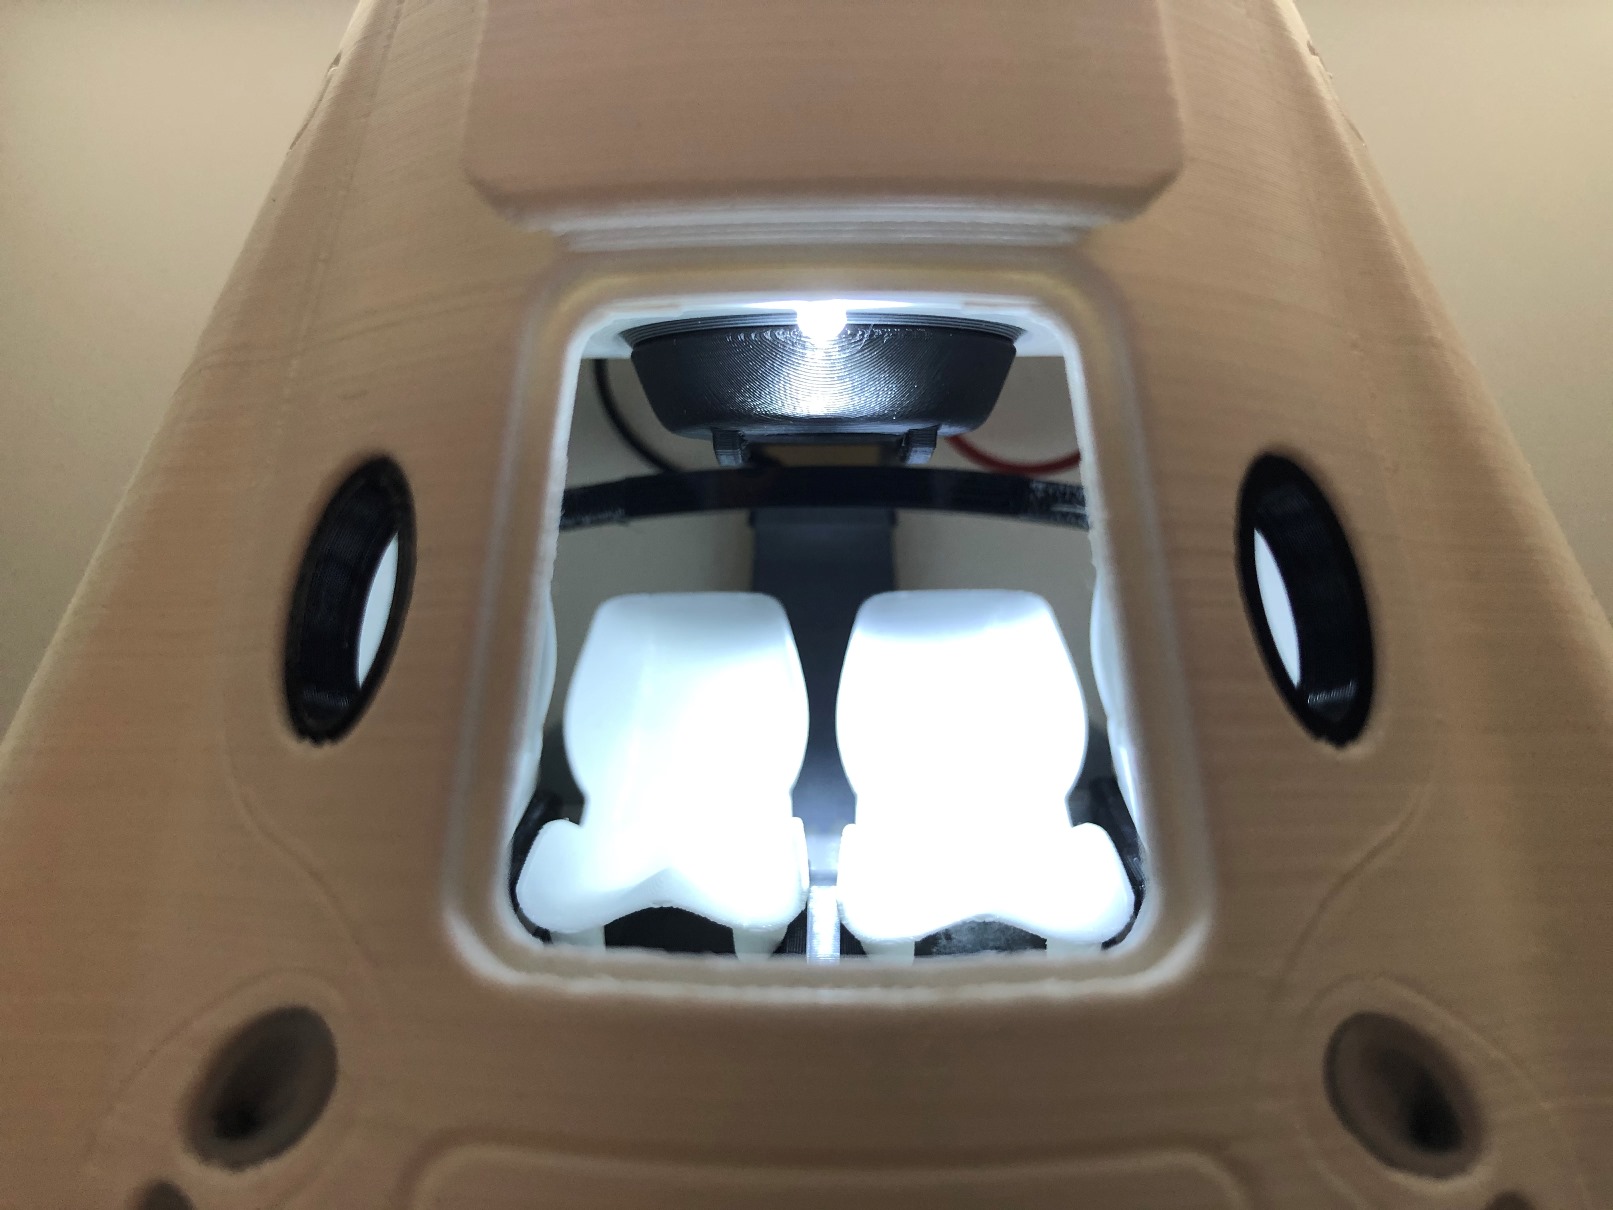
Note: If the interior lighting was installed correctly, the LED light should be pointing towards the cabin – where the seats are. If you want to turn off the LED light, simply disconnect one end of the LED from the battery

I would like this in addition to the STL files for the capsule but I only see the printed version for the light upgrade. I would like to buy the STL file and print it myself.